Summary of Arduino Game Controller for Both PC and Android
This article guides users on converting an Arduino Uno into a versatile USB joystick compatible with PCs, laptops, and Android phones using the UnoJoy library. It details the software installation, circuit assembly with buttons and an analog stick, and testing procedures for games like Euro Truck Simulator and various Android titles. The guide also explains how to revert the device back to a standard Arduino if needed.
Parts used in the Arduino Game Controller:
- Arduino Uno
- UnoJoy Library files
- JRE Flip Installer
- Old Drone Transmitter
- Six Push Buttons
- Analog Joystick (X-axis only)
- OTG Cable
- Jumpers or metal tools for shorting pins
In this instructables session we are going to see . How to make your joystick . Which is compatible for PC, Laptop , Smart Phone . By Using UnoJoy Libary. With this libary we can convert a arduino uno into USB game Controller . People who are physically challenged can make there own Joystick based upon there requirement . With this Joystick You can play Any games Which Support Joystick Option . You can Also Use this in Android Phone By using OTG
Step 1: Convert Arduino Uno Into JoyStick

1) I have attached a UnoJoy File . In the file First Install JRE Flip Installer
2) Then Connect Arduino to Your PC or Laptop
3) Open UnoJoyArduinoSample Upload the code to your arduino
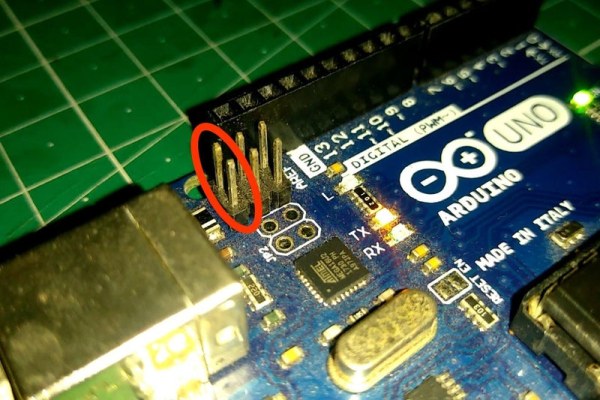
4) Short Reset and Ground Pin of Arduino Uno. To enter into DFU (device frimware update ) mode
5) Run Turn Into A Joystick Batch File
6) Unplug and replug Arduino
7) Now Your Arduino is converted to Joystick
Step 2: Circuit Connection
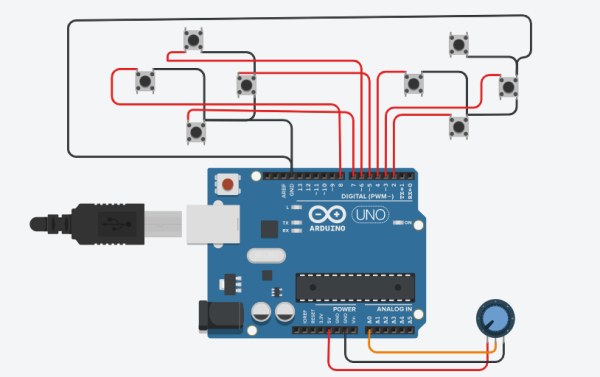
In This project I used old Drone Transmitter . In the transmitter I used six Push Button and One Analog Joystick 1) Soldered All Six Push Button one pin as common for Ground
2) And Took Six Separate Wire from Push button For using as Input on Arduino Uno Digital Pins ( Use Digital Pins 2 – 13 )
3) In Analog Joystick I used X axis Only because In UnoJoy You Can use only one axis
4) Connect Analog Joystick Power and Ground Pin To arduino 5V and Gnd Pin
Step 3: Checking JoyStick
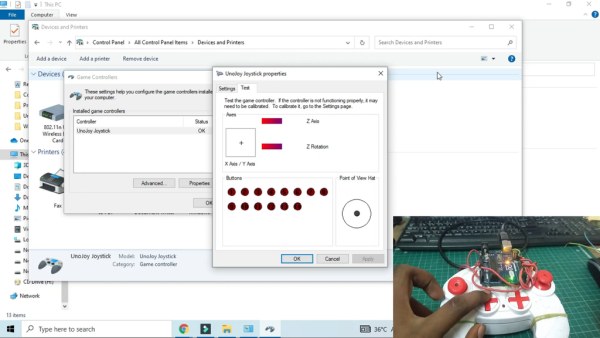
1) Connect Joystick To Your PC
2) Go to Control Panel > Devices and Printers > UnoJoy Joystick > Left Click > Game Controller > Properties
3) Move Joystick X axis You Can See any Variation in Your Monitor
4) Click Push Button To check Whether It is Working Or Not
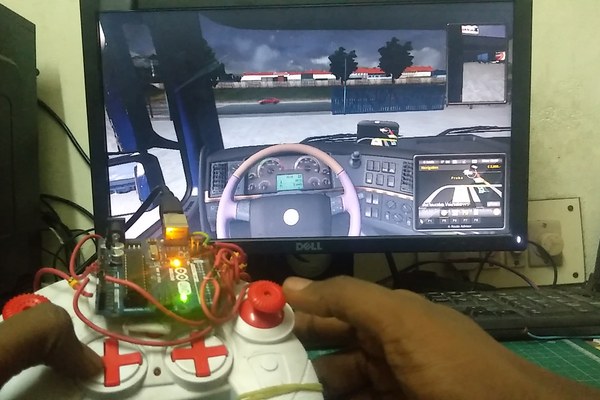
Step 4: Testing in Game
For This Tutorial I Going to use Euro Truck Simulator for test
1) Go To Options > Control > Change (Keyboard to Keyboard + UnoJoy Joystick)
2) Change Steering Sensitivity And Steering non-linearity to maximum
3) In Acceleration axis Check Wheather X axis is working or not . By Moving Joystick X axis
4) Go to Keyboard Options > Click Throttle And Press any Key In your JoyStick To assign keys
5) Click Brake/Reverse And Press any Key In your JoyStick To assign keys
6) Now you can play the game To press the key that you assigned
Step 5: Testing in Android Smart Phone
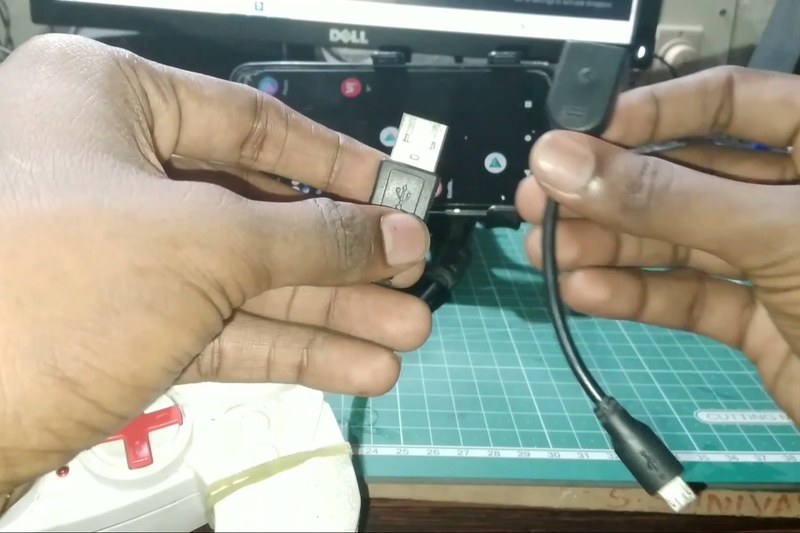
Connect the Joystick Your Smart Phone Using OTG Cable. In Android Only Few Games are Supported
//List of Supported Games//
Bridge Constructor Portal
Crossy Road
Endurance
Evoland 2
GRID Autosport
Horizon Chase
Levelhead
Minecraft
Oddmar
Portal Knights
Riptide GP series
Not Only Above Listed . Some Other Games Are still supported with this Joystick
Now I am going to play Traffic GamePad
1) Go to Options> GamePad> Map Buttons
2) Assign keys for Throttle and Brakes By Press Joystick Keys
3) Now you are ready to play with your joystick
Step 6: Convert Joystick Back to Arduino
Now Your Arduino is With Different Frimware. To change back to Arduino . You have to follow these steps
1) Again short Reset and Ground Pins of Arduino By using Any metals or with jumpers
2) Now Run Turn Into A Arduino Batch File in UnoJoy Floder
3) Again Unplug and Replug the arduino . To Change into normal
Source: Arduino Game Controller for Both PC and Android
- How do I convert an Arduino Uno into a joystick?
Upload the UnoJoy code, short the Reset and Ground pins to enter DFU mode, run the Turn Into A Joystick batch file, then unplug and replug the Arduino. - Can this project work with Android phones?
Yes, you can use it with Android phones by connecting the joystick via an OTG cable, though only specific games are supported. - Which pins should be used for the push buttons?
You should connect the six separate wires from the push buttons to Digital Pins 2 through 13 on the Arduino Uno. - What is the best way to test if the joystick works on a PC?
Go to Control Panel, select Devices and Printers, find the UnoJoy Joystick, open Properties, and move the X axis or click the buttons to check for variations. - Does the UnoJoy library support multiple axes?
No, you must use only one axis, so the tutorial uses only the X-axis of the analog joystick. - How do I assign keys for acceleration and braking in a game?
Go to the game's control options, select the key assignment for Acceleration or Brake/Reverse, and press the desired button on your joystick. - How can I convert the joystick back to a normal Arduino?
Short the Reset and Ground pins again, run the Turn Into A Arduino batch file, and then unplug and replug the Arduino. - Are there any specific games recommended for testing on Android?
Supported games include Bridge Constructor Portal, Crossy Road, Minecraft, GRID Autosport, and Riptide GP series among others.