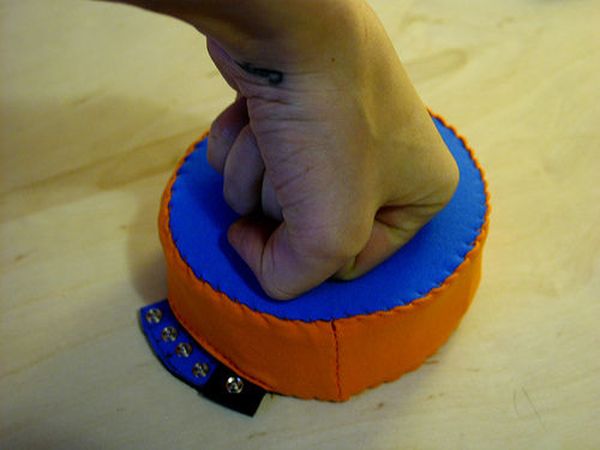
How to make an “analog” input device from fabric and a few other necessary materials.
“Analog” in parenthesis because, although it is made up of 4 analog inputs, the only analog transition between the directions (up, right, down and left) comes from the buffering material (in this case 3cm thick squishy packing material) that absorbs and spreads the pressure from the user’s pushing, creating a gradual transition between the inputs.
This Fabric Joypad does not need to be used with the drawing application seen in the video, it basically supplies you with analog outputs that sense which direction (part of the circle) pressure is being applied to.
If you are interested, the drawing application etchAsketch was written in Processing and can be downloaded from the link in STEP 8.
All pictures can be seen on Flickr in my Analog Fabric Joypad Set
Step 1: Materials and Tools
MATERIALS you will need for the Joypad:
– Conductive thread – 117/17 2ply (www.sparkfun.com)
– Ex-static – plastic from the black bags used to package sensitive electronic components
– 6 mm thick neoprene with jersey on both sides (www.sedochemicals.com)
– 3 cm thick squishy packing material (or anything else you can think of)
– 5 metal snaps
– Stretchy fabric
– Regular thread
TOOLS you will need for the Joypad:
– Sewing needle
– Scissors
– Cutter (forgot this in picture)
– Ruler
– Compass
– Pen and paper or cardboard
Step 2: Pattern making and tracing
Using the compass, draw a circle with a 5.5cm radius on the paper or cardboard. Using scissors cut the circle out and mark the center. Divide the circle through the center into four equal sections. Give these sections about .5 cm space between themselves, 1.5 cm to the edge and 1cm to the center. Cut out these inner sections with the cutter.
Now trace this circle onto the neoprene three times:
1 x TOP: just the outline
1 x INPUTS: as it is (outline and sections). Remember to leave a little tag that is not included in the pattern!
1 x VCC: outline and inner circle line (see picture). Remember to leave a little tag that is not included in the pattern!
Now cut out these circles. Just the outlines (remember the tabs!) and nothing from the inside!
Step 3: Sewing Inputs and Vcc
Thread the needle with conductive thread and take the INPUTS piece of neoprene. Start to sew back and forth in cake-slice manner inside one of the sections. When the section is full, sew to the tab and attach a snap with the same piece of conductive thread.
With separate pieces of conductive thread do the same for all four sections. Make sure that the individual threads never touch each other.
Now take the VCC piece of neoprene and one long piece of conductive thread. Sew back and forth (see pattern in picture) with this to cover the space inside the inner circle. Using same piece of thread sew snap to tab.

Step 4: Cutting more circles
Using the pattern circle, trance it’s outline on the ex-static. Use scissors to cut out the circle a few millimeters smaller the outline.
Also trace the circle to the squishy packing material and cut this out using the cutter to get a straight edge.
Now all the individual layers are finished. Before continuing to create an edge and sewing everything together, we will want to test the inputs, to make sure there are no mistakes.
– Ex-static
– 6 mm thick neoprene with jersey on both sides
– 3 cm thick squishy packing material
– 5 metal snaps
– Stretchy fabric
– Regular thread
For more detail: Analog Fabric Joypad using an Arduino