Summary of Arduino Countdown Timer With Setup Buttons
This guide demonstrates building a two-digit countdown timer using an Arduino Uno, breadboard, and two 7-segment displays. The project allows users to set a maximum countdown of 99 seconds using three push buttons for start/stop, change, and setup functions. It explains the basics of common cathode 7-segment displays and provides specific pin connections for segments, decimal points, and control buttons on the microcontroller.
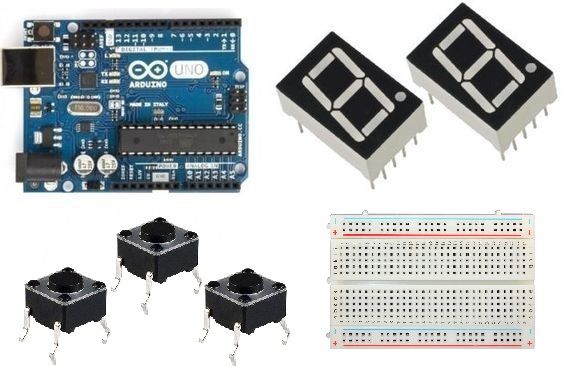
Parts used in the Arduino Two Digit Countdown Timer:
- Arduino Uno
- Breadboard
- Two digits 7 segment displays
- Three button switches
- Breadboard cables
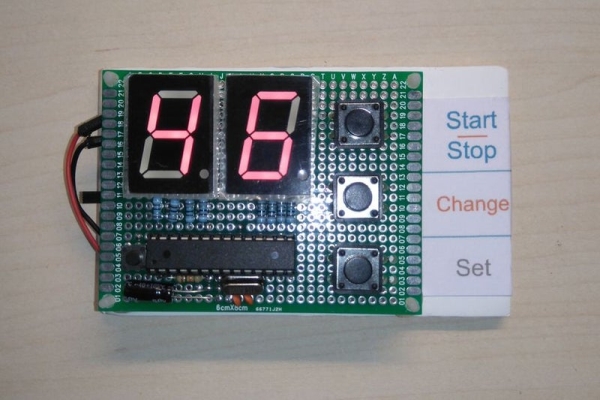
In this Instructables guide I will show you how to make your own Arduino two digit countdown timer. I made my own circuit by using the ATmega328 micro controller but this is an optional step. In this guide I will help you to make it easily on breadboard by using the Arduino uno board!
We will be able to set the timer by pressing the setup buttons. We will use two digits seven segment display, so the maximum countdown time will be 99 seconds.
Operation video:
So, let’s get started!
Step 1: About 7 Segment Displays
A Seven Segment Display, is a form of electronic display device for displaying decimal numerals that is an alternative to the more complex dot matrix displays. Seven segment displays are widely used in digital clocks, electronic meters, basic calculators, and other electronic devices that display numerical information.
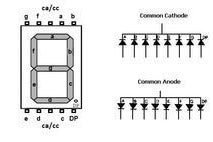
The 7 segment display consists of seven LEDs (hence its name) arranged in a rectangular fashion as shown (see first image above). Each of the seven LEDs is called a segment because when illuminated the segment forms part of a numerical digit (decimal numbers and some letters) to be displayed. An additional 8th LED (right corner) is sometimes used within the same package thus allowing the indication of a decimal point, (DP) when two or more 7-segment displays are connected together to display numbers greater than ten.Each one of the seven LEDs in the display is given a positional segment with one of its connection pins being brought straight out of the rectangular plastic package. These individually LED pins are labelled from ‘A’ through to ‘G’ (see second image above) representing each individual LED. The other LED pins are connected together and wired to form a common pin.The displays common pin is generally used to identify which type of 7-segment display it is. As each LED has two connecting pins, one called the “Anode” and the other called the “Cathode”, there are therefore two types of 7 segment display called “common cathode – cc” and “common anode – ca” (see third image above).In this tutorial we will use a common cathode 7 segment display.
Find here an Arduino tutorial for the 7 segment display
Step 2: What We Will Need
For this project we will need:
- Arduino uno
- breadboard
- 2 digits 7 segment displays*
- 3x button sw
- some breadboard cables
(*you can use common cathode or common anode type)
You can buy them from gearbest.com, low prices and free shipping.
Step 3: The Circuit

The connections are pretty easy, see the image above with the breadboard circuit schematic.
(if you want you can connect one 220 Ohm resistor to each pin – except “CC” or “CA”)
Notes:
- The segments A-G: A, B, C, D, E, F, G –>10,9,8,7,6,11,12
- CC or CA pins of them connected to Arduino pin 4 & 5
- Start/stop button pin 2
- Change button pin 3
- Set button pin13
~UPDATE~
- dot pin of right digit at pin A0
- dot pin of left digit at pin A1
Read more: Arduino Countdown Timer With Setup Buttons
- What is the maximum countdown time for this project?
The maximum countdown time will be 99 seconds. - Can I use a common anode display instead of common cathode?
Yes, you can use either common cathode or common anode type displays. - How do I set the timer values?
You set the timer by pressing the setup buttons. - Which Arduino pins connect to the Start/Stop button?
The Start/stop button connects to pin 2. - What pins are used for the decimal point of the right digit?
The dot pin of the right digit connects to pin A0. - Do I need resistors for the circuit?
You can connect one 220 Ohm resistor to each pin except CC or CA. - What component identifies the type of 7-segment display?
The displays common pin is generally used to identify which type of 7-segment display it is. - Where can I buy the components for this project?
You can buy them from gearbest.com.