
Summary of ARDUINO CAR HUD DOES THE JOB
This article describes a DIY Heads-Up Display (HUD) project by [PowerBroker2] for cars lacking stock HUDs. The system reads vehicle data via an OBD-II reader, processes it using microcontrollers to display speed and RPM on the windshield, and houses everything in a custom 3D-printed enclosure with optical components.
Parts used in the Arduino Car HUD:
- ELM327 Bluetooth OBD-II reader
- ESP-32 microcontroller
- Teensy 3.5 microcontroller
- CAN bus interface
- SD card
- OLED display
- LED display
- 3D-printed housing
- Plexiglass
- Reflective windshield film
Many cars these days come with a basic Heads Up Display, or HUD. Typically, these display speed, though some also throw in a tachometer or navigational graphics too. Of course, if your car doesn’t have one of these stock, hacking in your own is always an option.
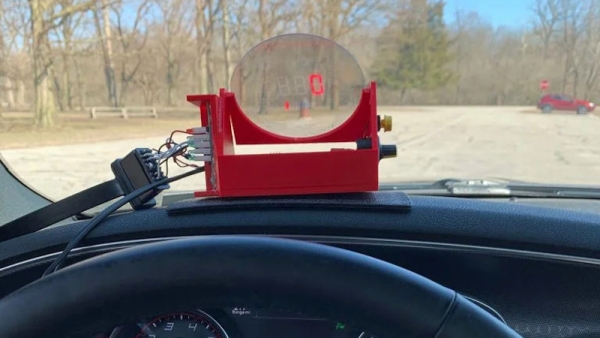
[PowerBroker2] developed this HUD in a somewhat circuitous way, but it’s effective nonetheless. An ELM327 Bluetooth OBD-II reader is hooked up to the car, collecting data on speed and RPM. This data is passed to an ESP-32 and Teensy 3.5. From reading the code, it appears the Teensy is responsible for logging data from the CAN bus on an SD card, and running a small OLED display. The ESP32 is then charged with running the LED display that actually forms the HUD. It’s then combined with a 3D-printed housing, some plexiglass, and reflective windshield film to complete the effect.
It’s a build that probably packs in more hardware than is strictly needed to get the job done, but it does indeed get the job done. Other builds we’ve seen use LED strips as a quick and tidy way to get the job done. Video after the break.
Source: ARDUINO CAR HUD DOES THE JOB
-
How does the system collect vehicle data?
An ELM327 Bluetooth OBD-II reader is hooked up to the car to collect data on speed and RPM. -
What is the role of the Teensy 3.5 in this build?
The Teensy logs data from the CAN bus onto an SD card and runs a small OLED display. -
Which component runs the LED display that forms the HUD?
The ESP32 is charged with running the LED display that actually forms the HUD. -
What materials are used to complete the visual effect?
The build uses a 3D-printed housing, some plexiglass, and reflective windshield film. -
Does this project work for cars without a stock HUD?
Yes, hacking in your own is always an option if your car doesn't have one of these stock. -
What kind of information can this HUD display?
The system typically displays speed, though some setups also throw in a tachometer or navigational graphics. -
Is there an alternative method mentioned for creating a HUD?
Other builds use LED strips as a quick and tidy way to get the job done.
