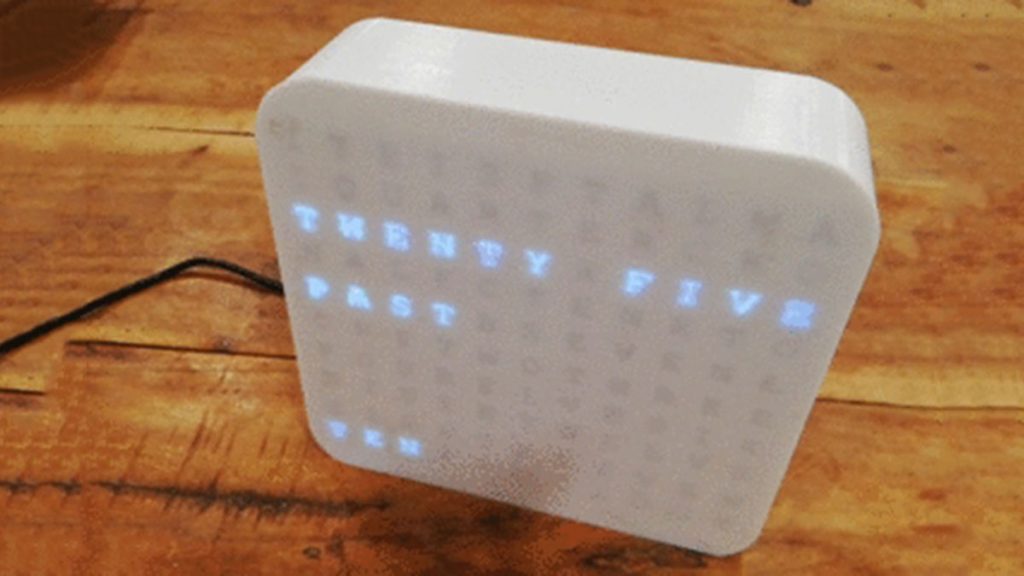
Build your own Word Clock with an animated display. This is a simple project uses an Arduino Nano, Color LEDs and includes a stylish 3D Printed Case.
The Word Clock has three animated patterns
– Matrix style
– Typewriter Style
– Rainbow Color
The three buttons on the back enable animation style, color and time to be set.
A great addition to your home office or work space and a great gift for others. The Display provides an opportunity to experiment with various display options so there is potential to add your own custom animations.
– I hope you enjoy!!
Step 1: Gather the Materials
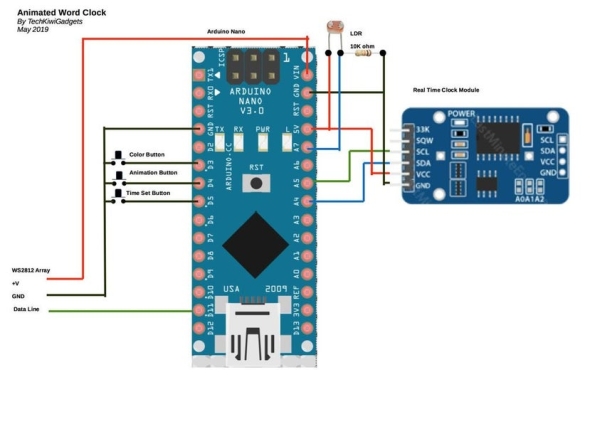
- Arduino Nano
- WS2812B RGB LED Module x 110
- DS2321 RTC module
- Light Dependent Resistor (Approx 8k-20k range)
- Resistor 10K ohm
- Push Button Switch x 3
- Vero Board 15 x 34 holes
- Access to 3D Printer with a build volume of 200mm x 200 mm x 70mm (Ender 3)
- White PL filament
- Mini-B USB cable – 2m length
- Multi-core hookup wire
- Bell Telephone Single-Core wire 3m
- Soldering Iron
- Silver or Black Spray paint for coating inside of Baffles
Step 2: Print the Case
The 3D design of the case has been through three iterations in the field and now I’ve settled on this design to give maximum transfer of light in the clock without compromising on aesthetics or build quality.
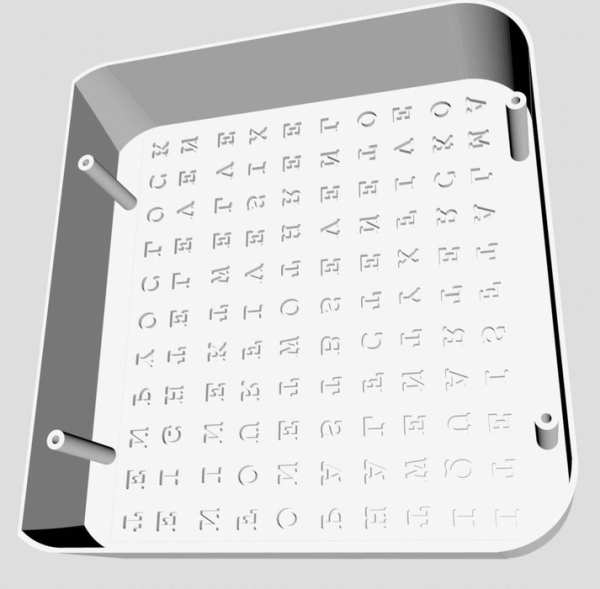
There are four components to print
- LED Mount – Contains the 110 x WS2812 LEDs
- Front Case
- Baffles
- Rear Panel
Download the STL files from Thingiverse link here and load into your slicer in preparation for printing on your 3D Printer.
I used PLA filament and printed at 210 Degrees with a print speed of 40mm/sec, no supports are required.
I printed on a glass bed heated to 60 Degrees to get the clean finish on the face.
Note: When you print the baffles there are some parts of the letters that have no attachment. For instance the centre of the letter “O”. Dont worry about these because you can use a marker pen to color these in on the back of the front case if there is too much diffusion. See the final photo above.
Read more: Animated Word Clock