
Summary of An amplifier for Arduino
The author built an amplifier circuit to drive three 12V computer fans using an Arduino, as the board's output was insufficient. The circuit utilizes a BDX53 NPN transistor capable of handling high current (1.5A) and includes a parallel diode to protect against voltage spikes from the adapter. This setup allows for switching DC motors and regulating their speed via PWM signals from Arduino pins 9, 10, or 11.
Parts used in the Arduino Fan Amplifier:
- Arduino Board
- BDX53 Transistor
- Diode
- 12V Power Adapter
- Three Computer Fans
For my project, the Arduino output is not enough so digging on the net and asking to a friend some help, I managed to build an amplifier to feed my 3 computer fans.
This circuit can be used as an amplifier to switch on and off a DC motor and to regulate its spinning speed with a PWM source generator. In my case the PWM generator would be the PIN 9, 10 and 11 from the Arduino board.
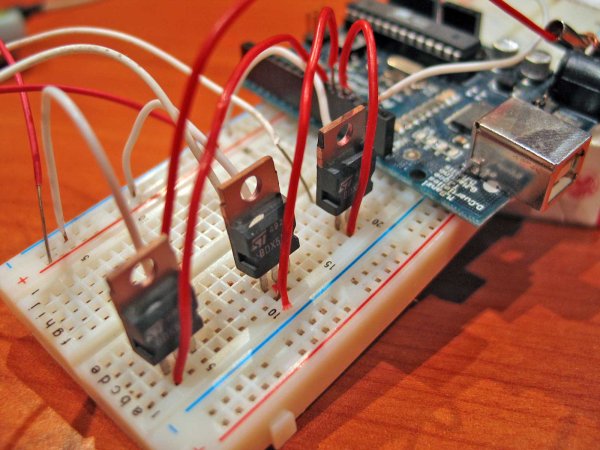
Given that the adapter that I will use to drive my 3 computers fan has a voltage of 12V and an intensity of 1,5A, a common npn transistor would not do the job and burn quite fast. From the datasheet, you can see that the BDX53, the transistor that I chose is used to drive small drills, for example, so perhaps it would be quite good for the completion of my project. The diode, put in parallel, is used to control and limit the extra tensions that can be generated by the adapter that would damage the transistor.
For more detail: An amplifier for Arduino
- Why was the Arduino output not enough?
The Arduino output could not supply sufficient power to drive the three computer fans directly. - What components are needed to build this amplifier?
The project requires an Arduino, a BDX53 transistor, a diode, a 12V adapter, and three computer fans. - Can this circuit control motor speed?
Yes, it can regulate spinning speed using a PWM source generator connected to specific Arduino pins. - Which Arduino pins generate the PWM signal?
Pins 9, 10, and 11 on the Arduino board serve as the PWM source generator. - Why is a common NPN transistor not suitable?
A common NPN transistor would burn quickly because it cannot handle the required 1.5A intensity. - What is the purpose of the diode in the circuit?
The diode limits extra tensions generated by the adapter that could otherwise damage the transistor. - Is the BDX53 transistor appropriate for this load?
Yes, the BDX53 is rated for driving small drills and handles the 12V 1.5A requirement well.
