This instructable is part of the course Physical Interaction and Realization at KTH, Royal Institute of Technology.
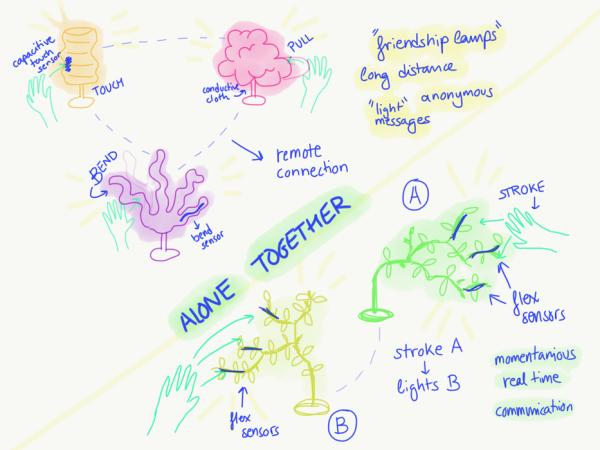
We are going to teach you how to build two, quite organic and interactive plant-lamps, Thorulf and Svamp. Thorulf is a plant with flex sensors and LEDs while Svamp is a collection of mushrooms with circular force sensors. They are connected via Bluetooth and communicate with each other, sort of like “friendship lamps”.
Step 1: Motivation – “Alone Together”

This project was conceived as part of a design course with a theme dictating the solution should be revolving around libraries. We figured that one of the interesting aspects of the library at our university was that it was more of a place where people went to study than to read books. Further, people often went there alone but some sense of community was still present, a sense of being alone together. Inspired by the concept of a Friendship lamp, we created interactive plants which could be interacted with as well as being able to send a message to their counterpart on the other side of the room.
Step 2: Parts, Materials & Tools

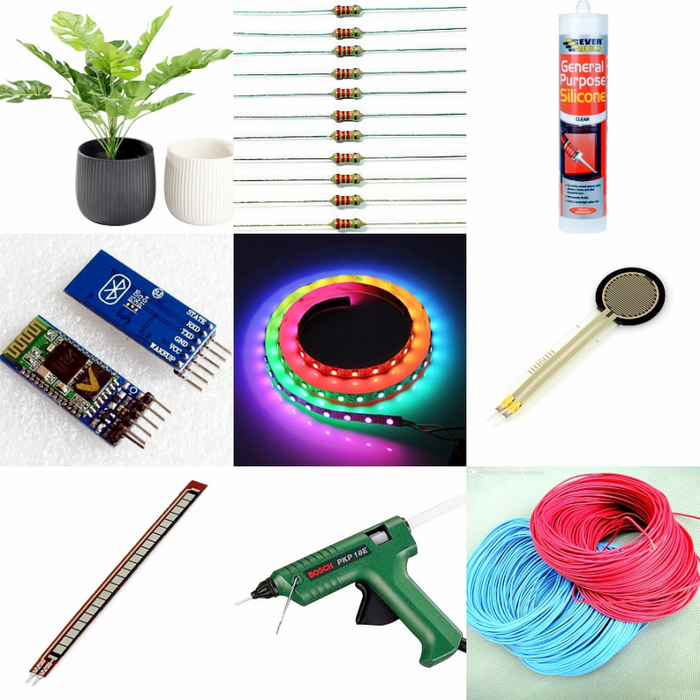
Parts:
3x – Flex Sensor 2.2″
3x – Round Force-Sensitive Resistor
2x – Bluetooth HC06 module
2x – Arduino Uno
2x – 9V batteries
1x – Luxorparts addressable RGB LED-strip 1 m (cut into 6x 6 led strips and 3x single leds)
Resistors
Wire
Materials:
Any plant of your liking (we used an artificial one)
Pots or other containers for the plants to be placed in
Clear silicone/watercolor paint
Cling wrap
Solder
Heat sinking tubes
Hot glue
Tools:
Soldering iron
Hot glue gun
Step 3: Circuits

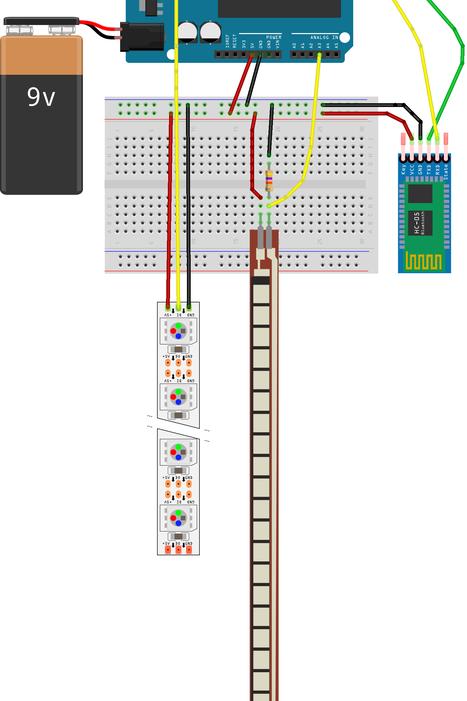
These are circuit diagrams for our two prototypes
First picture: Thorulf
Second picture: Mushroom
Step 4: Connection & Construction of the Plants – General
About the Bluetooth connection
The plants communicate to eachother via Bluetooth for this first prototype. Therefore, they shouldn’t be very far from eachother and a computer running a server is required.
For the Bluetooth connection we created a server in openFrameworks following this instructables: https://www.instructables.com/id/Wirelessly-Connec…
The server can also be created in the language of your choice, or on an Android app from your phone.
For the future, we’re going to look into ways to communicate without a server, for example having one bluetooth module act as a “master” and the other as a “slave”.
Soldering the LEDs
To solder the LEDs, quickly heat up the copper pads on the strips and then apply a drip of solder. Let it cool off and then put your wires on top of the drip, heating up the solder through the wire letting it slide into place. Cut off any remaining part of the wire. Insulate each wire individually with heat sinking tubes before applying some hot glue on top of the connections to give it some more mechanical strength. At the end, put a bigger heat sinking tube around the whole connection.
Make sure to solder in the same direction as the indicating arrow on top of the LEDs
Soldering the prototyping boards
After assembling the circuits and testing them on a protoboard, we can make them more robust by soldering all components to a PCB
Step 5: Connection & Construction of the Plants – Thorulf

Thorulf
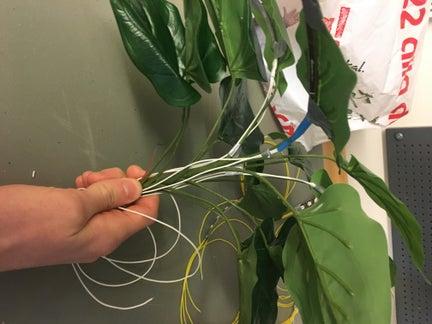
For our first plant, any plastic plant is good if the leaves let light pass. We attached the LED strips and Flex sensors to the other side of the plant’s leaves with hot glue and tape, and then wrapped them in green tape to hide the cables. It’s important to leave long enough cables and to keep track of which are which by maybe color-coding them.
Calibrate the flex sensors by adjusting their resistance values, in order to get more or less sensitivity to bending.
Source: Alone Together – Plant Lamps
