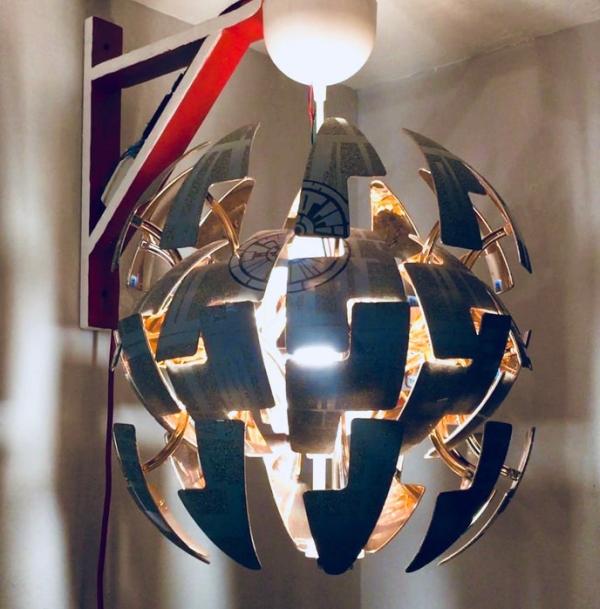
Bring a snippet of the Dark Side to your living room with this unique voice-activated lamp. A functional work of art that is both useful and pleasing to look at. Switching on or off? All lamps do that! Changing brightness? Very common! But can yours do this? *cue to turn volume up for intro video*
Rad, innit? Besides that cool light-n-sound show, you can also ask Alexa to simply turn the lamp on/off, or choose a brightness setting between ten glow levels.
Impress your friends with the true power of the Dark Side!
Step 1: Overview
This project takes a popular IKEA lamp, automates its lighting / kinetic actions, and connects it to Amazon Alexa to enable voice control. The six components of this project, in order of undertaking, are:
- Painting the lamp (Steps 2-6)
- Building the circuit (Step 7)
- Setting up Alexa (Step 8)
- Installing the motor (Steps 9-11)
- Constructing the brace (Step 12)
- Assembling it all (Steps 13-16)
To keep the workload manageable, I have abstracted out the elements of backend software that parse Alexa messages and handle real-time communication. You only need to upload the Arduino sketch and set up the Alexa skill as described in this tutorial, and the voice-control should all happen out-of-the-box.
All relevant code can be found here. All STL models are measured out in mm. This is my first time writing an Instructable, so your comments and feedback are much appreciated!
Step 2: Fetch the Lamp
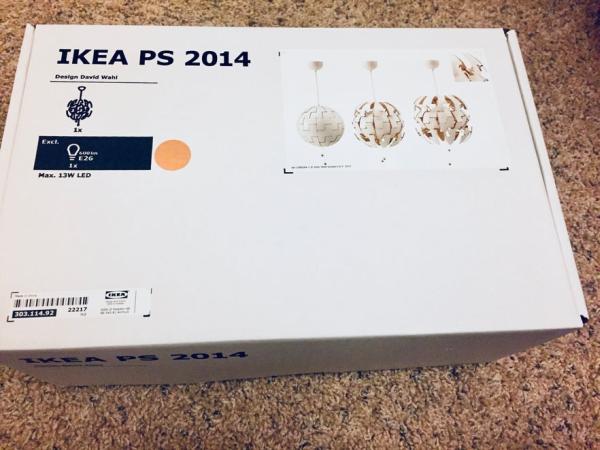
Head to your closest IKEA and get PS 2014 pendant lamp.
There will be a 14″ version and a 20″ one. Get the 14″ with the white/copper variant. Upon unboxing, you’ll find a white central frame, 10 copper arms and 40 white panels. Four panels go on each arm at the points marked in the picture. The following four rows thus emerge:
- Small top panels
- Large top-middle panels
- Large bottom-middle panels
- Small bottom panels
Attach the arms to the frame and label them with some masking tape. Also label the panels (but don’t attach them yet). I labelled the arms from 0 to 9, and the panels from B0 to B9 and T0 to T9. Note that I used each panel number twice since the the design of rows 1 and 2 (like 3 and 4) is distinctive and the same label can be used. So for instance, the panels going on arm 7 would be T7 (small top), T7 (large top-middle), B7 (large bottom-middle) and B7 (small bottom).
Tedious? Yes. But all this labelling will get relevant later. So go ahead, label away!
Step 3: Paint Them Glossy Gray
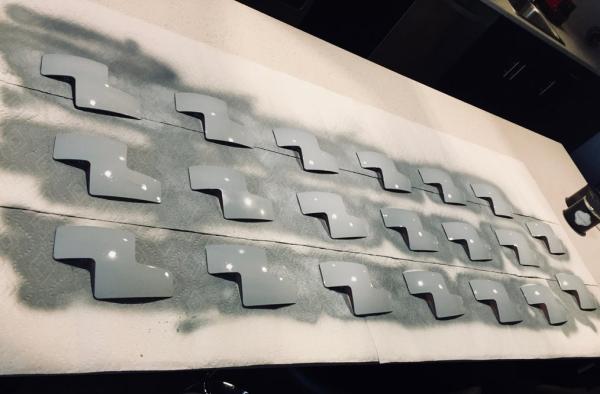
Pick up some glossy gray paint. Get a couple of cans, you’ll need them. I went with Rust-Oleum Gloss Winter Gray.
Lay down the panels (all 40 of them!) and spray them nice ‘n even. Make sure you wear a mask. Even the Dark Side considers safety first! See mine for reference.
Leave panels out to dry overnight, then give them a second coating. Sweet!
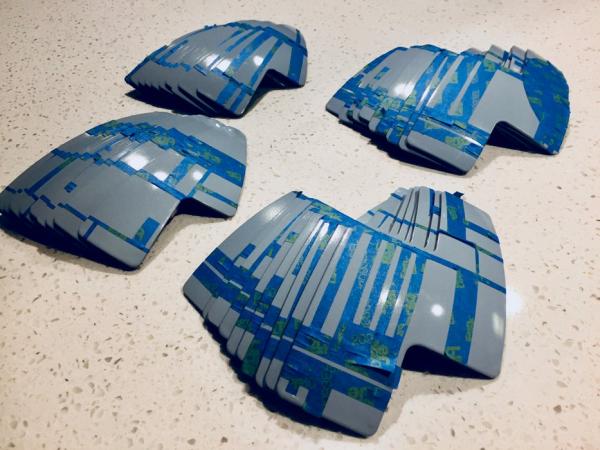
Step 4: Tape Up the Trenches
Put all the panels back on the arms, but not all the way. Don’t let them snap in. You’ll be removing them again soon, and it takes some effort to remove a panel snapped in place.
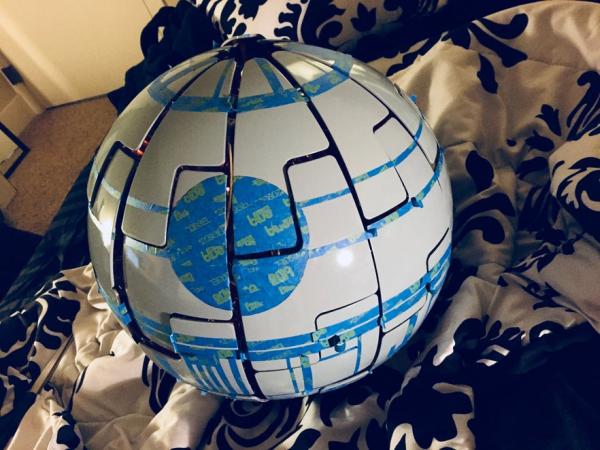
Once done, use a reference Death Star image (like this one) to tape up all the “trenches and valleys” on the globe. These are the areas you wish to remain light gray, like the Equatorial trench and so on. It’s a slow and repetitive process, but it will pay off greatly once you see the end result!
Also make sure to tape off a large circle in the top hemisphere. This is where the Superlaser design shall be traced out later. Just use something large and circular to mark a circle in masking tape. Then cut it out and stick it at roughly the same place as shown in the pictures.
Step 5: Paint in the Texture
Get a couple of cans of stone-textured gray paint. I went with Rust-Oleum Gray Stone finish.
Take off the panels and paint them up! A single coat with slower, slightly sustained spraying gave me just the right touch. Labels on the arms and panels will help you put the pieces in their right place in the design, but hold that for later.
Rip out the masking tape and viola, your Death Star panels are ready!
Step 6: Draw Out the Superlaser
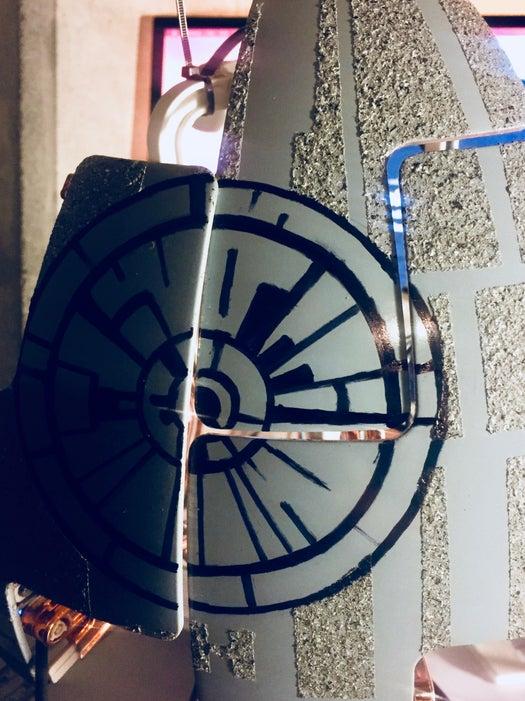
Use a 3D printer to make a stencil for the Superlaser. I’ve attached the STL from my design.
Attach only the panels that have the Superlaser area back on the arms (only lightly, no snapping in yet), and tape them together from the other side. Stick the 3D printed stencil and use a black sharpie to trace out the concentric circles. Then make lines for the Superlaser’s internal design using your reference Death Star image.
Congratulations, you are all done with the design bits!
Enough of the artsy stuff. Now let’s get technical.
Step 7: Build the Circuit
You got a nicely painted globe and well functioning motor system, but this thing isn’t gonna connect to Alexa itself! Let’s make that circuit happen.
Use the Gerber files attached to order the PCB. I personally like to use OSH Park. If you don’t want to deal with Gerber files, just order the board I’ve shared here.
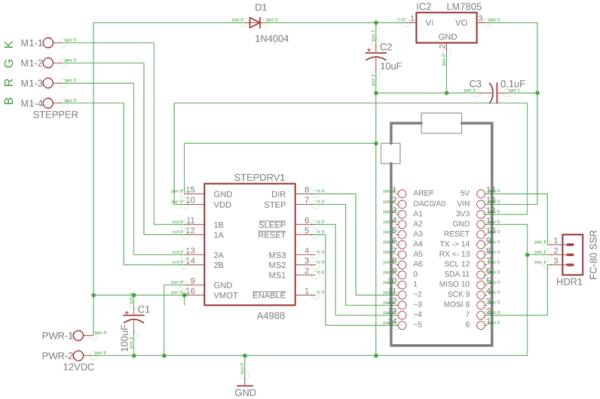
While you wait for the board to arrive, pick up the components shown in the schematic:
- 1 x Arduino MKR1000
- 1 x A4988 Stepper Driver
- 1 x 5V 1-Channel SSR Board
- 1 x LM7805 Regulator + Heatsink
- 1 x 1N4004 Diode
- 1 x 100µF Capacitor
- 1 x 10µF Capacitor
- 1 x 0.1µF Capacitor
- 3 x 2-Pole 5mm Screw Terminals
Solder everything on as shown in the pictures. Use 4 thin screws to attach the SSR board to the PCB. Note that you will have to affix three short wires from the PCB to the SSR terminals.
If you want to verify the circuit, use the test code here. If all works well, you should see something like the video above.
Source: Alexa-Enabled Death Star Lamp