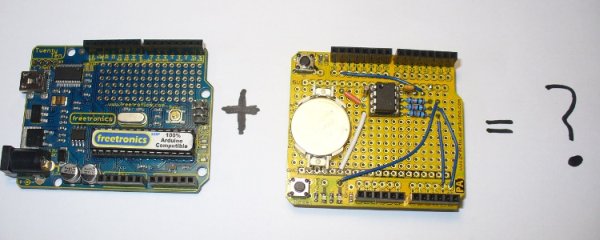
Let’s add a DS1307 real-time clock to our Freetronics Arduino-compatible board.
Updated 18/03/2013
Now and again I find myself making another kind of clock or timing device using the Arduino system, and each one has been making use of the Maxim DS1307 real-time clock IC. However every time another clock is being worked on, my DS1307 real-time clock shield needs to come out to play. Although in itself it is a nice shield, at the end of the day – the less you havethe better. Originally I used a Freetronics TwentyTen board – which has now been superseded by their Eleven board, however they’re both identical for the purposes of this tutorial.
So what to do? As regular readers will know, my preferred board is the Freetronics Eleven, and within this we have a solution to the following problem:
The Freetronics team have thoughtfully provided a prototyping area in their board – and that will be a perfect home for the real time clock system. Being a cheapskate and a masochist – instead of following others by using a smaller RTC module I will instead use parts already in stock (except for the battery) and install my own circuit.
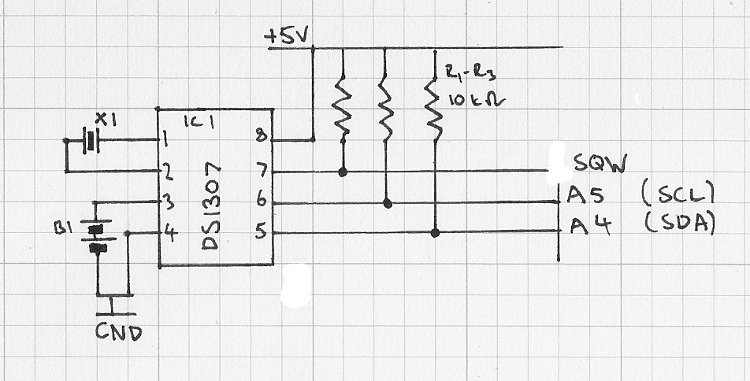
So, as always – we need a plan. The circuit itself is quite simple, the DS1307 data sheet has a fine example on page thirteen, and here is my interpretation:
The CR1220 battery was chosen over the usual CR2032 due to the smaller diameter. According to the DS1307 data sheet, the battery should last around ten years if it has a capacity of 48 mAh. Our CR1220 is 35 mAh – which will do nicely, perhaps seven years or so. That will have to do. Don’t forget to check the voltage of the battery before installation – it should be just over three volts.
Now to get everything arranged in the prototyping area. When doing this it pays to always have the schematic in front of you as well so you can refer to it when necessary. Planning to use protoboard of any size requires a good plan as well. After spending some time considering component placement, the final layout was as follows:
Each square on the grid represents one hole on the board. After you see the images below, everything will make sense. Before soldering away, it will pay to give the prototyping area a quick clean with some PCB cleaner.
Now it is finally time to get soldering. The first items were the battery, crystal and the resistors. Although the battery was designed to be soldered, I am always a little wary when applying heat to them. Two seconds with the hot iron was enough.
When soldering in the crystal (or anything else), try to keep in mind what the leads will be connecting to. For example, the crystal legs will need to connect to pins 1 and 2 of the IC socket. So bend the crystal leads in the direction of the respective IC socket pins. Doing so will make creating solder joins between them much easier:
So the parts required for our clock circuit will be:
- IC1 – Maxim DS1307 I2C real-time clock IC
- 8-pin IC socket
- R1~R3 – 10k ohm 1% metal film resistors
- X1 – 32.768 kHz crystal
- B1 – Panasonic CR1220 3v battery with solder pins (Farnell part number 1298944) [data sheet one and two]
- One header pin (from those 40-way strips)
- some thin black single-core wire
For more detail: Add a real-time clock to the Freetronics TwentyTen using Arduino


