
Summary of TOUCHSCREEN MAKES FOR A NEAT WAVETABLE SYNTH
This article describes a DIY wavetable synthesizer built by [Kevin] using an Arduino Uno and an ILI9488 touchscreen. Users draw waveforms directly on the screen with a stylus or finger, which the Arduino processes to generate audio via PWM based on MIDI inputs received over the serial port. This project offers a tactile alternative to traditional chiptune software tools for creating unique sounds.
Parts used in the Wavetable Synthesizer:
- Arduino Uno
- ILI9488 color touchscreen display
- Stylus
- PWM output circuitry
A popular tool in chiptune software like LSDJ allows the user to draw a waveform and use it as the basis for a wavetable synth. It’s fun and it can produce some great bleeps and bloops. [Kevin] has created a similar tool using an Arduino and a touchscreen.
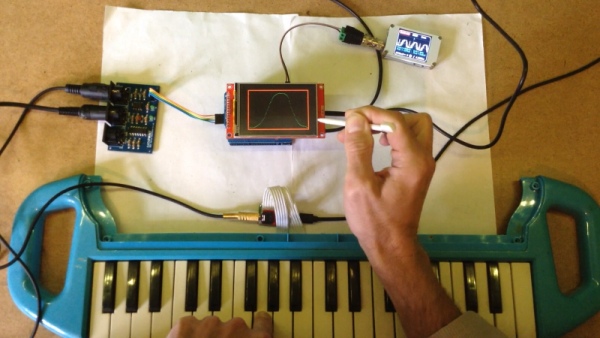
The build is based on the Arduino Uno, the humble mainstay of the Arduino line. It’s hooked up to an ILI9488 color touchscreen display, which acts as the primary user interface. Using a stylus, or presumably a finger, the user can draw directly on the screen to specify the desired waveform for the synth to produce. The Arduino reads the step-by-step amplitude values of the drawn waveform and uses them to synthesize audio according to MIDI messages received over its serial port. Audio output is via PWM, as is common in low-cost microcontroller projects.
It’s a fun build and we’re sure [Kevin] learned plenty about wavetable synthesis along the way. We’ve seen his work on other Arduino synthesis projects before, too! Video after the break.
Source: TOUCHSCREEN MAKES FOR A NEAT WAVETABLE SYNTH
- What tool does Kevin use to create his wavetable synthesizer?
Kevin created a similar tool using an Arduino and a touchscreen. - How does the user specify the desired waveform?
The user can draw directly on the screen using a stylus or a finger. - What display is used as the primary user interface?
An ILI9488 color touchscreen display acts as the primary user interface. - How does the Arduino process the drawn waveform?
The Arduino reads the step-by-step amplitude values of the drawn waveform. - How does the system receive instructions for synthesis?
It uses MIDI messages received over its serial port. - How is the audio output generated?
Audio output is via PWM, as is common in low-cost microcontroller projects. - What kind of synth does this build produce?
It produces a wavetable synth capable of creating bleeps and bloops. - Can users interact with the screen using their fingers?
Yes, the user can presumably use a finger to draw on the screen.
