
Summary of 3D Printed Mini CNC Machine
Summary: This article describes building a 3D-printed prototype 3-axis CNC machine using salvaged DVD writer stepper motors, an Arduino Nano with a CNC Shield v4 and A4988 drivers, a 3D-printed pen holder, and a wooden base. It covers disassembling DVD drives, mounting motors, assembling X/Y sliders and pen holder, wiring electronics, and configuring Benbox/GRBL-compatible software.
Parts used in the 3D Printed Mini CNC Machine:
- Arduino Nano x1
- CNC Shield v4 (expansion board) x1
- A4988 Stepper Motor Driver x2
- Servo motor x1
- Pen x1
- Old DVD drive scrap (to extract stepper motors and shafts) x2
- Wires (some)
- Wooden base and wooden spacer pieces
- 3D printed pen holder (STL file provided)
- Heatsinks for A4988 drivers x2
- Power supply 7.5–12 V DC (for shield)
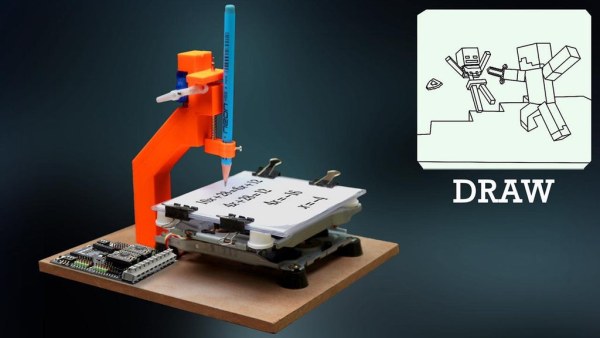
Introduction!
Hi Friends Welcome to the DiY Projects Lab insctructable , I hope you all are well, so today we are going to learn how to make your own 3D Printed CNC machine. It is a prototype module, but once you build it you will definitely be able to build a very large CNC machine and with much higher accuracy. The principle will be the same, we will use DVD Writers Stepper Motors to control the movement of 3 axis of CNC machine.
VIsit DiY Projects Lab For More CNC Like this
Supplies
Let’s Make It
List of some use full material required
Arduino nano x1
CNC shield x1 A4988 Stepper motor Driver x2
Servo motor x1
pen x1
old DVD Scrap X2 Some wires
Step 1: What Is CNC ?
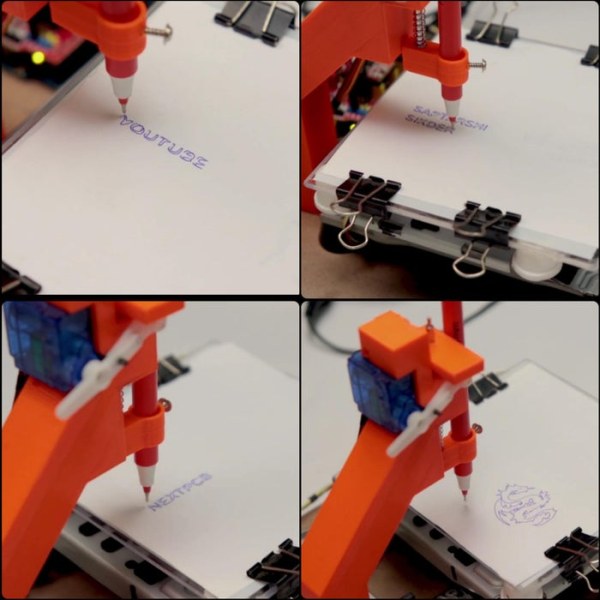
CNC (computer numerical control) The system is based on the control of the movements of the work tool in relation to the coordinate axis of the machine, using a computer program benbox executed by a computer.it is necessary to control the movements of the tool in two coordinate axis: the X axis for the longitudinal movements of the carriage and the Z axis for the transverse movements of the tower. servo motors are incorporated in the carriage and turret displacement mechanisms.
AXIS MOVEMENTS
X axis – left to right
Y axis – front to back
Z axis – up and down
3 Axis
Automatic/interactive operation
Milling slots
Drilling holes
Cutting sharp edges
Step 2: What Is Stepper Motor ?
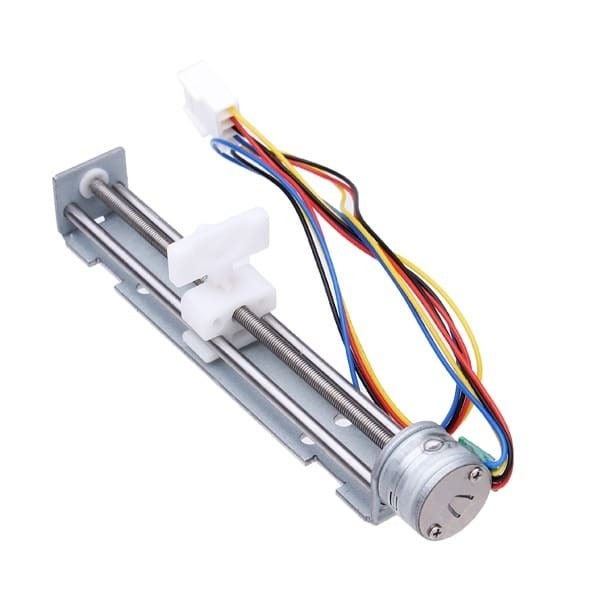
The stepper motor is an electromechanical device that converts a series of electrical impulses into discrete angular displacements, which means that it is capable of advancing a series of step depending on its control inputs. The stepper motor behaves in the same way as a digital-to-analog (D / A) converter and can be driven by pulses from logic systems. Its main applications include a variable frequency motor, brushless DC motor, servo motors and digitally controlled motors
Step 3: DVD Drive Stepper Motor Disassembly
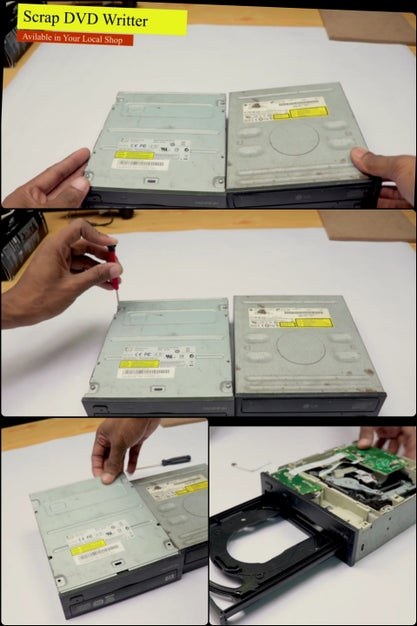
First of all we must open the 2 DVD scrap to extract the motors and moving parts necessary for the CNC machine. We must open them carefully so as not to the break the pieces we need. In the following image we can see Image. Simply by unscrewing the 4 screws marked in the image we can extract the part which we need, a whole shaft together with a stepper motor.
Step 4: Attach Motor With Base
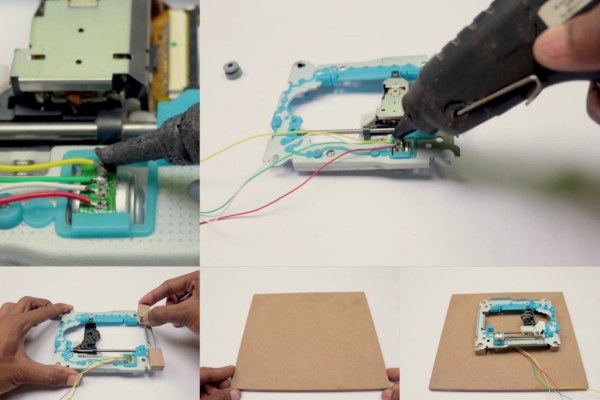
We have soldered the wire with stepper motor and then given it a spacer with a piece of wood. (As shown in the picture below) we cut a wooden plate that will be our base.
Step 5: X-axis and Y-axis Co-ordinates Movement.
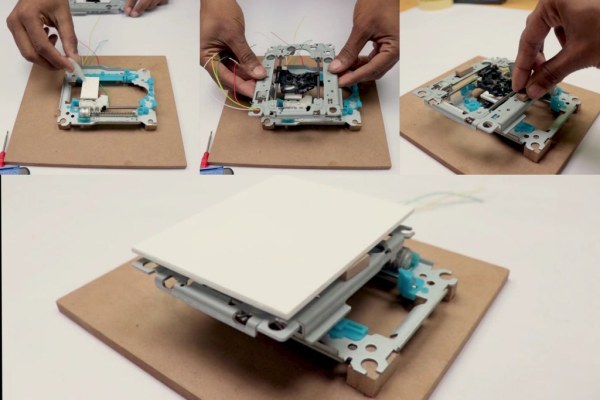
I’ve attached the slider of X and Y-axis together in perpendicular to each other, using glue between them. And also attached a cut wood piece above it as a working bed.
Step 6: Assemble the Pen Holder
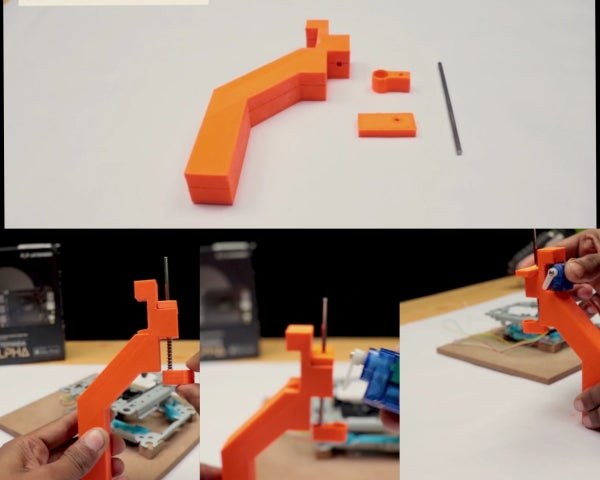
Attach the pen holder with bed
i have use 3d printed Pen holder
you can also print this holder
Step 7: The Electronics
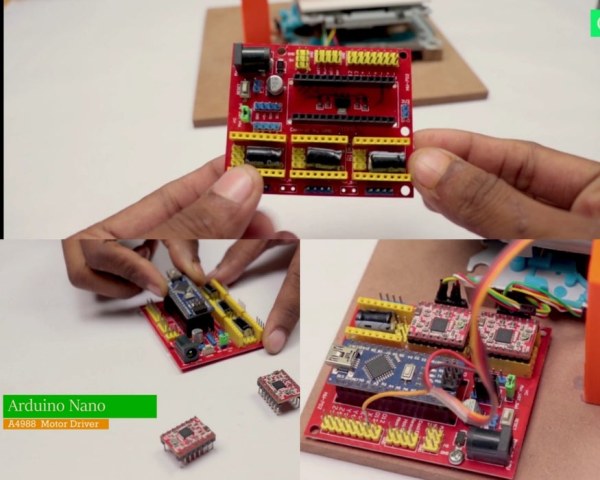
CNC Shield v4
This is the Shield CNC v4 for Arduino Nano, it is a 3 axis stepper motor controller, ideal for creating your own three axis CNC or laser engraving machine. This card can control two phase (4 wire) stepper motors up to 2A. It has a digital I / O interface, easy to connect to other modules, such as ENDSTOP, it also has an I2C interface, it can be connected to the I2C LCD or another I2C module. The power supply is 7.5-12Vdc, and the control logic is 5Vdc. This card is GRBL compatible.
Ready to your all circuit
1) 2 PCs A4988 Stepper Motor Driver 2) v4 Expansion Board A4988 Driver 3)Arduino Nano First of all take hit sink and stick on A4988 motor Driver. 2 pcs A4988 Stepper motor driver connect on expansion board A4988 driver module. then connect the arduino nano with expansion board and connect all wiring
Step 8: Benbox Softwer Configuration
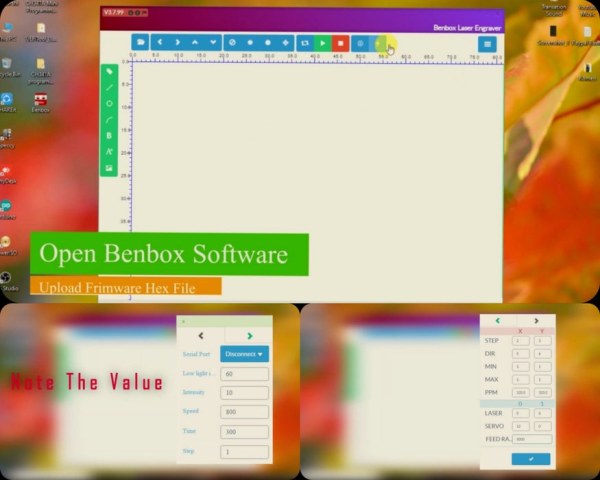
Software
visit DiyProjectsLab For more info
Source: 3D Printed Mini CNC Machine
- What is the purpose of this project?
The project teaches how to make a 3D printed prototype 3-axis CNC machine using DVD writer stepper motors and Arduino-based electronics. - What motors are used to control movement?
DVD writer stepper motors are used to control movement of the three axes. - Which microcontroller and shield are used?
An Arduino Nano with a CNC Shield v4 (expansion board) is used. - What stepper motor drivers are required?
Two A4988 stepper motor drivers are used on the expansion board. - How is the pen mounted?
A 3D printed pen holder is attached to the bed as the tool holder. - What materials form the machine frame and bed?
Cut wood pieces are used for the base, spacers, sliders, and working bed. - What software is mentioned for configuration?
Benbox software is mentioned and the shield is GRBL compatible. - What power supply voltage is recommended?
The CNC Shield v4 power supply is 7.5–12 V DC and control logic is 5 V DC. - Do you need to extract parts from old DVD drives?
Yes, you must open 2 DVD drives carefully to extract the stepper motors and shafts. - Are heatsinks required for the A4988 drivers?
Yes, heatsinks are attached to the A4988 motor drivers as part of the assembly.
