
Summary of Honey Bee Counter using Arduino
This article details the creation of a Honey Bee Counter, a device tracking bee activity with high accuracy. Version 2 introduces micro SD logging, solar power readiness, and temperature sensors, while Version 1 relies on USB power and Google Docs for real-time monitoring. The project utilizes infrared sensors to detect bees crossing a gate, processed by a microcontroller to distinguish between workers and drones.
Parts used in the Honey Bee Counter:
- Infrared (IR) Sensors
- Resistors (30K, 50K, 100K, 10, 20, 50 ohm)
- Arduino or Teensy ++ Microcontroller
- Printed Circuit Board (PCB)
- EAGLE Software
- Soldering components and pins
- Micro SD card (Version 2)
- Real time clock module (Version 2)
- Solar cell (Version 2 ready)
- 3D printed turn-styles or gates
Where the honeybee’s division of labor has stayed on a steady progression for 25 million years… our human superorganism has grown more complex and in all directions… hence the bee counter… By: thomashudson.org
Live data from – June 25, 2012
I’ve moved away from live data… my version 2 has an SD card and I’m partnering with a university to do some research… feel free to make your own WIFI enabled swarm detector and I’d love to partner someone that wants to sell them to the masses.
 beeBacker2.stl18 KB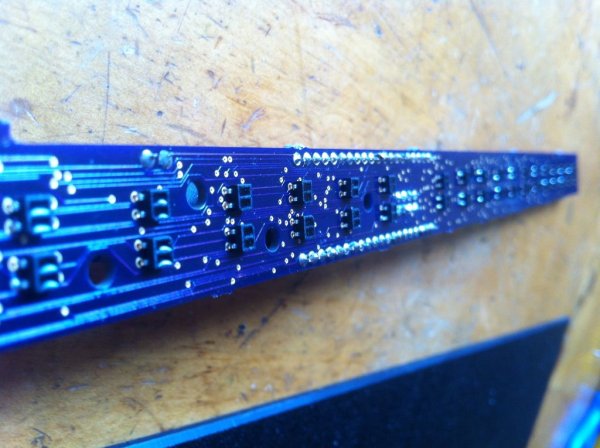
Step 1: Manifesto
Bee Counter – Version 2, October 14, 2012
– micro SD datalogging
– real time clock turns OFF the counter at night for reduced power
– decoupled the LEDs from the microcontroller to reduce average power to 6.6 ma when not in use
– small battery will last for months
– solar cell power ready
– unlimited temperature sensors
– can perform estimates of size of the bee (worker vs drones) and therefore monitor drone/worker activity
– 3D printed turn-styles or gates
– for sale complete without battery $400 or make your own (see below)
Here are the specs for Version 1. This instructable details out Version 1 which is easily upgradable to version 2 though I’ve not provided complete plans.
– 95% Accuracy
– Runs off USB power
– should be rain resistant with a top cover
– bees adapt to new opening in a few minutes
– real time monitoring on google docs
– USB connection dumps data onto your laptop text file
Here’s the plans to build your own. There are general instructions for prototyping or you can go to the circuit page and copy my exact board and circuit.
1. Buy a couple of infrared (IR) sensors
– Sparkfun: http://www.sparkfun.com/products/9542
– Get some 30K 50K and 100K resistors for testing the digital input sensitivity..
– Get some 10 , 20, and 50 ohm resistors for powering the IR LED
2. Prototype your parts with an Arduino
– I used a dead bee on a wire
– its an easy circuit
3. Select a Microcontroller… I used the Teensy ++
– same user interface as Arduino..
– has 46 inputs/outputs,
– its cheap, and
– designed locally here in Portland..
4. Design your Printed Circuit Board with EAGLE for free
– i took a 4 hour class at dorkbotpdx.org here in Portland. the software is free.
– have it printed through dorkbot in Portland $45 for 3 boards
5. put everything together
– solder your components on the board
– calibrate your sensors
– fine tune your programming
Rough cost and components for my board ~ $110
– Printed Circuit Board $45
– qty(44) QRE1113 IR Sensors $33
– Teensy ++ $24
– resistors and pins $10
– my time $ouch!
Message me if your interested in me putting together a kit as it would probably be $130 if you want to do the soldering and hot glue gunning yourself!
Step 2: Circuit
Sparkfun sells the Infrared sensor or IR sensor. It is an LED AND a Sensor! crazy useful!.
When the bee crosses under the LED the light is reflected back to the sensor..(its a photo transistor) and triggers a digital input to the Arduino.. (or teensy in my case).
- How does the sensor detect a bee?
The IR LED reflects light off the bee back to the photo transistor sensor, triggering a digital input. - Can I build this without buying a kit?
Yes, you can buy parts like sensors and resistors to prototype with an Arduino and design your own board. - What is the cost of the complete unit?
The complete unit without a battery is for sale at $400. - Does the counter work at night?
Version 2 uses a real time clock to turn the counter off at night to reduce power consumption. - How accurate is the device?
The device boasts 95% accuracy in counting bees. - Can the system monitor different types of bees?
Yes, it can estimate bee size to monitor drone versus worker activity. - Is the project open source?
The author encourages others to make their own WIFI enabled swarm detector and partner for research. - What software is recommended for designing the circuit board?
EAGLE is recommended for free PCB design.
