Summary of Make A Air Cap-Sense Piano Using Arduino
Summary (under 100 words): An air piano using Arduino-based capacitive sensing: eight aluminum-tape keys wired through high-value resistors to a common Arduino cap-sense pin detect a hand near each key. The Arduino reads pins 4–11 for key touches and drives a piezo buzzer on analog pin A0 to play notes. Resistor value (2M, 10M, 40M) controls sensing distance and sensitivity.
Parts used in the Air Cap-Sense Piano:
- Aluminum tape or aluminum foil
- Some wires (jumper cables)
- 8 × 10M Ohm resistors (alternatively 2M or 40M options)
- Piezo buzzer
- Arduino
- 9V battery or USB cable (power source)
I recently got my shipment of 10 buzzers I ordered about a month ago, so as soon as I got them I was eager to make something fun with them, so I looked around a bit and searched for what to do with them, and by spending some time on www.arduino,cc and posting lots of questions on the forums, I figured out what I am going to make.
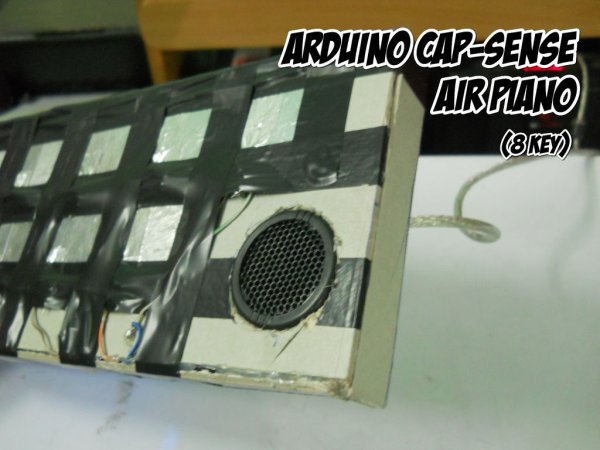
I decided to make an air piano which is based upon cap-sense and the Arduino.
Basically, there are square pieces of aluminum tape stuck onto a thick card which is attached to a jumper cable and a resistor, 8 replicas of this are made, then all the other ends of the resistors are attached together and to pin3 of the Arduino, this will act as the common base pin for all the sensors. The resistor values can be 2M or 10M or 40M Ohm. 2M Ohm will make it so that it only senses when you press on the aluminum tape, 10M Ohm resistor makes it so that your hand can be sensed at a little height of 2-4cm or so and 40M Ohm will sense quite a bit further, but it gets a little messy as if the aluminum tape pieces are too close together then at that height interference occurs therefore other keys might get pressed. If you want to use this 40M Ohm version then you have to make sure to place the aluminum tape pieces a little far away from each other.
I used 10M Ohm for my device and it works perfectly when I wave my hand over the note I want to use.
Step 1: What is Cap-Sense and how does it work
The principle behind this is that the aluminum tape detects the difference between human body capacitance and the capacitance of air, or in other words the aluminum tape is given a small voltage by the Arduino which creates an electrical field in that area, and when our finger(being a conductor) touches it or moves close to it so as to disturb the electric field, we form a capacitor. This change is detected by the aluminum tape and therefore sends a signal to the Arduino with which we can tell it to send a signal to the buzzer.
(I have heard that we can also use resistive sensing instead of capacitive but I’m not exactly sure how it works.)
For more information: http://en.wikipedia.org/wiki/Capacitive_sensing
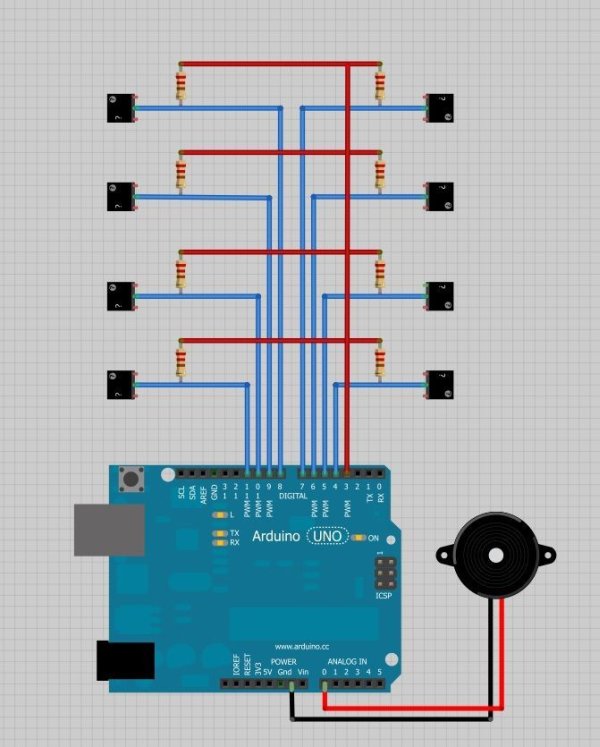
Step 2: Pinout diagram and wiring
I attached a piezo buzzer to pin A0 or Analogue Pin 0, the common pin to pin 3 and the 8 different squares of aluminum tape to 4,5,6,7,8,9,10,11 pins.
Schematic in attached as an image.
Tip: Attaching wire to the aluminum tape its simple as the tape is sticky, but if you are using pieces of aluminum foil then its kind of hard to do it as solder does not work and you cant use a glue-gun or anything of that sort, so I would advice you to use some conducting glue if you can get hold of it
Here is a link where you can get some conducting glue.
http://www.ebay.in/itm/Electrical-Conductive-Glue-No-Soldering-Iron-Gun-Flux-/270754006766
Major Components in Project
Materials;
- Aluminum tape or aluminum foil
- Some wires
- 8 10M Ohm resistors
- Piezo buzzer
- Arduino
- 9V battery or USB cable
For more detail: Make A Air Cap-Sense Piano Using Arduino
- What is the sensing principle used in the project?
The project uses capacitive sensing: aluminum tape forms an electrode, the Arduino applies a small voltage, and a hand near the electrode changes capacitance which the Arduino detects. - Which Arduino pins are used for the eight keys?
The eight aluminum tape keys are connected to digital pins 4, 5, 6, 7, 8, 9, 10, and 11. - Where is the common sensor resistor network connected?
All the other ends of the resistors are tied together and connected to pin 3 of the Arduino as the common base for the sensors. - Which pin is the piezo buzzer attached to?
The piezo buzzer is attached to analog pin A0 (Analogue Pin 0) on the Arduino. - What resistor values can be used and how do they affect sensing?
Resistor values of 2M, 10M, or 40M Ohm can be used: 2M senses only on touch, 10M senses a few centimeters away (2–4 cm), and 40M senses farther but can cause cross-talk if keys are too close. - How should aluminum tape be wired to wires?
Aluminum tape is sticky so wires can be attached directly; for aluminum foil use conductive glue because solder does not work well. - What issue occurs when using very high resistor values like 40M?
At 40M Ohm sensing distance increases but interference and false triggers can occur if aluminum pieces are placed too close together. - Can the project be powered by battery or USB?
Yes, the project can be powered by a 9V battery or by USB cable.