
Summary of Arduino multi-mode lamp with soft touch switch
This article details a minimalist, Arduino-based lamp project featuring multiple light modes like color sequencing and firelight effects. Controlled by a custom touch bar, the circuit utilizes an ATMega-328 microchip, 16MHz resonator, and three common-anode RGB LEDs with specific resistors. The design emphasizes cost-efficiency under $10 and uses point-to-point wiring with Teflon wire for durability. All functions, including the unique touch sensor logic, are handled via software on an Arduino-compatible host board.
Parts used in the Arduino Multi-mode Lamp:
- ATMega-328 microchip
- Three common-anode Piranha RGB LEDs
- Resistors (220-ohm for green/blue, 330-ohm for red, 1k-ohm for indicator)
- 16MHz resonator
- Teflon wire (silver-plated #28 recommended)
- Two 16-pin sockets (for microchip mounting)
- Pushbutton reset switch
- 6-pin header for USB-serial connection
- Arduino Nano, Boarduino, or RBBB host board
- Capacitors
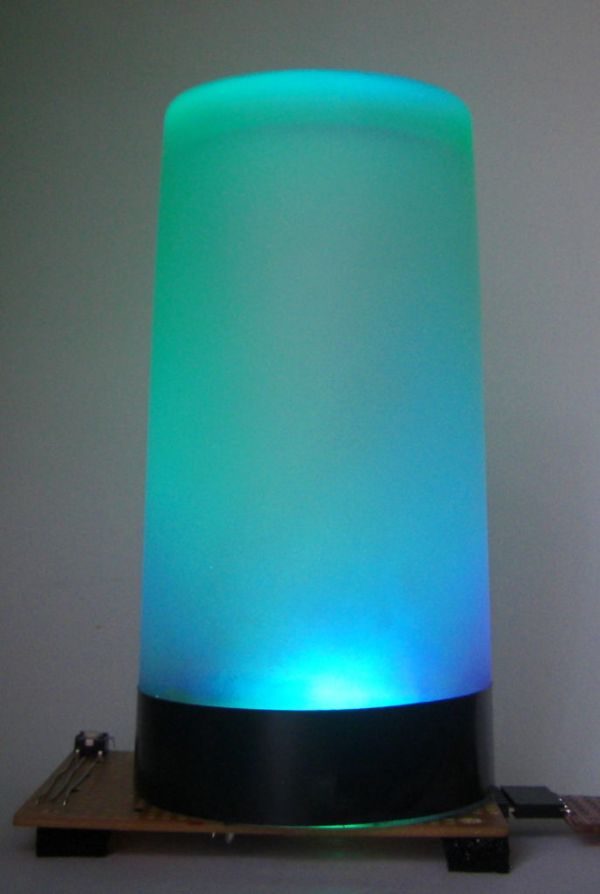
In this Arduino-based project, we will build a lamp with multiple light displays: color sequencer, dimming light, color chaser, firelight – all selected by a touch bar on the circuit board.
All the functions are done in software, including the touch sensor, which is a unique feature.
Step 1: What is needed?
We will be going the minimalist way for this project, filling the board with just a microchip, the LEDs, a handful of resistors and some capacitors, all for under $10, along with the necessary connecting hardware.
The circuit will be using 3 RGB LEDs. These are common-anode Piranha type available here and contains three LEDs within its body. Each color will need a single dropping resistor (220-ohm for green and blue and 330-ohm for Red). We can also add a small LED with a 1k-ohm as an indicator.
The IC we are using is an ATMega-328 microchip, available for about $5 here You will also need a 16Mhz resonator for about 35c, also available at the same site.
The development and testing of the software is done using the Arduino system, so a suitable ‘host’ is necessary. I’ve used an Arduino ‘Nano’, a Boarduino and a RBBB board and they all work fine.
Step 2: Getting started
It is a very good idea to put the microchip in a socket. Here, I’ve used 2 x 16-pin sockets end-to-end, because that is what I have available… The ATMel chip only has 28-pins so we’ll have a few empty sockets on the end.
In this picture, the LEDs are along the bottom, with a resistor for each of the primary colors.
The little pushbutton on the left is for the Reset, although this is not strictly needed. The yellow blob in the center is the resonator.
After I’ve done the preliminary wiring, the circuit (and programming) is tested through jumpers connected to the ‘host’, an RBBB (Really Bare Bones Board), also from Modern Devices. This lets me make sure the wiring is correct before we commit the Microchip.
The process is quite straightforward – run / test with the host, then simply transplant the IC over to the circuit board.
Step 3: A quick test…
If you’re really impatient, you can actually run the program with just the IC, and the resonator! Just add a 5v source and Presto! There is light!
Step 4: The circuit
The picture clearly shows the point-to-point wiring used.
A major effort-saver is the use of Teflon wire, which does not melt even when routed close to soldered parts. Teflon wire is also available silver-plated which allows me to use thinner wires (#28) and still handle the current. These wires can be found here on eBay.
The 6-pin header in the back is so I can connect a USB-serial port (“USB BUB”) and make programming changes directly to the chip.
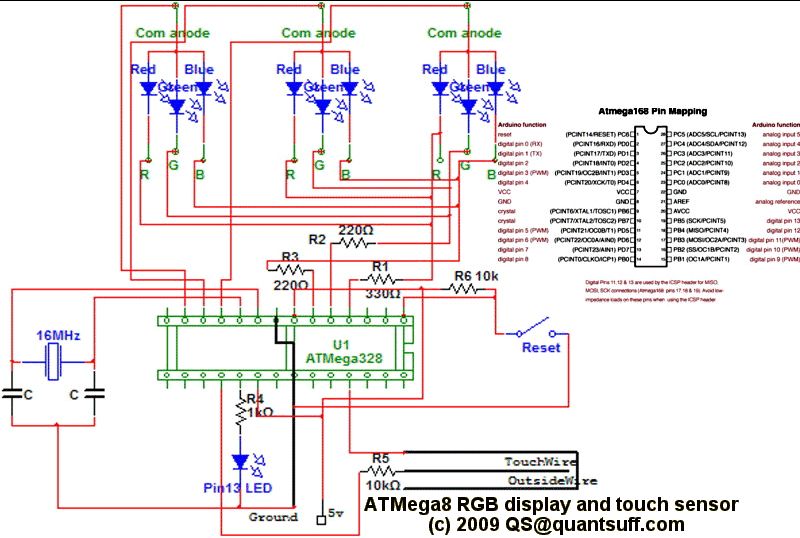
The wiring at the front is used as the touch sensor. The program measures the voltage drop between the wires and can tell if it is touched. The duration is measured and we can tell if it is a tap, a press or a hold, and the program uses it to control the light patterns.
3 RGB LEDs
ATMega-328 microchip
An Arduino
For more detail: Arduino multi-mode lamp with soft touch switch
-
What light displays can this lamp create?
The lamp supports color sequencer, dimming light, color chaser, and firelight displays. -
How does the user select different light modes?
Users select modes using a touch bar on the circuit board that measures voltage drop duration. -
What type of RGB LEDs are required for this project?
The project requires common-anode Piranha type RGB LEDs which contain three LEDs within one body. -
Which resistors should be used for the primary colors?
You need 220-ohm resistors for green and blue, and a 330-ohm resistor for red. -
Can the microchip be soldered directly without a socket?
While possible, it is highly recommended to put the microchip in a socket to facilitate testing and replacement. -
How is the touch sensor functionality implemented?
The touch sensor is implemented entirely in software by measuring voltage drops between wires to detect taps, presses, or holds. -
What kind of wire is suggested for the point-to-point wiring?
Teflon wire is suggested because it does not melt when routed close to soldered parts and allows for thinner gauges if silver-plated. -
How can programming changes be made directly to the chip?
A 6-pin header connects to a USB-serial port called USB BUB to allow direct programming changes. -
What host boards are compatible with this project?
An Arduino Nano, Boarduino, or RBBB board can all be used as the development and testing host.
