
Summary of Weather Station With Data Logging
This article outlines the first part of a DIY weather station project, requiring basic electronics and programming skills. The system utilizes a DFRobot weather station kit to measure wind speed, direction, rainfall, temperature, humidity, and barometric pressure. It features data logging capabilities via an Arduino SD card module and is powered by a solar panel with a battery backup system housed in a waterproof enclosure.
Parts used in the Weather Station System:
- Weather station kit
- Arduino SD card module
- SD card (16GB)
- Solar power manager
- 5V 1A Solar panel
- Nylon cable ties
- Mounting kit
- LCD display
- Breadboard
- Li-ion batteries (Sanyo 3.7V 2250mAh)
- Waterproof plastic junction box
- Wires
- Resistors (2x 10kOhm)
- Anemometer
- Wind vane
- Rain bucket
- Sensor Board
- Stainless steel studdle (30CM)
In this instructable I will show you how to make weather station system by yourself. All you need is basic knowledge in electronics, programming and a little bit of time.
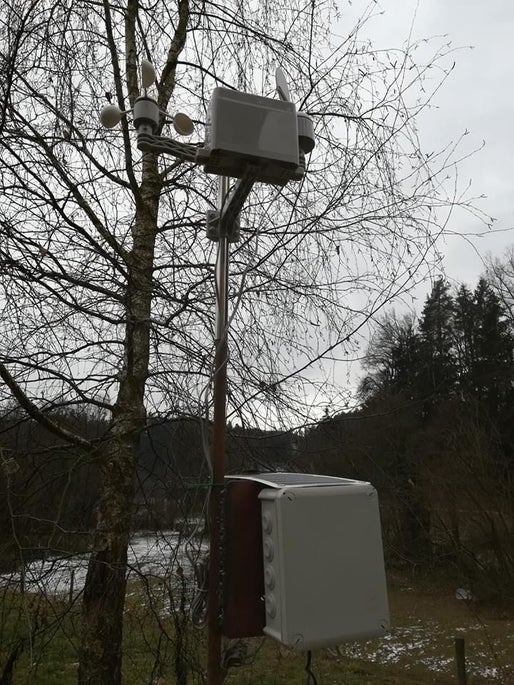
This project is still in the making. This is only first part. Upgrades will be uploaded in next one or two months.
If you have any questions or problems you can contact me on my mail:[email protected].
Components provided by DFRobot
So let’s begin
Step 1: Materials
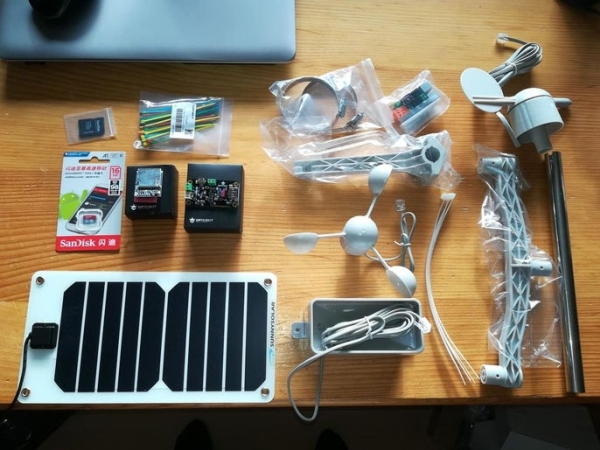
Nearly all needed materials for this project can be bought on online store: DFRobot
For this project we will need:
-Some nylon cable ties
-Li- ion batteries (I used Sanyo 3.7V 2250mAh batteries)
-Waterproof plastic junction box
-Some wires
-Resistors (2x 10kOhm)
Step 2: Modules
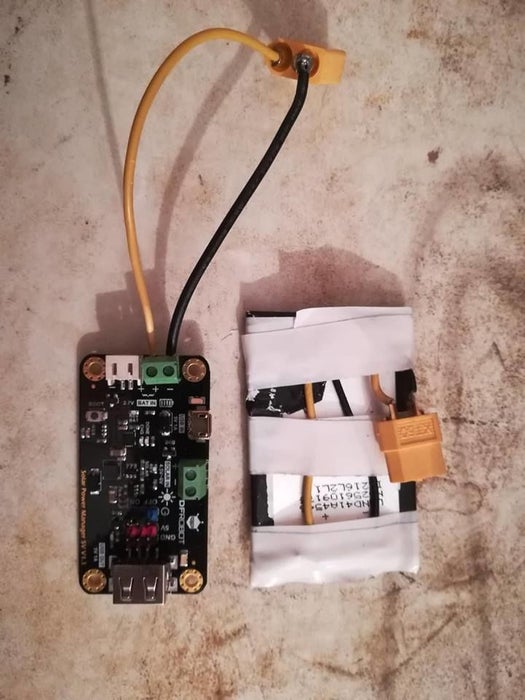
For this project I used two different modules.
Solar power manager
This module can be powered with two different supplys, 3.7V battery, 4.5V – 6V solar panel or USB cable.
It has two diffrent outputs. 5V USB output which can be used for supplying Arduino or some other controller and 5V pins for powering different modules and sensors.
Specifications:
- Solar Input Voltage (SOLAR IN): 4.5V~6V
- Battery Input (BAT IN): 3.7V Single cell Li-polymer/Li-ion
- BatteryCharge Current(USB/SOLAR IN): 900mA Max trickle charging, constant current, constant voltage three phases charging
- Charging Cutoff Voltage (USB/SOLAR IN): 4.2V±1%
- Regulated Power Supply: 5V 1A
- Regulated Power Supply Efficiency (3.7V BAT IN): 86%@50%Load
- USB/Solar Charge Efficiency: 73%@3.7V 900mA BAT IN
SD module
This module is fully compatible with Arduino. It allows you to add mass storage and data logging to your project.
I used it for collecting data from weather station with 16GB SD card.
Specifications:
- Break out board for standard SD card and Micro SD (TF) card
- Contains a switch to select the flash card slot
- Sits directly on a Arduino
- Also be used with other microcontrollers
Step 3: Weather Station Kit
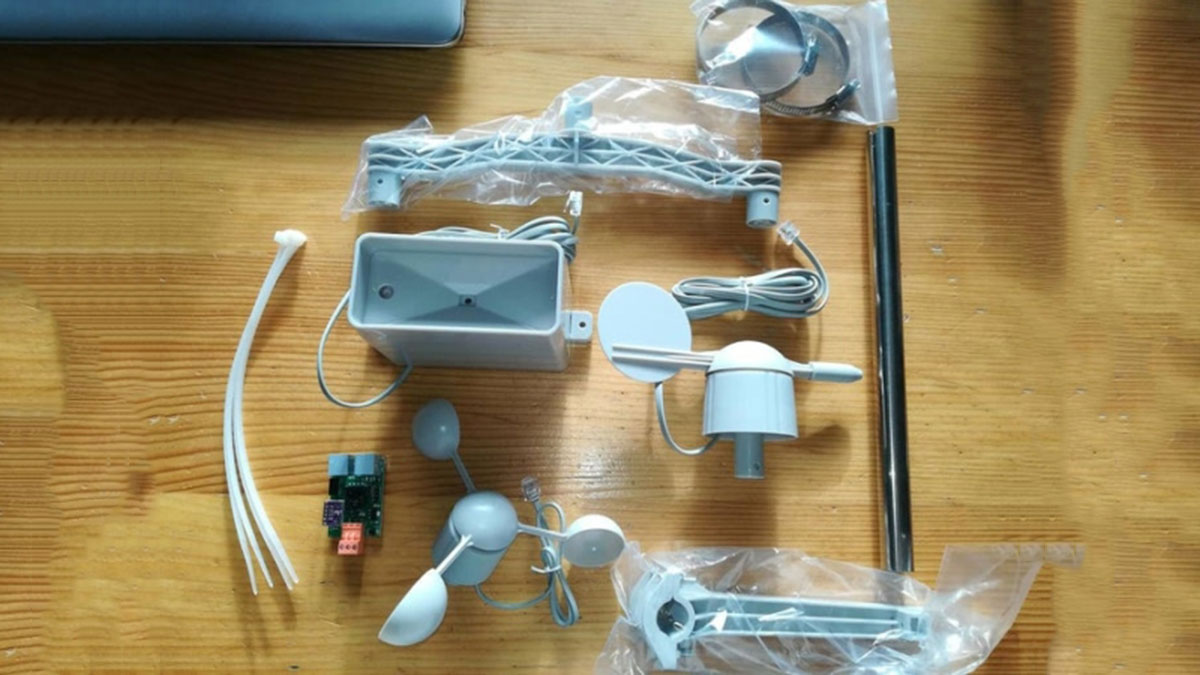
The main component for this project is weather station kit. It is powered by 5V from Arduino or you can also use external 5V supply.
It has 4 pins (5V, GND, TX, RX). TXD data port uses 9600bps.
Weather station kit consist of:
- Anemometer
- Wind vane
- Rain bucket
- Sensor Board
- Stainless steel studdle (30CM)(11.81″)
- Component package
It can be used to measure:
- Wind speed
- Wind direction
- Amount of rainfall
It has build in humidity and temperature sensor which can also measure barometric pressure.
Anemometer can measure wind speed up to 25 m/s. Wind direction is displayed in degrees.
More info about this kit and sample code can be found on: DFRobot wiki
Step 4: How to Assemble Weather Station Kit
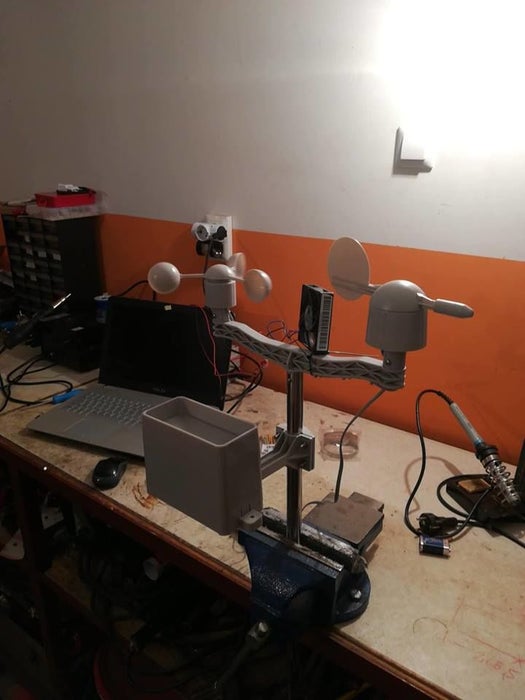
The assembly of this kit is quite easy but for more info about assembly watch a tutorial on how to assemble this kit.
Source: Weather Station With Data Logging
-
What components are included in the weather station kit?
The kit consists of an Anemometer, Wind vane, Rain bucket, Sensor Board, Stainless steel studdle (30CM), and a Component package. -
How does the solar power manager supply energy?
It can be powered by a 3.7V battery, a 4.5V-6V solar panel, or a USB cable and provides a 5V output for the Arduino. -
Can the weather station measure barometric pressure?
Yes, it has a built-in humidity and temperature sensor that can also measure barometric pressure. -
What is the maximum wind speed the anemometer can measure?
The anemometer can measure wind speed up to 25 m/s. -
How much data storage capacity was used in this project?
A 16GB SD card was used for collecting data from the weather station. -
What is the communication speed for the TXD data port?
The TXD data port uses 9600bps. -
Where can I find sample code for the weather station kit?
More info and sample code can be found on the DFRobot wiki.
