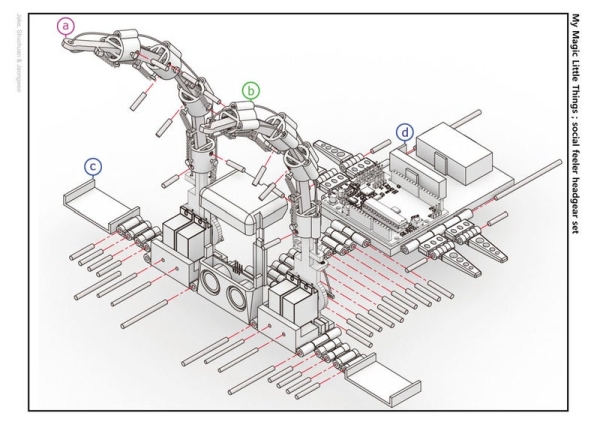
The project conducted as part of the Computational Design and Digital Fabrication seminar in the ITECH masters program.
A Project by: ShuChuan Yao, Jeongwoo Jang, Zijie Tan
- Arduino Uno
- Servo Motors x4
- fishing wires
- pins (cotton buds stem, thread rod, toothpick)
- Gyro Sensor
- 9V Battery
- Pretty Scarf/Bandanna
Do you ever feel the need to express yourself but always fail to do so? Do you want to stand out in party but you are boring af? Are you constantly irritated by the presence of the people you don’t like and want to maintain a distance but don’t know how to? If the answer is yes, look no further! the magic feeler is here to break down every wall and ego of the people you love and hate and make you the next icon in your local night club. It is an extension of your feelings, a defense mechanism that protects you and a new way to perceive and sense your surrounding. It is designed as a headgear that goes well with your favourite headscarf, protruding our from your head like a feeler that amplifies your action and comply with your selected mood. Apart from extending your mood of the day, it can also serve as an attractor feature that enhance the saturation of your world by lighting up and dancing along with you. Look no further, employ this extension as your newly grown body part or die a awkward turtle in this cold harsh world.
Step 1: Assemble Feelers

You will need:
- Magic feeler x2 (Robotic Tentacle Arm by RoboBaggins, mirrored ver.attached)
- Servo Motors x4
- pins as connectors (cotton buds stem, thread rod, toothpick)
- Fishing wires
Assembly Sequence:
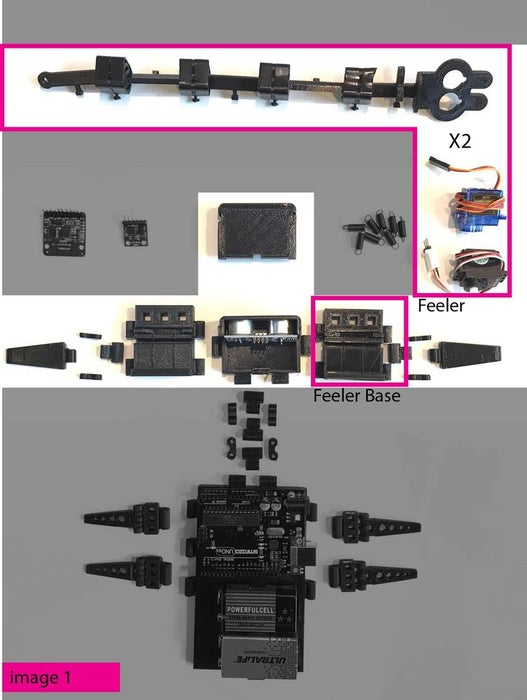
- Assemble both feelers (image 1)
- Install assembled feelers upright on frontal part of headgear, sitting on feeler base
- Assemble front part of headgear (image 2)
Step 2: Assemble Electronics

You will need:
Front part
- Ultra sonic sensor x1
Rear part
- Arduino Uno x1
- 9V Battery x1
On Body Part
- Gyro sensor
Instructions
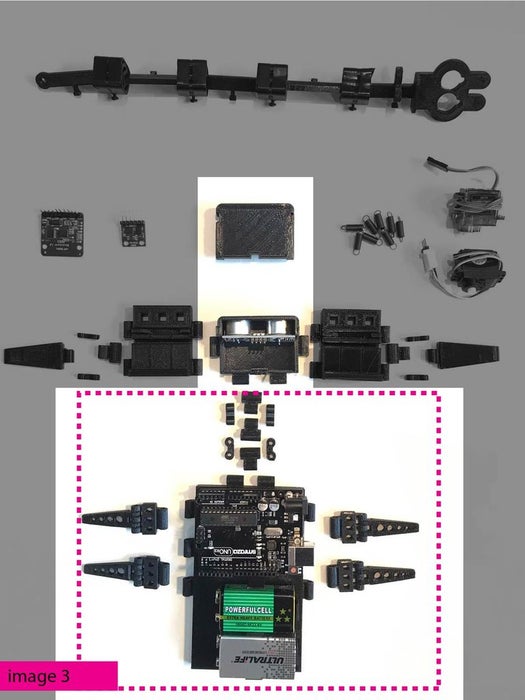
- Assemble rear part of headgear (image 3)
- Follow Schematic for wiring sequence (image 4, 5)
- Paste gyro on your preferred body part (arm area recommended, measure length of wire accordingly, image 6)
- Place lighting on the tip of feeler( measure length accordingly)
- wrap a foil around it as decoration (image 7)
Step 3: Code and Movement Adjustment

You will need:
- Arduino Code (attached above)
Instructions
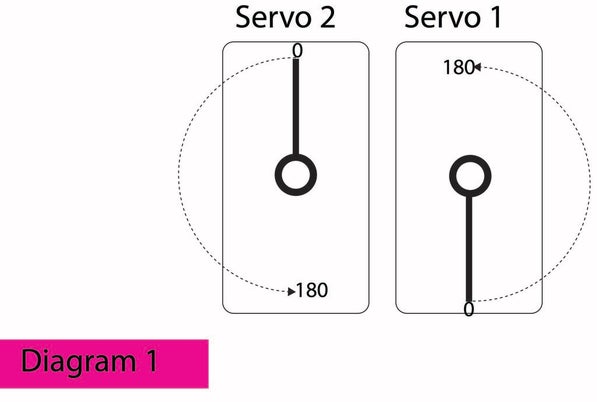
- Set servo starting position (Refer to diagram 1)
- Upload Code to arduino board
- Adjust fishing wire tension accordingly to achieve flexible gesture
Check:
- check if feeler reacts to gyro
- random colours at tip
- check if feeler reacts to ultrasonic sensor
- if sensor covered, light should be red(alert mode)
Source: Magic Feeler
