This instructable will teach you to build a simple Arduino based Voting machine using simple components such as push buttons and LCD. The highlighting feature of this system is that Serial Monitor in Arduino IDE is used to perform the polling operation no other external applications needed.
Key Features:
- Every step of polling operation will be under control of the supervisor.
- Password enabled security system.
- Poll results can be obtained instantly.
- Voter will be aware of the candidate he is voting for.
Step 1: PARTS REQUIRED
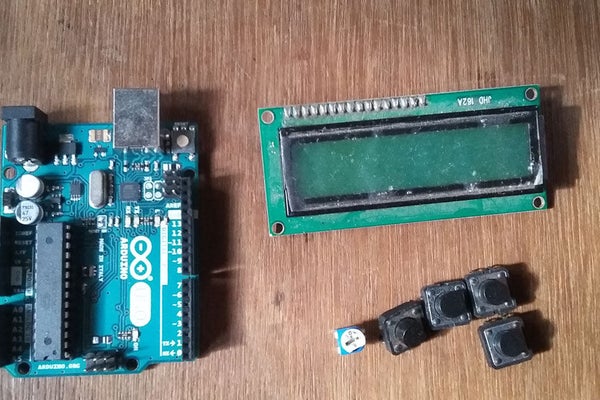
This simple project can be done with minimal components. The parts list are given below

- Arduino Uno – 1
- 16×2 LCD -1
- Push Buttons – As required
- Potentiometer 100k – 1
- Breadboard – 1
- Connecting Wires – As required.
Step 2: DESIGN
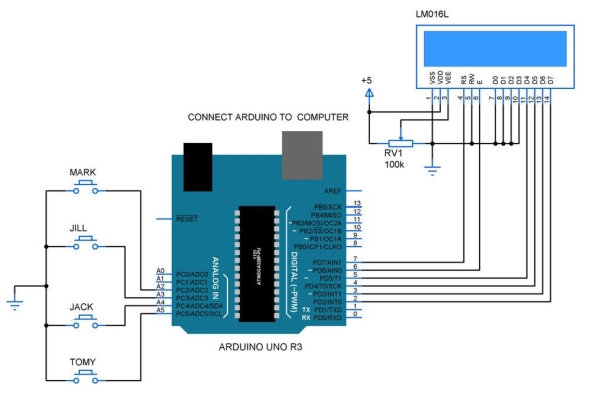
The design of the voting machine was given here. The Arduino reads the keypad input by the process of Polling. A 16×2 LCD was connected to the PORTD in 4 bit mode. This system will be operated by plugging the Arduino to the your PC and controlling using Serial monitor of Arduino IDE.
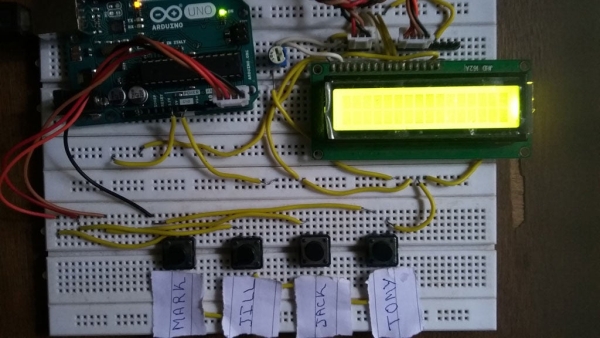
Step 3: PUT IT TOGETHER
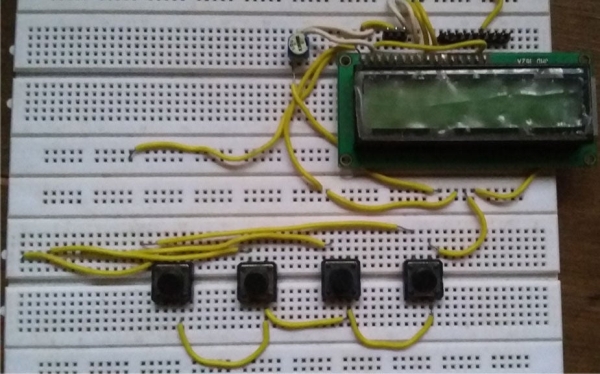
Now connect the buttons to a breadboard as shown in the diagram. You can increase the number of buttons you use based on the number of candidates for the poll. Afix the LCD along with the potentiometer to the board and finish up all the connections as shown in the schematic design.
Step 4: ADD YOUR ARDUINO
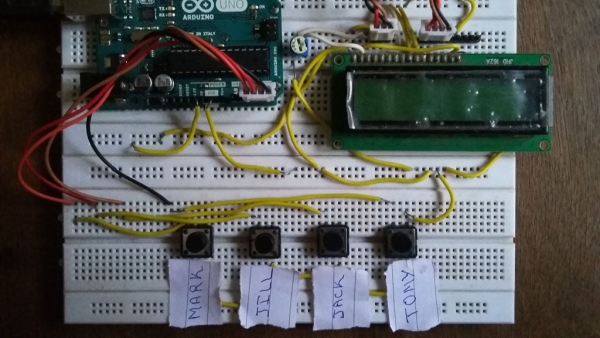
Now connect your Arduino to buttons and LCD in the breadboard. You are now all set with the hardware.
Step 5: CODE AND WORKING OPERATION
You can read the detailed working operation and code in this website http://www.gadgetronicx.com/arduino-based-voting-system/ . Upload the code to your arduino after obtaining it from that site.
Step 6: OPERATING WITH SERIAL MONITOR

Now you are ready to go and operate your voting machine. Connect your Arduino to the PC using the USB. Now open the Serial monitor to conduct the poll. Enter the password to get access to the system.
V – Allow Voter to caste their vote
D – Display the Vote tally.
Take a look at the snap shot of serial monitor to get understanding of its working.
Step 7: WORKING VIDEO
See the outcome of this system in this video which is uploaded to official channel of Gadgetronicx .
Source: Arduino Voting Machine