
Contents
hide
Summary of Wii Nunchuck Arduino Tutorial
This article explains how to connect a Wii Nunchuck to an Arduino to enable game-style motion control using its three-axis accelerometer. The project requires an Arduino board, the Nunchuck controller, and a specific adapter. It details the 6-pin Wiimote bus pinout and provides wiring instructions for connecting the device to both Arduino Uno and Mega models via I2C communication.
Parts used in the Wii Nunchuck Arduino Project:
- Arduino
- Wii Nunchuck
- Nunchuck – Arduino Adapter
Why Wii Nunchuck Arduino?
You can create and build endless electronics design and project with the powerful Arduino, for example a robot. By attaching Wii Nunchuck Arduino, you create the opportunity to control Arduino using the way we most familiar with, the way we play games! Not to mention, Wii Nunchuck is cheap (~5 US dollars), and it also has three-axis accelerometer for motion sensing, which is very useful.
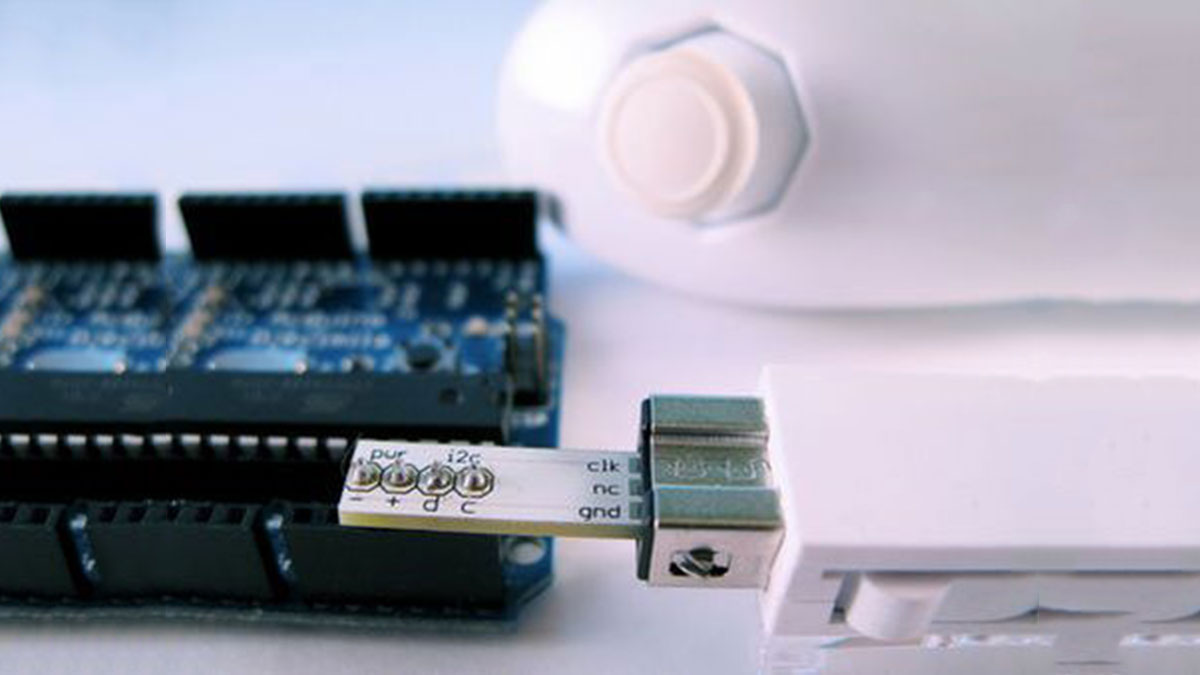
What hardware are required?
- Arduino
- Wii Nunchuck
- Nunchuck – Arduino Adapter
Wii Nunchuck Arduino Hardware Explained
Wiimote Bus Pins (6-pin proprietary connector on Wiimote)
The wii nunchuck accessory bus is a 6 pin data connector. However, only 4 pins are useful to us.
Looking into Wiimote:
|   135   |
|   246   |
|___---___|
- 1 (Red wire) – +3V
- 2 (Yellow wire) – Clk
- 3 (Red wire) – Attachment detection?
- 4 (No wire) – Unknown (unconnected at Nunchuk connector)
- 5 (Green wire) – Data
- 6 (White wire) – GND
Hook up Arduino Uno and Wii Nunchuck
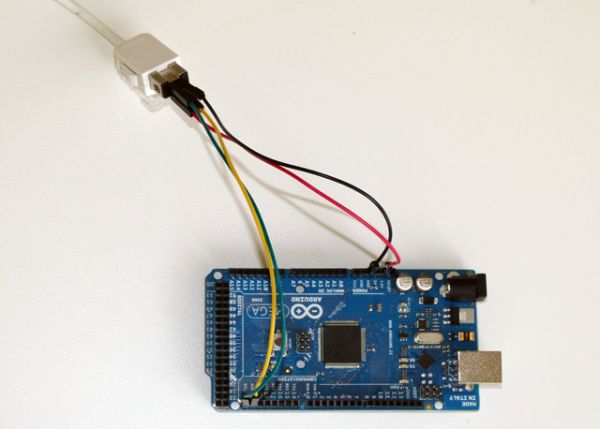
Hook up Arduino Mega and Wii Nunchuck
- + to +3.3V
- – to GND
- d to SDA (pin 20)
- c to SCL (pin 21)
For more detail: Wii Nunchuck Arduino Tutorial
- Why use a Wii Nunchuck with Arduino?
It allows you to control the Arduino using familiar game-playing methods and offers a cheap (~5 US dollars) solution with a three-axis accelerometer. - What hardware is required for this project?
You need an Arduino, a Wii Nunchuck, and a Nunchuck–Arduino Adapter. - How many pins are useful on the Wiimote accessory bus?
Although the connector has 6 pins, only 4 pins are useful for this application. - Which wire color corresponds to the Clock signal?
The yellow wire (Pin 2) serves as the Clk signal. - How do you connect the Nunchuck to an Arduino Uno?
Connect positive to +3.3V, negative to GND, data to SDA (pin 20), and clock to SCL (pin 21). - Does the Nunchuck include motion sensing capabilities?
Yes, it features a three-axis accelerometer which is very useful for motion sensing projects. - What is the approximate cost of a Wii Nunchuck?
The Nunchuck is described as cheap, costing approximately 5 US dollars.
