
Summary of Thermohygrometer with clock and LCD display on Arduino UNO
This article outlines a 7-step guide to building a thermo-hygrometer with a clock using an Arduino UNO. The project displays data, time, humidity, and temperature on an LCD 16x2 screen. It details necessary hardware components, software setup including library installation for the DHT22 sensor, and connection instructions. The tutorial is designed to be beginner-friendly while allowing independent use of specific steps like configuring the DS3231 real-time clock.
Parts used in the Thermo-Hygrometer with Clock:
- Arduino UNO
- USB cable
- MB-102 breadboard
- DHT22 sensor
- DS-3231 real time clock
- LCD 16x2 display
- 10k Ohm linear potentiometer
- 2N3904 transistor or 2N2222
- Three 10k Ohm resistors (1/4 Watt)
- Pushbutton
- Dupont cables
- Small wooden board (optional)
- Short self-tapping screws (optional)
These 7 steps will drive you through the “construction” of a thermo-hygrometer with clock on Arduino UNO.
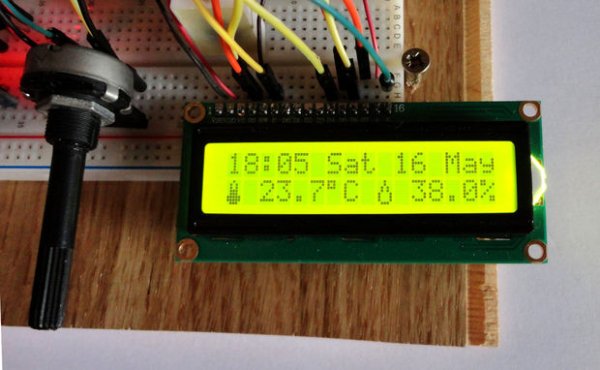
Data and time, humidity and temperature will be shown on a LCD 16×2 display .If you have purchased a LCD display and want to know how to properly solder a pin header to it, take a look at our tutorial “Yet another tutorial on how to solder”.
Each step of this tutorial is independent from the others. So, if you are looking for an easy way to make your DS3231 work (for example) this tutorial is also suitable for you.
What you need to follow all steps of this tutorial is:
- Arduino UNO
- A USB cable
- The Arduino IDE installed on your computer
- A MB-102 breadboard
- Set of Dupont cables
- DHT22(humidity and temperature sensor)
- DS-3231 (A cheap but accurate real time clock)
- LCD 16×2 display
- A 10k Ohm linear potentiometer
- A 2N3904 transistor (or a 2N2222)
- Number 3 10k Ohm resistors (1/4 Watt)
- A pushbutton
- Preferably, a better text editor than Arduino IDE
Another very useful thing (but not strictly required) is a small wooden board where fixing Arduinio and breadboard. Get some short self tapping screws if you decide to follow this advice.
Even if this tutorial seems to be not easy, it can be done by newbies as well if followed step-by-step,
YOUR COMMENTS AND SUGGESTIONS ARE WELCOME!
Step 1: Make Your DHT22 Work
The first step is downloading and installing the library needed by DHT22 sensors.
Download the zip file attached in this step. Into this folder there are two files which have to stay into the sub-folder \DHT. If you are on Windows, install the library by putting the \DHT folder into the directory:
C:\Program Files (x86)\Arduino\libraries
So, the two files dht.cpp and dht.h have to be contained in a folder named DHT and no other sub-folders have to be made. Click here for more info about adding new libraries.
DHT22 connections
Before uploading the code to your Arduino, you need to connect the DHT22 sensor properly.
Read more: Thermohygrometer with clock and LCD display on Arduino UNO
- What components are required to build this project?
The project requires an Arduino UNO, USB cable, MB-102 breadboard, DHT22 sensor, DS-3231 clock, LCD 16x2 display, various resistors, a transistor, a pushbutton, and Dupont cables. - How do I install the library needed for the DHT22 sensor?
You must download the attached zip file, place the DHT folder into your Arduino libraries directory, ensuring dht.cpp and dht.h are inside without extra sub-folders. - Can beginners follow this tutorial?
Yes, even though it seems complex, newbies can complete the project if they follow the steps step-by-step. - Does each step depend on the others?
No, each step of the tutorial is independent from the others. - What is displayed on the LCD screen?
Data and time, humidity, and temperature will be shown on the LCD 16x2 display. - What alternative transistor can be used instead of the 2N3904?
A 2N2222 transistor can be used as an alternative to the 2N3904. - Is a wooden board strictly required for the project?
No, a small wooden board is very useful but not strictly required. - Where should the DHT library files be installed on Windows?
The DHT folder should be placed in C:Program Files (x86)Arduinolibraries.
