Summary of DIY USB to TTL Converter
DIY USB to TTL Converter — concise summary (under 100 words) This article shows how to build a DIY USB-to-TTL module on a breadboard using the CH340G USB-to-TTL IC. It explains why CH340G was chosen over PL2303, FT232, and CP2102, lists required components, mentions using a 16-pin SMD-to-DIP adapter to mount the SMD CH340G, and references the simple schematic and driver support for Windows and macOS.
Parts used in the DIY USB to TTL Converter:
- CH340G USB to TTL converter IC
- 16 pin SMD to DIP converter
- Breadboard
- Male to Male jumper wires
- USB A to B Cable
- LEDs
- Resistors
Now that the PC’s com port or Serial port is almost obsolete there is quite a lot of requirement for USB to TTL or USB to RS232 converter. USB to TTL converters are required for interfacing microcontrollers to PC it is also required for loading code in Arduino Mini, setting/modifying ESP8266 firmware. Over here we are going to make a do it yourself (DIY) USB to TTL Module on a breadboard.
Lots of USB to TTL modules are available in the market based on various chips like PL2303, FT232, CP2102 and CH340g. I have decided to use CH340g IC. Low costing clones of Arduino UNO & Arduino Nano also uses CH340g IC. And this IC is now easily available in India. Reasons for not using other converter IC’s.
- PL2303: Lots of duplicates in Market so not reliable
- FT232: Costly
- CP2102: Difficult to solder
Step 1: Components Used
Components Used in Projects
- CH340G Usb to TTL converter IC
- 16 pin smd to dip converter
- Breadboard
- Male to Male jumper wires
- USB A to B Cable
- Led’s
- Resistors
Step 2: Schematic
Above is the implemented schematic. The schematic I got from CH340g in Eagle. Not much explanation is required as its a very simple circuit. Still if you have any queries you are free to ask.
Step 3: CH340 USB to TTL Converter
CH340g is a great new low cost alternative to other usb to ttl converter IC’s. It is also gaining lot of popularity andhas support for window’s 8, windows 10 and all OSX for MAC. It is very easy to Install and Tutorials are available for installing CH340 drivers for windows and also for MAC.
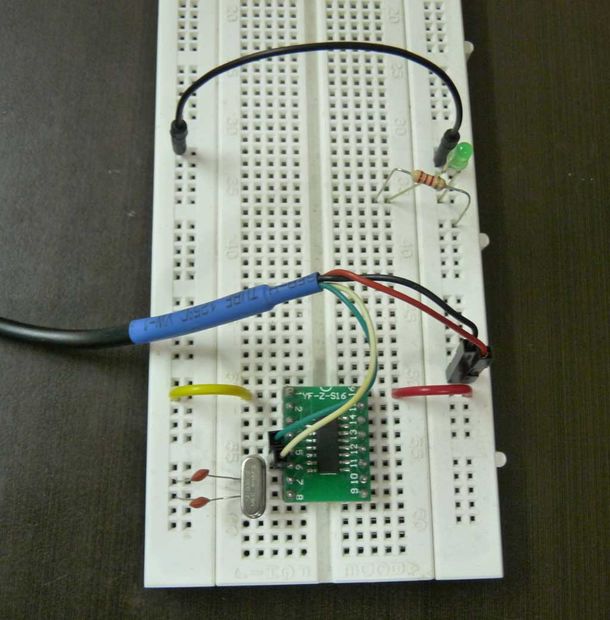
Step 4: SMD to DIP Converter
Truly speaking this converter board is the only reason that it was possible to make this project. The problem in using CH340 was that it does not come in DIP version only smd versions are available. But luckily I found a 16 pin SMD to DIP converter which made this project possible. Now using SMD IC’s is not a problem at all as variety of SMD to DIP converter PCB’s are available online.
Read more: DIY USB to TTL Converter
- Why use CH340G for the USB to TTL converter?
The article states CH340G is low cost, widely available, and commonly used in Arduino clones. - Can I use other USB to TTL ICs like PL2303, FT232, or CP2102?
The article notes PL2303 has many duplicates and is unreliable, FT232 is costly, and CP2102 is difficult to solder, so CH340G was chosen instead. - How do you mount the SMD CH340G on a breadboard?
Use a 16 pin SMD to DIP converter to adapt the SMD CH340G for breadboard use. - Is driver support available for CH340G?
The article says CH340G has driver support for Windows 8, Windows 10, and macOS, and tutorials are available. - What components are needed to build the module on a breadboard?
The article lists CH340G IC, 16 pin SMD to DIP converter, breadboard, male-to-male jumper wires, USB A to B cable, LEDs, and resistors. - Does the article provide a schematic for the circuit?
Yes, the article includes a schematic sourced from CH340G in Eagle and describes it as a very simple circuit. - Is using SMD ICs a problem for this project?
No, the article explains that using an SMD to DIP converter makes working with SMD ICs feasible. - What is the primary purpose of the USB to TTL converter described?
The article indicates USB to TTL converters are used for interfacing microcontrollers to PC and tasks like loading code on Arduino Mini and setting/modifying ESP8266 firmware.