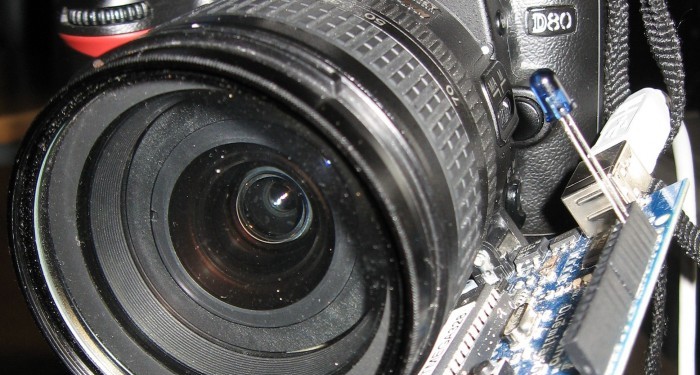
I’m cheap and skint, yet I want to do timelapse photography with my Nikon D80 DSLR. Unfortnately that requires spending some cash on an intervalometer for time lapse photography which will set me back a sizeable chunk of cash. Or I could get a remote or get the trigger system then create a delay mechanism to do the timelapse. But again it’d cost a few quid to even get a remote…
Thankfully I already have an Arduino board and a bag of Infrared emitter diodes which I was wondering what I could use them for. So I had a quick scout round the interweb and saw various projects where people had written programs to allow Arduino to work as a TV remote etc.. and I stumbled up on this site: http://www.bigmike.it/ircontrol/ which listed the very IR timing sequence and frequency I would need to trigger my camera. I’m guessing you can find other sequences/ frequencies for other bits of hardware too.
There is no point in me writing up a circuit diagram or parts list for this as you just need an IR diode and an Arduino board. Oh and check that your camera has an Infrared remote port on it or else this is pointless!
Arduino Nikon Intervalometer Remote Code
You will see that basically we blink an IR LED for a set time, wait and repeat to create our signal. The only complicated bits are working out the delays to create the pulse cycle/ wave. Turns out Arduino isn’t so hot at measuring delays in Microseconds so we need to give it a hand keeping track using the micros() function – so we just create a counter to do this and specify an end time for it to count up to.
/*

LUCKYLARRY.CO.UK - IR Remote control for Nikon using Arduino

Mimics the infrared signal to trigger the remote for any Nikon camera
which can use the ML-L1 and ML-L3 remotes. Can be used as an intervalometer
for time lapse photography.

The IR sequence I used is originally taken from: http://www.bigmike.it/ircontrol/

You should be able to use my pulse methods to alter to suit other cameras/ hardware.

micros() is an Arduino function that calls the time in Microseconds since your program
first ran. Arduino doesn't reliably work with microseconds so we work our timings by
taking the current reading and then adding our delay on to the end of it rather than rely
on the in built timer.

*/

int pinIRLED = 13;                                      // assign the Infrared emitter/ diode to pin 13

void setup() {
  pinMode(pinIRLED, OUTPUT);                            // set the pin as an output
}

// sets the pulse of the IR signal.
void pulseON(int pulseTime) {
  unsigned long endPulse = micros() + pulseTime;        // create the microseconds to pulse for
  while( micros() < endPulse) {
    digitalWrite(pinIRLED, HIGH);                       // turn IR on
    delayMicroseconds(13);                              // half the clock cycle for 38Khz (26.32×10⁻⁶s) - e.g. the 'on' part of our wave
    digitalWrite(pinIRLED, LOW);                        // turn IR off
    delayMicroseconds(13);                              // delay for the other half of the cycle to generate wave/ oscillation
  }

}

void pulseOFF(unsigned long startDelay) {
  unsigned long endDelay = micros() + startDelay;       // create the microseconds to delay for
  while(micros() < endDelay);
}

void takePicture() {
  for (int i=0; i < 2; i++) {
    pulseON(2000);                                      // pulse for 2000 uS (Microseconds)
    pulseOFF(27850);                                    // turn pulse off for 27850 us
    pulseON(390);                                       // and so on
    pulseOFF(1580);
    pulseON(410);
    pulseOFF(3580);
    pulseON(400);
    pulseOFF(63200);
  }                                                     // loop the signal twice.
}

void loop() {
  takePicture();                                        // take the picture
  delay(5000);                                          // delay in milliseconds which allows us to do timelapse photography - 1 second = 1000 milliseconds
}
Ok, so one other thing when using your camera and thats a quick modification to the remote timer, if like mine your infrared camera remote port is set to be active for less than a minute then you’ll need to edit the settings accordingly – just check your owner manual. For me it’s in the menu screen, custom setting menu, then option 30: Remote on duration.
Read more: Arduino – IR remote/ intervalometer for Nikon D80 DSLR

