Summary of Arduino Esplora Kart
This article explains how to convert an Arduino Esplora into a custom game controller for SuperTuxKart. The Esplora acts as a USB keyboard, mapping its analog joystick and four switches to specific keystrokes. By using arrays in the code, the system detects button presses and releases to control game actions like throttling, braking, turning, and firing.
Parts used in the Arduino Esplora Kart:
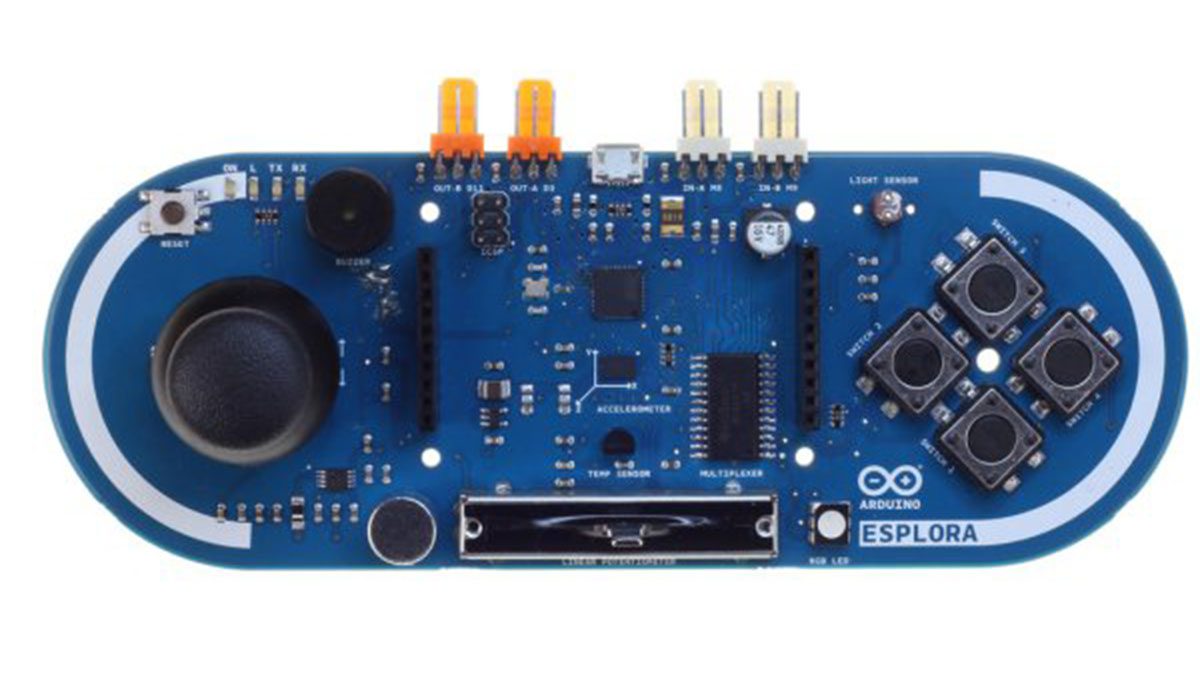
- Arduino Esplora
- USB cable
This example demonstrates how to turn your Esplora into a customized computer game pad.
It uses the analog joystick and the four switches as inputs to a video game. The Esplora will appear to the computer as a standard keyboard, the computer will see joystick movement and button presses as keystrokes.
The configuration choosen in this example is suitable for SuperTuxKart, an open-source racing game, available for Windows, OSX, and Linux. It can be downloaded from http://supertuxkart.sourceforge.net/ .
Circuit
Only your Arduino Esplora is needed for this example. Connect the Esplora to your computer with a USB cable.
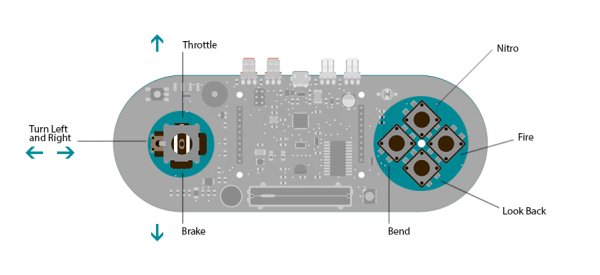
Esplora as SuperTuxKart game controller
Code
The default keys to play with the SuperTuxKart game are:
| command | key |
| Throttle | KEY_UP_ARROW |
| Brake | KEY_DOWN_ARROW |
| Turn right | KEY_RIGHT_ARROW |
| Turn Left | KEY_LEFT_ARROW |
| Fire | SPACE_BAR |
| Bend | V |
| Nitro | N |
| Look back | B |
You need to map these keyboard keystrokes to the available inputs on your Esplora board. To handle the eight different buttons, you’ll use arrays, ordered lists of variables with a fixed size. Each array has an index (counting from 0) to keep track of the position you’re reading in the array, and each position can contain a number.
This code uses three different arrays: one for the buttons you’ll read, a second to hold the current state of the buttons, and a third to hold the keystrokes associated with each button.
The Esplora has the ability to appear to a connected computer as a USB keyboard, so when you press the buttons and move the joystick, it’s just like pressing keys on your keyboard.
The for() loop checks the state of all the buttons and the joystick. If the button’s state has changed, then the corresponding keypress or release is sent to the computer. See the keyboard library reference for more information on using the Esplora as a keyboard or mouse.
Esplora KartThis sketch turns the Esplora into a PC game pad.It uses the both the analog joystick and the four switches.
By moving the joystick in a direction or by pressing a switch,
the PC will “see” that a key is pressed. If the PC is running
a game that has keyboard input, the Esplora can control it.
The default configuration is suitable for SuperTuxKart, an
open-source racing game. It can be downloaded from
http://supertuxkart.sourceforge.net/ .
Created on 22 november 2012
By Enrico Gueli <[email protected]>
*/
#include <Esplora.h>
/*
You’re going to handle eight different buttons. You’ll use arrays,
which are ordered lists of variables with a fixed size. Each array
has an index (counting from 0) to keep track of the position
you’re reading in the array, and each position can contain a number.
This code uses three different arrays: one for the buttons you’ll read;
a second to hold the current states of those buttons; and a third to hold
the keystrokes associated with each button.
*/
/*
This array holds the last sensed state of each of the buttons
you’re reading.
Later in the code, you’ll read the button states, and compare them
to the previous states that are stored in this array. If the two
states are different, it means that the button was either
pressed or released.
*/
boolean buttonStates[8];
/*
This array holds the names of the buttons being read.
Later in the sketch, you’ll use these names with
the method Esplora.readButton(x), where x
is one of these buttons.
*/
const byte buttons[] = {
JOYSTICK_DOWN,
JOYSTICK_LEFT,
JOYSTICK_UP,
JOYSTICK_RIGHT,
SWITCH_RIGHT, // fire
SWITCH_LEFT, // bend
SWITCH_UP, // nitro
SWITCH_DOWN, // look back
};
/*
This array tells what keystroke to send to the PC when a
button is pressed.
If you look at this array and the above one, you can see that
the “cursor down” keystroke is sent when the joystick is moved
down, the “cursor up” keystroke when the joystick is moved up
and so on.
*/
const char keystrokes[] = {
KEY_DOWN_ARROW,
KEY_LEFT_ARROW,
KEY_UP_ARROW,
KEY_RIGHT_ARROW,
‘ ‘,
‘V’,
‘N’,
‘B’
};
/*
This is code is run only at startup, to initialize the
virtual USB keyboard.
*/
void setup() {
Keyboard.begin();
}
/*
After setup() is finished, this code is run continuously.
Here we continuously check if something happened with the
buttons.
*/
void loop() {
// Iterate through all the buttons:
for (byte thisButton = 0; thisButton < 8; thisButton++) {
boolean lastState = buttonStates[thisButton];
boolean newState = Esplora.readButton(buttons[thisButton]);
if (lastState != newState) { // Something changed!
/*
The Keyboard library allows you to “press” and “release” the
keys as two distinct actions. These actions can be
linked to the buttons we’re handling.
*/
if (newState == PRESSED) {
Keyboard.press(keystrokes[thisButton]);
} else if (newState == RELEASED) {
Keyboard.release(keystrokes[thisButton]);
}
}
// Store the new button state, so you can sense a difference later:
buttonStates[thisButton] = newState;
}
/*
Wait a little bit (50ms) between a check and another.
When a mechanical switch is pressed or released, the
contacts may bounce very rapidly. If the check is done too
fast, these bounces may be confused as multiple presses and
may lead to unexpected behaviour.
*/
delay(50);
}
Hardware Required
- Arduino Esplora
Source : Arduino Esplora Kart
- How does the Esplora function with a computer?
The Esplora appears to the computer as a standard keyboard where joystick movement and button presses are seen as keystrokes. - What game is this configuration suitable for?
The configuration is suitable for SuperTuxKart, an open-source racing game available for Windows, OSX, and Linux. - Which hardware components are required for this project?
Only the Arduino Esplora is needed, connected to the computer via a USB cable. - How many buttons are handled by the code?
The code handles eight different buttons using three separate arrays. - What role do the arrays play in the sketch?
One array holds the buttons being read, a second holds their current states, and a third holds the associated keystrokes. - How does the loop detect button changes?
The for loop checks all buttons; if the new state differs from the last stored state, it sends a press or release command. - Why is there a 50ms delay in the loop?
The delay prevents mechanical switch bounces from being confused as multiple presses which could cause unexpected behavior. - Can I use this setup on Linux systems?
Yes, SuperTuxKart is available for Linux, allowing the Esplora to control it on that platform.