The “universal gripper” developed by researchers from Cornell University, the University of Chicago, and iRobot inspired me to create my own version. The YouTube video is quite impressive. The gripper can form around very asymmetrical and smooth shapes and still pick up the object.
I gathered the materials below and decided to create a gripper of my own that could be incorporated into one of my robot designs. Adding a vacuum pump or a powerful air mover seemed difficult and probably unnecessary. So I started to think about vacuums.
I remembered that when they were filming “An American Werewolf in London” that Rick Baker used hypodermic syringes hooked up in a line. When a really big syringe was compressed at the end of the line, the little ones popped up creating the appearance of a spinal column erupting below the skin of the creature’s back.
I decided that the same idea might work with the “universal gripper.”
In addition, I thought that using a funnel could work nicely for balloon support. Playing around with it, I thought that adding a pressure sensor inside of the funnel would allow the Arduino to apply suction when the balloon came into contact with the object to pick up. This lead me to Plusea and her instructables using velostat and flexible materials.
Amazingly, it all seem to work. Follow these steps to see how I did it. You can probably see alterations that would improve the design
Step 1: Materials
- Good quality latex balloon
- Aquarium plastic tubing
- 60 ml veterinarian syringe
- 11/64” brass tubing
- zip ties
- Bond 527 cement
- Conductive thread
- Needle
- Craft foam
- some #6 bolts and nuts
- 5 cm of U channel aluminum
- TowerPro servo MG995
- flat stock aluminum
- an Arduino or other microprocessor
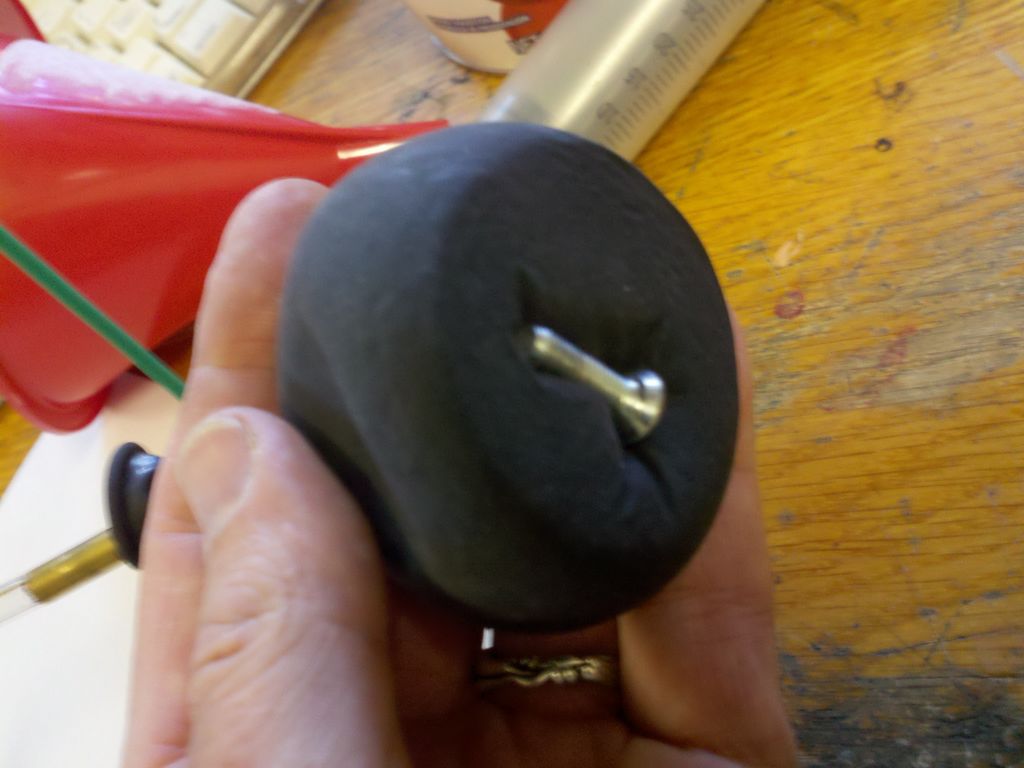
Step 2: Prepare the Balloon
I filled the balloon with coffee. I chose the cheapest and coarsest coffee in the store. I think that a coarser grind would provide more jagged edges for the coffee granules to lock onto each other when the vacuum is applied. I didn’t test it, so it remains s theory.
I decided to only fill the balloon about ¾ full of coffee. When the vacuum is removed the coffee needs some room to become a flowing powder again.
Next I used a craft pipe cutter to cut off about 5 centimeters of the brass pipe. You can get pipe cutters from hardware and craft stores. You could also use a Dremel tool or even a hacksaw.
The aquarium tubing was pushed onto the brass tubing, and then the tubing was inserted into the balloon neck and locked on with zip ties.
Step 3: Test One
However, I found that the coffee grounds also came up through the tube. This did not taste very good!
Step 4: Test Two
Watch the video to see how this rig successfully picked up a variety of objects. I found that you did need to put a fair amount of pressure on the balloon so that it would form around the object and not just sit on top of it.
Step 5: Test Three
I added a funnel to give the balloon and tubing some structure. I took the small funnel I had and used a hacksaw to cut it off shorter. That way the balloon could hang freely, but have support when it was pressed against the object to be picked up.
I decided to put a fabric pressure sensor in the funnel. That way the Arduino controlling the servo could sense when enough pressure was applied to the balloon. Plusea has a great Instructable describing how to create pressure and bend sensors. These sensors can be very sensitive and also very accurate in reading pressure or bending.
I created mine out of craft foam from a local craft store. It is flexible, but has enough structure that it doesn’t collapse. You need some material that can be compressed, but won’t stay that way after the pressure is removed.
Instead of sewing the edges together, I used Bond 527 multi-purpose cement. It is flexible and also adheres well to the foam. The conductive thread was sewn in in a criss-cross pattern as Plusea describes. The Velostat middle layer was cut smaller than the outer pieces so that the glue did not adhere to it and cause compression. Velostat is available from The EMF Safety Site.
Conductive thread was left sticking out about an inch on both sides to allow connection to a wire running to the Arduino.
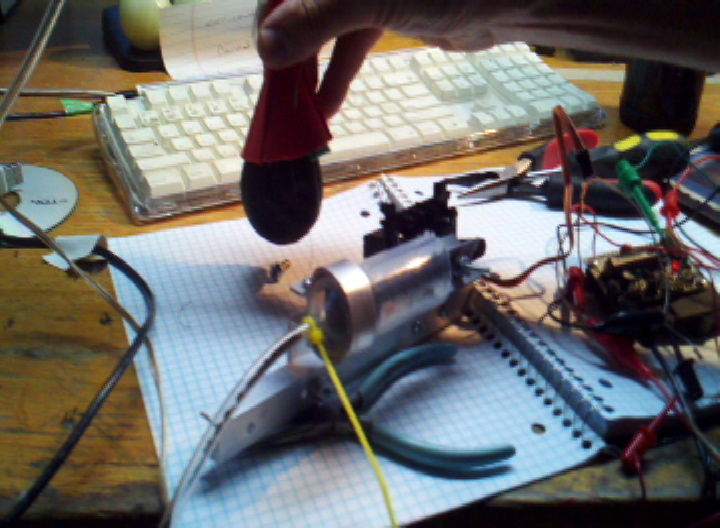
Step 6: Put it all together
Build the Syringe Mechanism:
I tested the syringe and found that I only needed to pull the plunger back to 30ml in order to get a good vacuum. So I used a hacksaw to cut off the barrel of the syringe.
I also cut the plunger off about 3cm longer than the barrel.
I drilled a hold in the servo arm and also through the plunger. A #6 bolt with washers and nuts holds the plunger pretty stable as the servo pulls it back and pushes it forward.
I had some aluminum U channel and cut a piece about 20 cm long. I don’t know the technical name, but I had a plastic piece used to mount servos that I got in a box of servos from eBay. I attached the servo to the plastic mount and then bolted the mount to the U channel aluminum.
For more detail: Universal Gripper – Syringe Powered