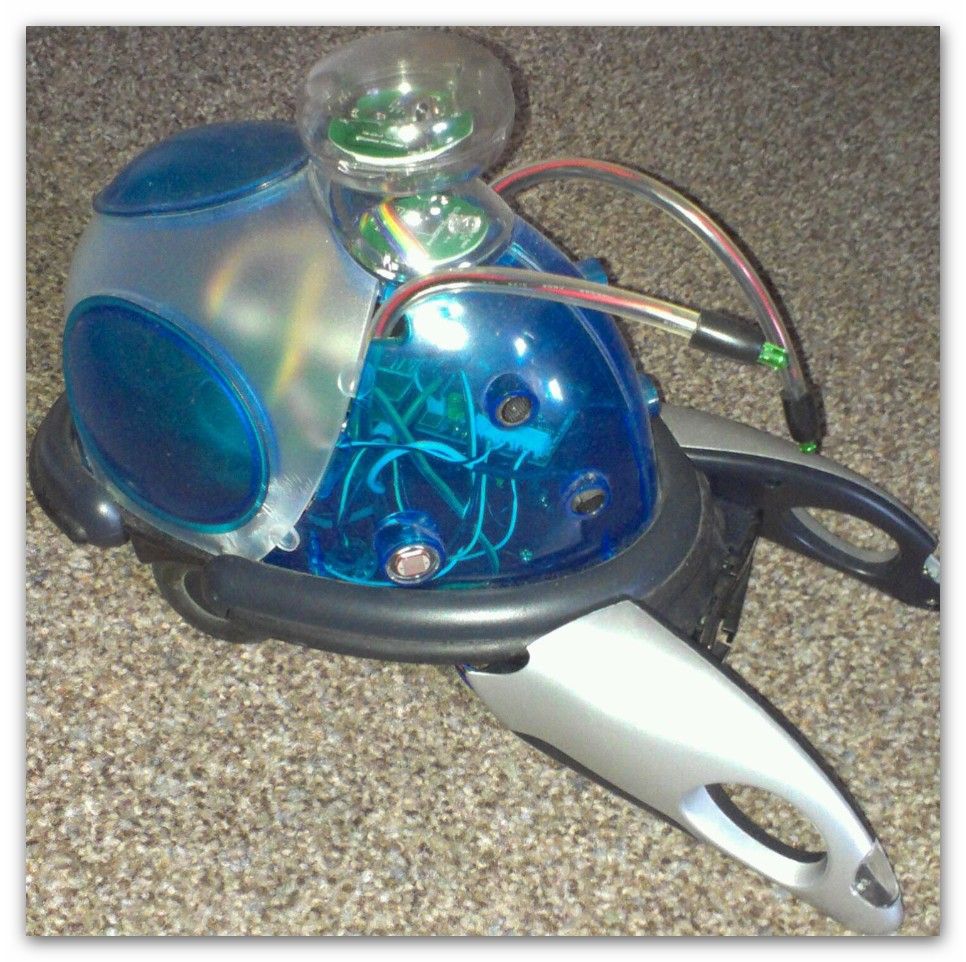
I’ve had a couple of Cybots as well as the Tom robots for a number of years – every so often they get dragged out and tinkered with. Now is this years turn. I have decided to try my hand at Arduino control of the Bots motors.
There seems to be a large number of You tube Videos that say “yes we did it”, but not many on how to get there, so I’m going to start from what I think should be the beginning. Assumptions these can be the mother of all mess ups, but I’m going to make one now that is that if you want to copy this guide you already have an Arduino and the IDE pack from the Arduino site and that you have had a play and know how to install a sketch onto the Arduino board. My eventual aim is to move onto something like the Android application development and control the Bot by bluetooth and possibly WiFi – again lots of Videos but not much else, but for now that will wait as the parts have not yet arrived.
this instructable will tell you how to get to this:
And as soon as my parts come I will create an additional one for Bluetooth and hopefully WiFi Control
I have also created an instructable covering the bar code interface at
http://www.instructables.com/id/Direction-display-…
Please read on
Step 1: Arduino Preparation
Once you have your Arduino set up to communicate with your computer you should have the Arduino icon on your desk top which once opened will display a screen similar to the second image.
For the board to work with Scratch for Arduino (S4A) you need to install the Scratch firmware sketch using the Arduino SDE (see the firmware file) this is the same file available from S4A and is totally free. Once installed that’s it for the Arduino software you now have to obtain the S4A application (again free to download from the following location. Scratch for Arduino (S4A) available from http://s4a.cat/ Go to the web page link above and scroll down to the “download and install” section and grab yourself the version that’s right for your operating system (I’m using windows). Once installed you have an additional icon which when opened will look something like the last image on this step. note that the application will start looking for your Arduino and the message will only disappear when it has found it so please connect up. Once connected the Arduino Port monitor will start cycling a series of numbers – this is just the information being monitored from the board by the application
Step 2: Connecting Cybot and Arduino
Personally I read from left to right, but the people that manufactured the Cybot motor board went the other way (this was my first mistake when working out the motor directions) once I realised I was fine and all numbering on this instructable for the Cybot board goes right to left now.
So there are 7 connections (the black block to the top of the first picture)
| Pin | Description of function |
| 1 | Right Motor – Forward |
| 2 | Right Motor – Reverse |
| 3 | Left Motor – Forward |
| 4 | Left Motor – Reverse |
| 5 | + 5 volt Output |
| 6 | + 6 volt Output |
| 7 | Zero Volts |
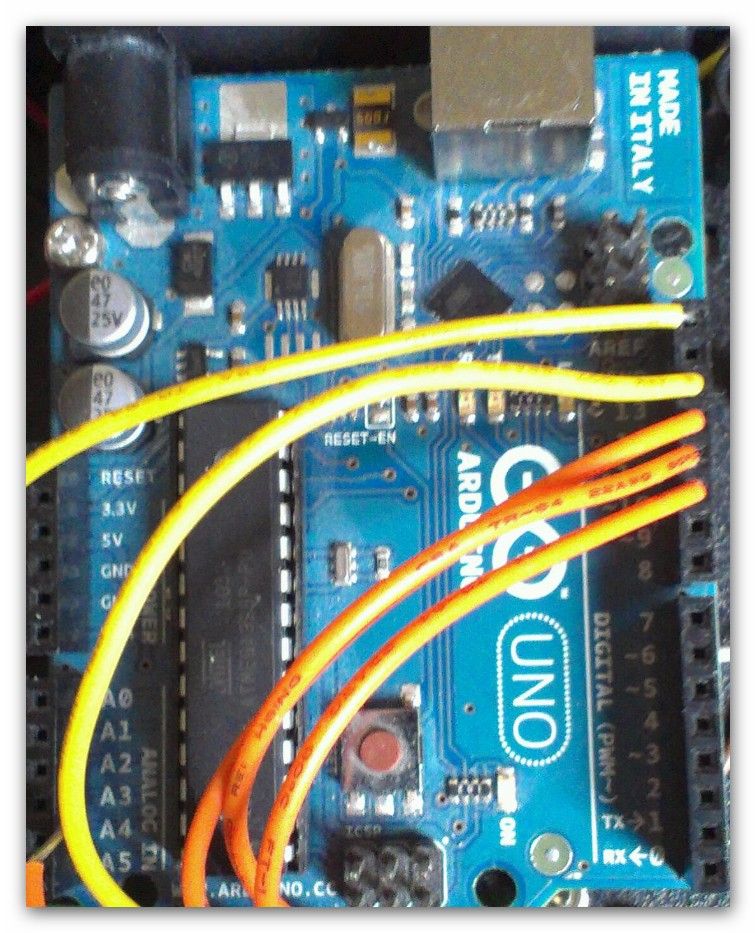
S4A has a number of predefined digital lines for the Arduino board, which are header connections 10,11,12 and 13 – connect one to each of the Cybot pins the last pin connected is the ARef pin of the Arduino to +6 volt pin of the motor board.
so the pin connections that I used are as follows
| Cybot Pin | Arduino Pin | |
| 1 – RM Forward | To | ~10 |
| 2 – RM Reverse | To | ~11 |
| 3 – LM Forward | To | ~12 |
| 4 – LM Reverse | To | ~13 |
| 6 – + 6 volt Output | To | ARef |
Step 3: Scratch Programming Basic movement
I have created a specific Instructable that covers the design and function of the navigation interface used in the SCRATCH application. You can find it at:
http://www.instructables.com/id/Direction-display-for-Arduino-Robot/
The first thing to get sorted as far as the programming is concerned is to get the motors moving forward and backwards – as each motor is controlled indigently there needs to be a command for both of them for each movement. for example for forward the Arduino needs to have digitial pins 10 and 12 set to on.
Note its important to have all other pins set to off. The best way to do this is to set all pins to off and then turn the pins on required for a specific direction. If you look at the image for the S4A code you will see that I have included a block for each direction using the arrow keys on the keyboard and an extra block using the space bar to stop all activity.
I have included a link to the Scratch Code as well (for this program there are no additional variables required)
Turning left or right
There are two possibilities for turning in either direction. The first is to have one motor on and one off so with the left on and the right motor off the cybot will turn right and vice verse – however if you have laminate floors this will mark them, it will also be a slow turn.
A faster way is to alternate the motors meaning that both contribute to the turn.
Key board control:
Note when you download the Scratch files you may get an error this will be because you computer is trying to open it – you need to save the file (say to your desk top) then open Scratch 4 Adruino and then open the downloaded file