For less than $50 of easy to find parts and a little ingenuity, we can let our best friend out as we approach home so he can meet us at the door. If for some reason we can’t be home on time, we can open the door from anywhere. We could even program a timer to automatically let him out in case we didn’t have service.
We’ve also created prototypes that can open the kennel door or activate other items as we approach or leave home, work, or any other location. You can find out more on the Internet Your Thing Kickstarter project.

Download a fully working server here, just unpack it and run.
Get the full source here. A complete list of all technology used is published at the end of this howto.
Step 1: Prepare
Materials
- Kennel
- aluminum or steel flat stock: (local hardware store) 1/16 inch thick, 1 inch wide, 2 feet long
- bolts and nuts: eight 10-24 x 1/2 inch long or similar
- board or rod: approximately two feet long
- pulley, small
- string: approximately two feet
- weight: a small water bottle works well
- hobby servo like B1221
- small stiff wire: three inches
- arduinio or derivative microcontroller and small stand-offs for mounting
- wire: approximately 4 feet (old telephone or Ethernet cable works great)
- electrical tape
- Twist ties from toy packaging
Tools
- screwdriver
- drill
- hacksaw
- pliers
- hammer
- large wrench or vice to bend metal for servo bracket
- knife or wire strippers
Optional
- Bluetooth or WiFi controller
- jumpers
- soldering iron
Step 2: Controller
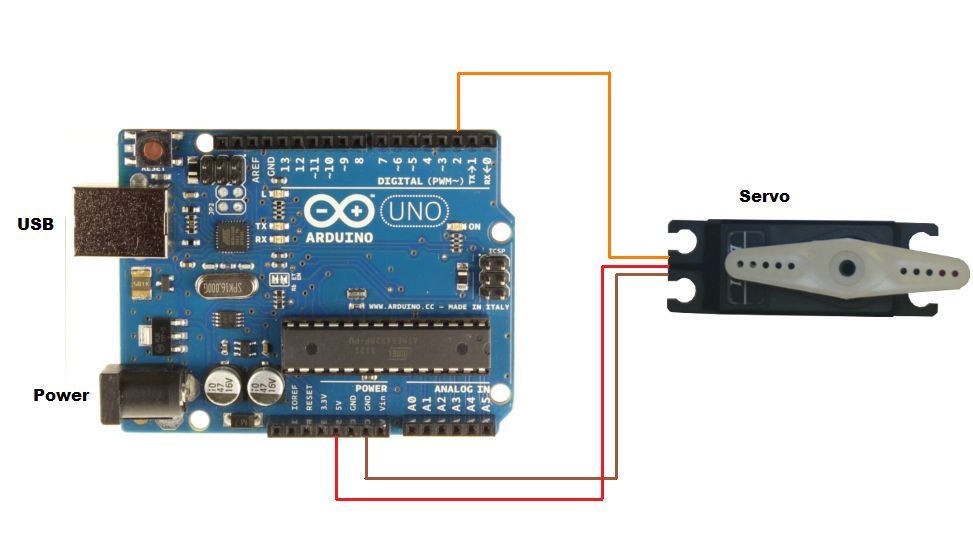
Servos generally require a little more power than the USB can provide, so we recommend an alternate power source. We just used an old 9 or 12 volt power adapter from something that broke long ago.
Step 3: Configure Arduino
- Download the free Aruduino IDE from the Arduino site
- Plug the USB cable into the Arduino and the PC
- Click Tools : Board and select you Arduino model – most likely an Uno if you bought it recently
- Click Tools : Serial Port and select the port for your Arduino, probably the only one available
- Copy the simple Arduino sketch below and paste it into the text area
- Click the on the toolbar square with the arrow that points to the right (it’s white in the picture), this is upload
- If it succeeds, you have successfully programmed the Arduino and can close the Arduino IDE
//Start of sketch
#include <Servo.h>
Servo servo;
//pin we connected the servo to
int servoPin = 2;
//Open and closed servo positions in degrees
int closedPosition = 130;
int openPosition = 30;
void setup()
{
servo.attach(servoPin);
Serial.begin(57600);
}
//does the following loop forever
void loop() {
//if something was sent to the arduino, process it
if (Serial.available() > 0) {
processInput();
}
}
void processInput() {
int input = Serial.read();
if (input == ‘o’) {
servo.write(openPosition);
} else if (input == ‘c’) {
servo.write(closedPosition);
} else {
Serial.println(“Send ‘o’ to open, ‘c’ to close”);
}
}
//End of sketch