You can read about the Tzolkin Mayan calendar on Wikipedia http://en.wikipedia.org/wiki/Tzolk%27in. It is one of several calendars, and consists of 13 numbers and 20 day signs which appear in 260 combinations that rotate. In other words, with every change of the day the numer increases from 1 to 13 and then back to 1 again. Similarly the 20 day signs rotate.
What I needed was a frame and face with the numbers and day signs on it, which I modeled on the Sleek World Clock, and relied on scottbez1’s great instructions on printing the face and making the actual calendar. The electronics are Arduino and I put the code together from bits and pieces to take the date from an RTC, calculate the Julian Date and then work out where in the two Tzolkin rotation that day falls. LED’s are controlled via a shift register.
This is my first ever Arduino project – a testament to the great ease of use of this amazing technology!

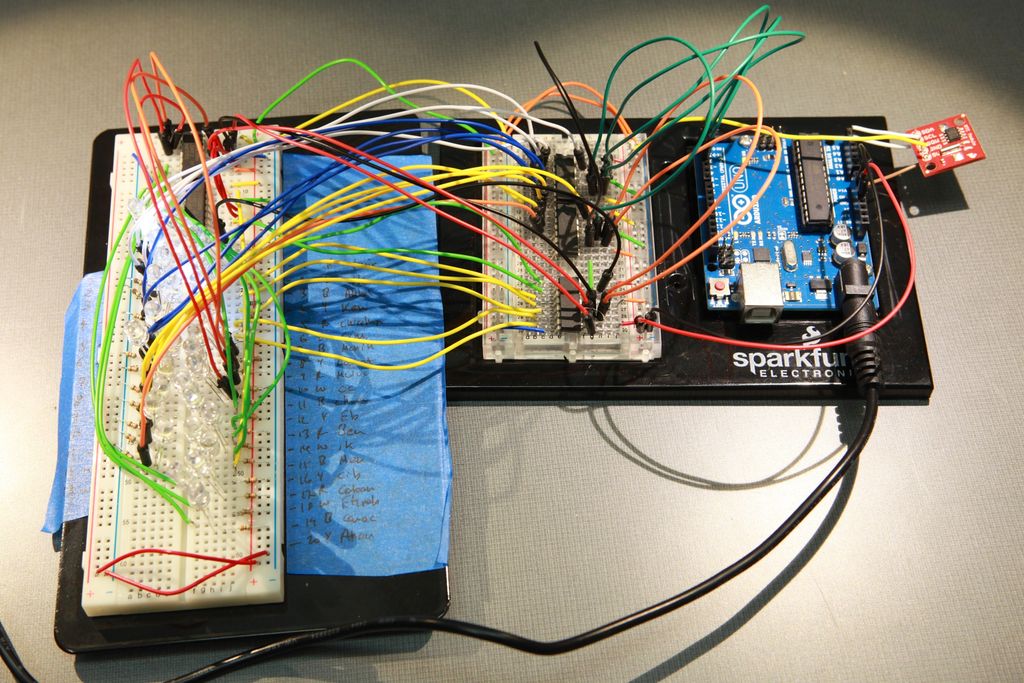
Step 1: Assembling the Electronics on the breadboard for testing
18 white, 5 red, 5 blue, 5 yellow LEDs (www.sparkfun.com SuperBright $0.50 each when bought in packs of 100) – $17
33 Resistors 330 Ohm 1/6th Watt – $2
1 Arduino Uno – R3 board www.sparkfun.com – $30
1 Real Time Clock Module DS1307 BOB-00099 www.sparkfun.com – $15
5 Shift Register 8-Bit – 74HC595 www.sparkfun.com – $7
1 Wall Adapter Power Supply – 9VDC 650mA www.sparkfun.com – $6
2 printed transparencies (see attached pdf on Step 2) – $1
Total cost: $88
Also: prototyping breadboards, prototyping leads, wire etc
Cardboard and other household items
Total cost: around $44 (using standalone ATMega168) or $67 (if you buy a full Arduino)
Step 2: Wiring it up
Then I put this part together, learning how to solder (not well, yet). The close up shows the different color coded wires. Brown and yellow wires going left are to the LED. Black is ground. Red is 5v. White and gray are latch and clock for the shift registers. Yellow exiting on the top and connecting shift registers on their right is data pin 2.
Step 3: LED mounting
Not shown, on the other side I made a series of walls around the LED to contain their light, made from cardboard and painted black.
This part closely followed the Sleek Word Clock by scottbez1 which you can see here: http://www.instructables.com/id/Sleek-word-clock/?ALLSTEPS.
Step 4: The calendar mask
Step 5: Arduino code
Finally, the code which uses an RTC chip to set the time on the board, then calculates the Julian date and from that works out where in the two Tzolkin rotations the day falls. It then writes the appropriate bit sequence to the shift registers. This is my first Arduino program, and I relied heavily on the referenced sources and the Arduino cookbook to put it together.
Read more: Making a Mayan Tzolkin Calendar