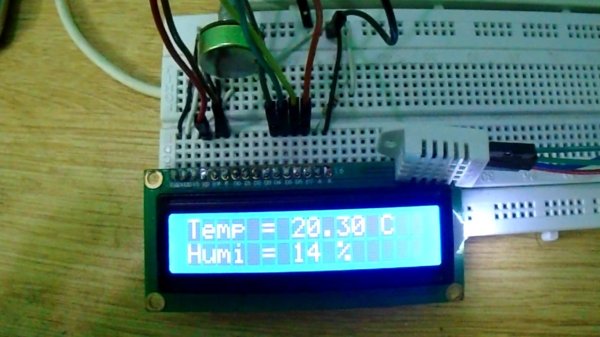
Today we are going to make an IoT WiFi data logger using Arduino, ESP8266 WiFi module and DHT22 temperature humidity sensor. Arduino is reading temperature and humidity sensed by DHT22 and sending it to an internet server using the ESP8266 WiFi module. Here we are using ThingSpeak as the internet server. ThingSpeak is an open source IoT application which can be used as an Internet or Intranet Server. It is providing HTTP API for data logging, location tracking, status updates etc.
Components Required
- DHT22 (Temperature and Humidity Sensor)
- ESP8266 WiFi Module
- Arduino Uno
- 16×2 LCD Display
- Breadboard
- 10KΩ potentiometer
- 1KΩ resistors
- 220Ω resistors
Circuit Diagram and Explanation
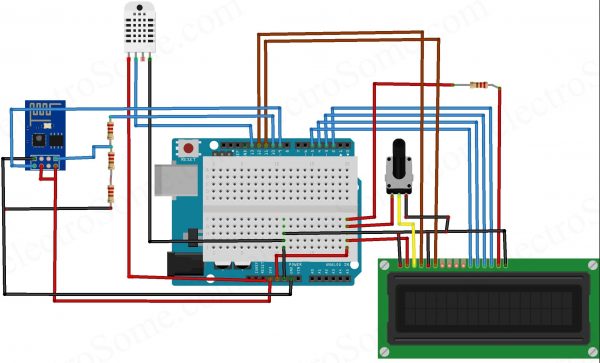
First of all, we are going to connect ESP8266 module with the Arduino. ESP8266 runs on 3.3V, so we should power it from the 3.3V output of Arduino. Connect VCC and CH_PD of ESP8266 module to the 3.3V output of Arduino and the ground of ESP8266 to the ground of Arduino. The RX pin of the ESP8266 is not 5V tolerant, so we need to reduce the 5V TX output of Arduino to 3.3V using voltage dividing resistors. Here we are using three 1KΩ resistors connected in series for that. So we will connect pin 10 (TX) of Arduino to RX of ESP8266 module via voltage dividing resistors. We can directly connect TX pin of ESP8266 to 9th (RX) of Arduino as it will detect 3.3V as logic HIGH according to TTL voltage specifications.
Then connect the DHT22 sensor to the Arduino. The first pin of the DHT22 sensor VCC power input, connect it to the 5V output pin of the Arduino. The second pin of the DHT22 is the data output pin, connect it to the pin 13 of the Arduino. The third pin is No Connection (NC) so we can leave it. Connect last pin to ground.
Now we can connect 16X2 LCD to the Arduino. The connections of LCD to Arduino are as follows.
- First pin of the LCD is the power supply ground, VSS. Connect it to the ground.
- Second pin of the LCD is the power input, VDD. Connect it to the 5V output of the Arduino.
- The third pin is VEE, which is used to adjust the contrast of the LCD display. Connect it to the variable pin of 10KΩ potentiometer. Connect the other two pins of the potentiometer to the 5V and ground. Now we can change the contrast by varying the potentiometer.
- 4th pin of LCD is RS (Register Select), connect it to pin 12 of the Arduino.
- 5th pin of LCD is R/W (Read/Write), connect it to ground as we are only going to write data to the LCD.
- 6th pin of LCD is E (Enable), connect it to pin 11 of the Arduino. This input is used to indicate a valid data or command in the following data pins.
- 7 ~ 8 pins are not using as we are using 4 bit communication mode. These pins are used only in 8 bit mode which is not commonly used as it will consume 4 more digital pins of Arduino.
- 11th pin is D4 (Data), connect it to pin 5 of Arduino.
- 12th pin is D5 (Data), connect it to pin 4 of Arduino.
- 13th pin is D6 (Data), connect it to pin 3 of Arduino.
- 14th pin is D7 (Data), connect it to pin 2 of Arduino.
- 15th pin is Anode of backlight LED, connect it to 5V through a 220Ω resistor for current limiting.
- 16th pin is Cathode of backlight LED, connect it to Ground.
ThingSpeak
ThingSpeak is an open source IoT application with HTTP API which can store and retrieve data from ‘things’ via Internet or Intranet. By using this we can easily create a network of things which can be used for applications like logging, tracking, analytics etc.
First of all,open the ThingSpeak Website and create your account.
Papertrail Data Logging Service:
Once we have data at higher level, with use of HTTP APIs we can use high-end services to manage the logs. As you grow, so will your logging needs. On-site logging is hard to scale, often requiring new infrastructure and processes. Logging as a service means not having to install and maintain your own collectors, endpoints, and management tools. The Papertrail™ solution provides everything you need to start managing your logs typically in just a few minutes. Simply forward your logs to Papertrail and watch as Papertrail parses, analyzes, and stores each event in real-time.
for more details visit: LaaS – Papertrailapp’s Data Logging as a Service
Continue with rest of the article at: IoT Data Logger using Arduino and ESP8266