The Internet has become a pretty good mask to portray yourself as anything you want. This includes hiding your true emotions when posting facebook statuses, IMing someone, or sending emails (like telling you’re boss they are awesome when they are really a jerk). But what about talking to someone in real life? How do you hide yourself then? That’s where the Emoticon Helmet comes in. The person that you’re talking to will never know how disgusted your face looks when you see their dress if you always show a happy face! Or how you’re happy that you mean ol uncle died and you’re smiling the entire time, but everyone else sees a frown.
This project was one that I’ve always wanted to do, but I never found the time to. But when the time rolled around for our final project in my Engineering 101 class, I suddenly found an excuse to make this ridiculous contraption. I first got the idea for this a while ago from the Mask of Emotion, but I couldn’t actually find where to buy it. So why not do the next best thing and make one myself? It was a team project, so I did half of the work while my teammate did the other half. That’s also why some of these pictures aren’t the best quality, because he tried sending me the pictures, but there was a miscommunication, so I just pulled them off of a video he made over it.
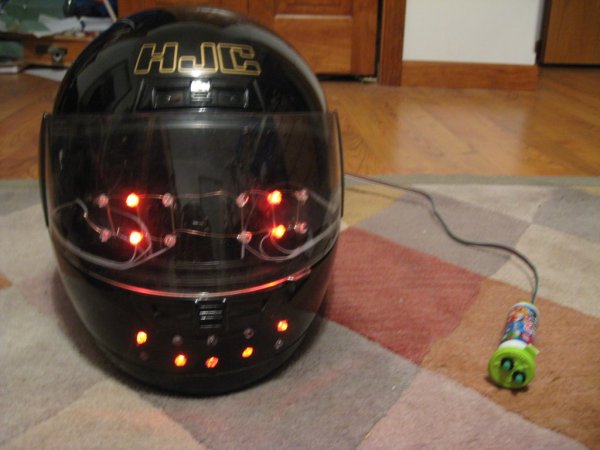
The helmet has 12 faces total: happy, sad, neutral, mad, surprised, tired, confused, disgruntled, disgusted, elated, worried, and creepy. It is done with a set of 22 LEDs, 6 for each eye and 10 for the mouth. It is set up as a multiplex matrix and hooked up to an Arduino in the back of the helmet, which is powered by four AA batteries. The user can switch between the faces with 2 buttons on a controller in the user’s hand.
Step 2: Drill them holes
The LEDs need a place to call home. The 7/32 inch drill bit should do well for the visor, as the LEDs aren’t going to be fully put in. The mouth LEDs need the full LED inside of the hole, and therefore require a bigger drill bit. I can’t remember completely, but I think we used the 3/8 inch for the mouth holes.
Try on the helmet and draw out places for the LEDs. For me, the top center LEDs on the visor were on my eyes and the middle row on the mouth was on the crest of my lips. Marked? Good, now the drilling can commence!
The LEDs can be secured into place with hot glue. I didn’t try it, but putting the glue on top of the LED could diffuse the light so that you can see the light better from different angles. Just make sure that you don’t put too little glue on them or you’ll regret later on (like we did).
Also, the “legs” of the LEDs weren’t long enough to fit all the way through the holes in the faceguard of the helmet, so we had to solder small wire extensions onto each leg. After we put the LEDs into the faceguard, we stuck small scraps of foam in the holes so that they wouldn’t touch and short-circuit.
Next, we need a place to put the Arduino. We drilled four holes in the back of the helmet in a square pattern and used the jigsaw to connect the dots. At first the hole was too small, so we used a box cutter to remove some of the styrofoam to give the Arduino a snug fit. Then we cut a hole in the fabric on the back of the helmet so that we could run the wires from the front to the Arduino.
Materials
What’s a project without supplies? Things I used:
– a motorcycle helmet (can be any helmet as long as it has a visor)
– an Arduino Uno
– 22 red LEDs
– plenty of wire and ribbon wire
– 10 resistors
– 4-6 transistors (depends on how you set up the multiplex)
– experimental board
– 2 buttons
– button housing (an old mini M&Ms bottle)
Tools:
– Hand drill
– 7/32 inch drill bit
– 3/8 inch drill bit (?) (can’t remember if that was correct)
– Jigsaw
– Soldering iron
– Hot glue gun
– Duct tape
For more detail: Emoticon Helmet using Arduino