
Summary of Wu-Tang Can: Interactive Tipping
This article details the creation of an interactive "Wu-Tang Can," a tipping jar that plays audio when cash is deposited. The project utilizes an Arduino and Wave Shield to trigger sound files stored on an SD card, amplified by a custom circuit. A photoresistor detects when light is blocked by coins, initiating playback.
Parts used in the Wu-Tang Can:
- Can (repurposed from beans)
- Arduino
- Wave Shield (Adafruit)
- SD Card
- Audio Amplifier
- Ultra Bright LED
- Photoresistor
- 1K resistor
- 300 ohm resistor
- Spray Paint (matte black)
- 2" speaker (Jameco)
- Scrap upholstery fabric
- M3-10 Bolts with Nuts
- Laser Cut Lid
Cash rules everything around me.
C.R.E.A.M.
Get the money.
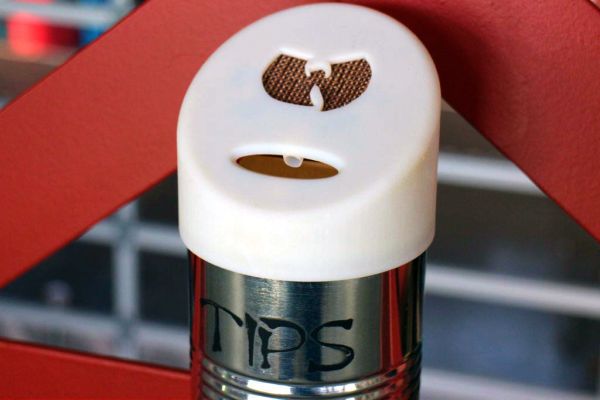
Arduinos are showing up everywhere. Even in space. But what about the lowly tip jar?
No.
Are Arduino projects giving the Wu-Tang Clan the proper respect they deserve?
Not even close!
Rectification.
That’s what this is about.
Interactive tipping.
Dolla dolla bill y’all.
Step 1: Materials
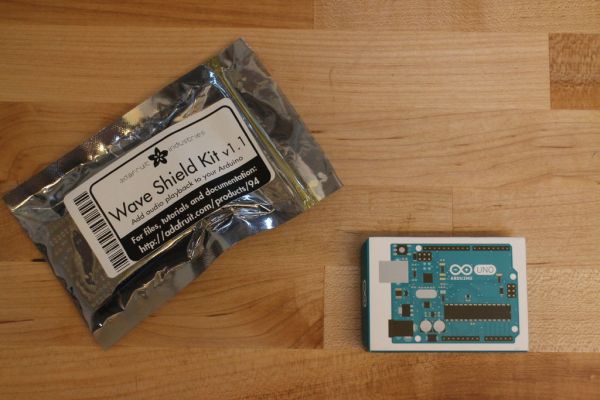
Here’s what you need.
Materials:
Can – My can used to hold beans. I ate those beans and kept the can.
Arduino
Wave Shield – Adafruit
SD Card – For holding the sound files.
Audio Amplifier – The wave shield has a really low volume coming off of the shield. You need to amplify it.
Ultra Bright LED
Photoresistor
1K resistor
300 ohm resistor
Spray Paint – I used a matte black
2″ speaker – Jameco
Scrap upholstery fabric for the speaker cover
M3-10 Bolts with Nuts
Tools used:
Soldering Iron
3D Printer
Laser Cutter
Hot glue gun
Step 2: Print the Wu-Tang Can Lid
Print it. On a 3D printer. I printed it one an Objet Connex 500… because I could. I modeled it on Autodesk Fusion 360… because I should (and would).
I ran lip test before printing out the full lid. I wanted to make sure that it would snap onto the lip of the can and stay on. First test print was a dismal failure (too small). Second print was successful. Huzzah!
The lid contains mounting for the LED and the photoresistor and snaps for the speaker. When I was putting attaching the speaker, one of the snaps broke off. Oh well. That’s what hot glue is for.
Step 3: Assemble the Wave Shield
TL;DR Adafruit has all the documentation to do this.
I use the Wave Shield a lot. It is a fickle shield. I’ve spent so much time troubleshooting it that I’ve come across and overcome a lot of the limitations. I think it’s because of this that I keep using it. Adafruit has told me that they are redesigning it. I’m looking forward to this.
Here’s an earlier write up (step 2) on getting the Wave Shield soldered and tested.
Step 4: Amplify It/Solder It
The audio off the Wave Shield is enough for headphones but not nearly enough for the Wu-Tang Can. You could buy an small amplifier but I decided to make my own because I don’t like to wait for shipments to arrive. It isn’t conducive to my building method (as fast as possible to get it 95% finished and a few weeks of procrastination to finish the last 5%).
I used the standard (and simple) LM386 amplifier circuit. It has a gain of 20 which will be more than enough. If you max out the volume on the Wave Shield and the amplifier circuit, the audio will get very distorted. Clippin’ ain’t easy.
I also put in a toggle switch to turn it on (or off!).
The circuit below is for the LED and photoresistor coupling. When cash is deposited, it blocks the LED triggers the code to play the audio.
For more detail: Wu-Tang Can: Interactive Tipping
-
How does the can detect when cash is deposited?
Cash deposits block an Ultra Bright LED from triggering a photoresistor, which signals the code to play audio. -
What component amplifies the audio volume?
An LM386 amplifier circuit with a gain of 20 is used because the Wave Shield output is too low for the speaker. -
How are sound files stored and played?
Sound files are held on an SD Card connected to the Adafruit Wave Shield. -
What tool was used to create the lid?
A 3D printer was used to print the lid, which was modeled in Autodesk Fusion 360. -
Why was a toggle switch included in the circuit?
The toggle switch allows the user to turn the device on or off. -
What happens if the volume is maximized?
If both the Wave Shield and amplifier volume are maxed out, the audio will become very distorted. -
What material was used to cover the speaker?
Scrap upholstery fabric was used as the cover for the 2-inch speaker.
