The story of this clock goes back a long way – more than 30 years. My father pioneered this idea when I was just 10 years old, long before the LED revolution – back when LED’s where 1/1000 the brightness of their current blinding brilliance. A true innovator, he coded in assembly language and hand wired each individual LED (an impressive feat of patience and determination)! His original version still works to this day.
I wanted to pick it up where he left off and leverage the advances in technology to make a beautiful clock that was web-connected, colorful, fun to play with and full of interest. It’s advanced to the point where we would like to release the clock to the public as an open source project but also provide finished products to those interested in purchasing. See our indiegogo campaign if you find yourself interested in supporting!
The clock as it stands today has a host of features and is a fully finished and functioning product. We are very pleased with how it turned out both in terms of quality and functionality but also in terms of the feature set and stability. The clock syncs every minute with a timeserver ensuring that the time will always be perfect. Users need only set the timezone once, enable daylight savings mode and they will never need to worry about setting the clock again!
52 different animations with adjustable color, speed and brightness give the user precise control and infinite variation. Favorite modes are saved in memory. Light timers and daily events can be set which allow users to visually be notified at the selected time. Special holiday modes can add festivity to your house during Halloween, New Years or Christmas. We even have a special mode for pi day where the clock animates the digits of pi for 100 digits every hour.
The clock is powered by a web connected Node MCU ESP8266 and is programmed using the arduino language and popular c++libraries that come standard in the arduino platform. Want to make one? Here’s how:
Step 1: Assemble the Materials
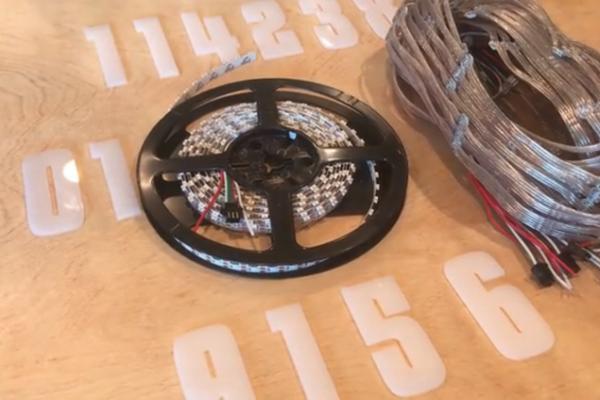
Here’s a complete list of everything you will need with prices and links.
- 18″ diameter 1″ thick circular wood blank – $10.40 – Lowes
- Light diffusing acrylic – $5.79 + $6.55 Shipping = $12.34 from Amazon
- (2) LED prewired strings of 50 – $11.67 x 2 = $23.34 from eBay
- LED side emitting – $26.62 from Adafruit
- ESP 8266 Node MCU – $8.39 from Amazon
- 2.5mm Pigtail – $ 6.99 (pack of 10) from Amazon
- 4cm x 6cm Prototyping Circuit Board – $9.99 (pack of 10 – you will need 1) from Amazon
- Terminal Blocks – $7.99 (pack of 20 – you will need 5)
- 1×8 piece of pine – $4.79 from Lowes
- 1/4 piece of hardwood flooring material (for the stand) Item number 422633 – $10.48 from Lowes
- (1) 5v, 5a power supply – $14.99 from Amazon
- 2.7mm utility backing material (Item 757295000023) – $10.98 from Home Depot
- (20) Black wood screws #6 – $6.83 – Amazon
- Stain and Clear Coat. General Finishes recommended! – approximately $20 from Woodcraft
- (2) Black 1/4-20 nuts (Item 755801) – $1.38 from Lowes
- (2) Black 1/4-20 pan head screws (Item 755806) – $1.49
Total Price of Listed Items here: $177.38
Tools needed:
- CNC machine
- Hot Glue Gun
- Soldering iron
- Dremel or hand file
- Wire strippers
Step 2: Familiarize Yourself With the Web Page
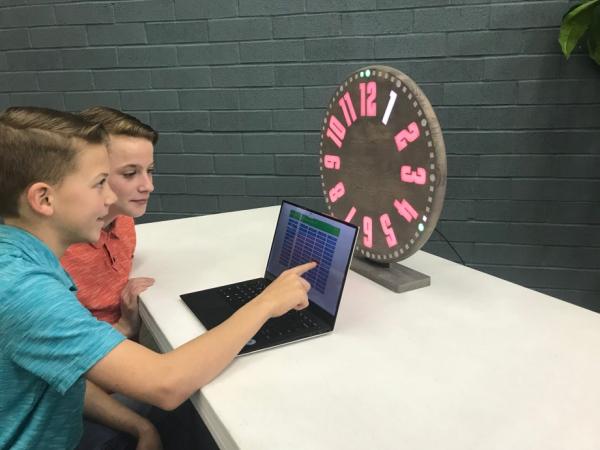
This part is what makes the clock both fun and cool. The web page is divided into four sections: General Settings, Color, Ring Animations and Number Animations.
- General settings – This section includes adjustments such as daylight savings, time zone, etc. Also present on this page is an option to save and recall three different clock configurations. This allows the user to save favorite scenes. All settings are saved in eeprom (non volatile memory); additionally, current setting are always saved so that in the event of a power failure the clock will recover where it left off.
- Color options – Every aspect of the clock is customizable. To change the color of any element simply click on the button corresponding to the element you want to change and then click the color wheel. Inside the color wheel is pure white. Outside the color wheel turns off the LED.
- Ring Animations – Ring animations are events that happen every minute (ie animations that advance the minute hand) or interesting activity like a pendulum. Choose from a variety of options here
- Number Animations – The number animations are light displays that are not linked to a time event. Rather they create moods or interest. There are 52 different options here and they can be made even more interesting by adjusting either the brightness or the speed using the slider bars.
The html and javascript for this page are included in the source code that’s hosted on github. We’ll get to that in a moment.
Step 3: Prepare the CNC Files
The construction work of the CNC machine is pressing go on your CNC machine. But as anyone knows, CNC work is 95% setup and 5% cutting! A few words on setup are important here.
First, getting a solid fixture is essential. I am choosing to hold down the wood blank with these cam clamps. They work amazing and are very strong! So that they do not damage the wood, I put some small pieces of rubber between the contact area and the wood (this will not reduce the clamping force). Beyond being incredibly strong, another major advantage of these clamps is the fact that the total height of the clamp is below the work surface so there is never any danger of collision. If you do not have these clamps available double-sided tape can work. Whatever your method, ensure strong hold-downs and proper grain alignment.
Important Note: You will have to flip the clock and CNC both side of the machine so make sure you index your piece of wood. Make sure you can flip it and be EXACTLY in the same place. This is essential for cutting a good clock!
Now for some notes on the CAD and CAM work.
The Cad File (ProductionClockMaster.3dm) is a Rhino3d file and has all the necessary CAD layers for the clock. If you need a more generic format, I’ve also included a *dxf export of the front and back layers of the clock. This should be all the information you need.
The CNC CAM work is broken down into 9 separate CNC Operations. The actual Mach3 gcode files are included in the GitHub repository as well as the VCarve Files that produced them (if you need to open them and export using a different post processor).
All files for the project are available on GItHub. Here is how to interpret the files. They are relatively self-explanatory but here’s some additional help to clear up any possible confusion. The first five files are listed in order of cutting operation. The file name ends in parentheses with the size of the cutting tool. So for example – 01_Rear Pockets_v1.8_(1-2 inch)
- This file name begins with 01 so it is the first operation.
- It will cut out the rear pockets.
- This is version 1.8 (I started with 0.0 so that tells you how many mistakes I made!)
- Use a 1/2 inch cutting tool
In addition to these five wood-block operations, there are two stand operations, an acrylic element operation and a back cover plate operation.
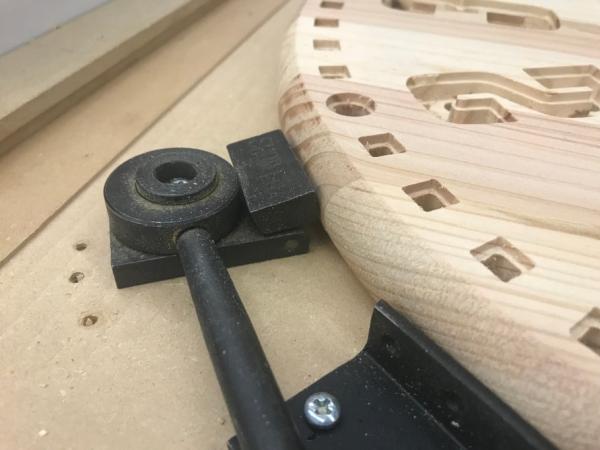
One operation that is unique is the T-slot CNC operation. This provides a channel for the bolts on the desktop stand to slide into. You will need a T-slot bit like the one shown in the photograph above.
Again if you need something other than the standard Mach3 post processor open the VCarve files and export in your local format. The next step we will actually walk through cutting the core and illustrate step by step what the clock should look like at each stage.
Step 4: Cut the Clock Core, Desktop Stand, Acrylic Tiles and Backing Material
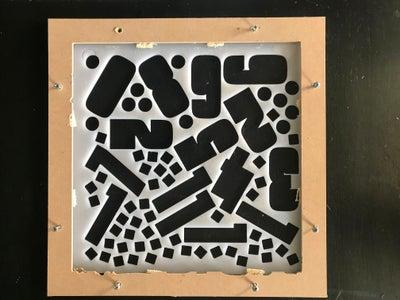
Here are some photos of each of the completed pieces as they come off the machine. The acrylic is the most challenging cut since acrylic has a tendency to melt if it gets too warm and it also chatters and lifts if not held down securely. A laser cutter would be ideal if you have one. As you can see in the photo, I made a special jig that holds down all four sides tightly. Double sided tape would probably be the absolute best for this operation but would be a little more time consuming to remove.
Step 5: Customize With Clock Face Art and Finish
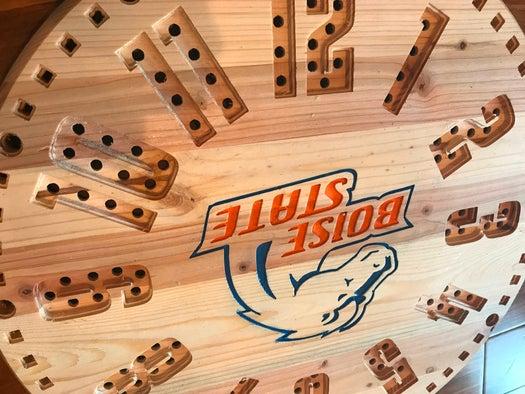
The clock can be used just fine without this step but it’s fun to customize it according to your needs or tastes. We’ve tried a lot of different designs and the sky is the limit here. We’d love to see examples of things you come up with!
In terms of finishing we have tried lots of different things but love the simplicity and ease of staining. We also love General Finishes topcoat as it is particularly easy to install, durable and looks great! Now’s the time to do that before we start installing electronics.
Tip: Don’t forget to also stain the desktop stand, backplate plug and backplate at the same time. It’s easy to get carried away and forget these accessory pieces!
Step 6: Acrylic Tiles and Stand Assembly
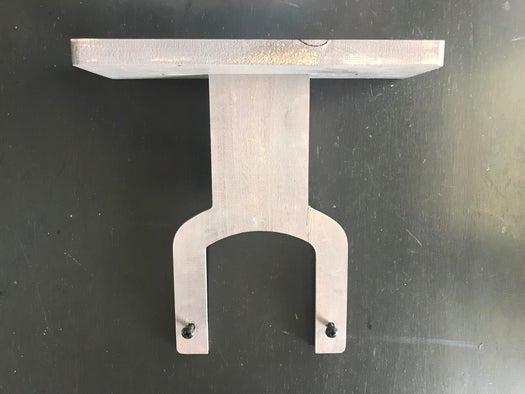
After you apply the finish to the wood pieces, it’s time to press in the acrylic tiles and assemble the stand. The acrylic tiles are press fit tolerances and don’t require any adhesive generally speaking. A few of the tiles may need small amounts of sanding or filing but generally, these just press in place and you are good to go. If you find that some of them are too loose and fall out, we use a few drops of white Elmers school glue as this is easy to apply, dries perfectly clear and provides plenty of adhesion. The front of your clock is now COMPLETE! Stand back and enjoy.
Also at this time you can also press into the stand the 1/4-20 nuts and lace in the bolts that slide down the T-slot channels. Drop the stand into the base with a little glue and your desktop stand is now ready!
Source: Web-Connected SMART LED Animation Clock With Web-based Control Panel, Time Server Synchronized
