Summary of Visual Network Threat Level Indicator v2 using Arduino
This article describes a wireless Visual Network Threat Level Indicator (VTLI) that displays network security status on an RGB LED. It connects an Arduino with a WiFly module to a Snort IDS system via Python, updating the display every five minutes based on log data. This setup allows for at-a-glance monitoring of network threats outside the computer environment.
Parts used in the Visual Network Threat Level Indicator:
- Arduino Uno
- WiFly RN-XV Module
- Sparkfun XBee Shield
- Sparkfun RGB Breakout Board
- Arduino Enclosure
- Wires and solder
- IDS system running Snort
- WiFlySerial libraries
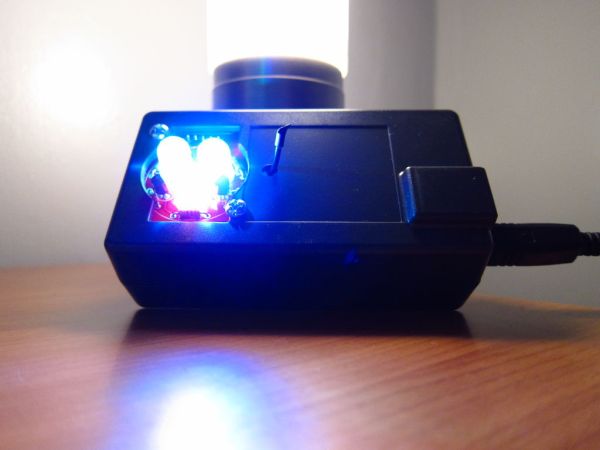
By popular request this is a new wireless version of the Visual Network Threat Level Indicator. This uses a Roving Networks WiFly RN-XV Module to do 802.11 WiFi along with an Arduino to display the threat level on your network.
Network monitoring is very important in todays world. The internet is a scary place. People have taken steps to raise their awareness by installing Intrusion Detection Systems(IDS) such as SNORT.
The problem with most of these systems is that upon first installing them they are vigilantly watched. After a week the allure wears off and they are no longer monitored, silently churning away in the depths of the network.
By moving the visualization outside of the computer we make it easier to notice, providing the information at a glance and to a larger audience.
The Visual Threat Level Indicator (VTLI) requires a network connection and power. It does not need to be directly attached to a computer, this way it can be placed anywhere there is network access.
A python script is run on the IDS which connects the the Arduino and updates the display.
Step 1: Parts
You will need:
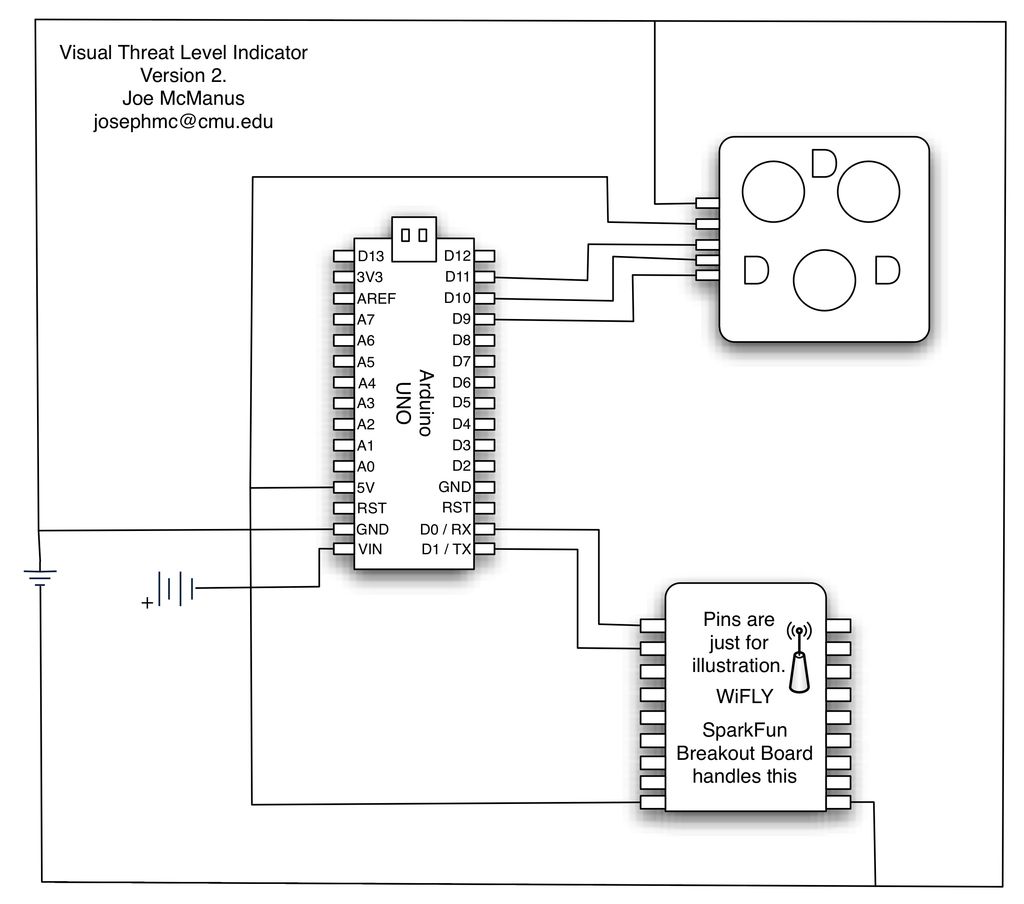
-Arduino Uno
-WiFly RN-XV http://www.sparkfun.com/products/10822
-Sparkfun XBee Shield http://www.sparkfun.com/products/9976
-Sparkfun RGB Breakout Board http://www.sparkfun.com/products/10111
-Arduino Enclosure http://www.sparkfun.com/products/10088
-Wires, solder, other bits and bobs.
-An IDS system running snort. http://www.snort.org
-WiFlySerial libraries: http://sourceforge.net/projects/arduinowifly/
Step 2: Brief Overview
The VTLI process runs on the IDS and the Arduino.
The Arduino listens for incoming connections to update the display.
The IDS machine has a python script running that will look at the last 24 hours of the snort log to generate the threat level. It connects over the network to the Arduino to update the display. This should run out of cron an interval appropriate to the environment, 5 minutes is a good guess.
Step 3: Arduino Program
 vtli-wifly.ino5 KB
Step 4: Edit your WiFi Details
The WiFi credentials are stored in the file Credentials.h. Edit the passphrase and ssid variables.
-WiFly RN-XV
-Sparkfun XBee Shield
-Sparkfun RGB Breakout Board
-Arduino Enclosure
-Wires, solder, other bits and bobs.
-An IDS system running snort
-WiFlySerial libraries
For more detail: Visual Network Threat Level Indicator v2 using Arduino
- How does the VTLI monitor network threats?
A python script on the IDS analyzes 24 hours of Snort logs to generate a threat level and updates the Arduino display over the network. - Can the device be placed anywhere in the network?
Yes, it does not need to be directly attached to a computer and only requires a network connection and power. - What is the recommended update interval for the display?
The article suggests running the script every 5 minutes using cron. - Which library files must be imported for the Arduino code?
You must import Credentials.h and MemoryFree.h along with the WiFlySerial.cpp and WiFlySerial.h files. - Where are the WiFi credentials stored?
The passphrase and ssid variables are stored in the Credentials.h file. - Does the project require an Intrusion Detection System?
Yes, the project requires an IDS system running Snort to provide the log data. - What hardware is used to visualize the threat level?
A Sparkfun RGB Breakout Board connected to an Arduino Uno is used to display the information. - How can I access the source code for the Arduino program?
The vtli-wifly.ino file and necessary libraries can be downloaded from the provided links or arduinology.tumblr.com.