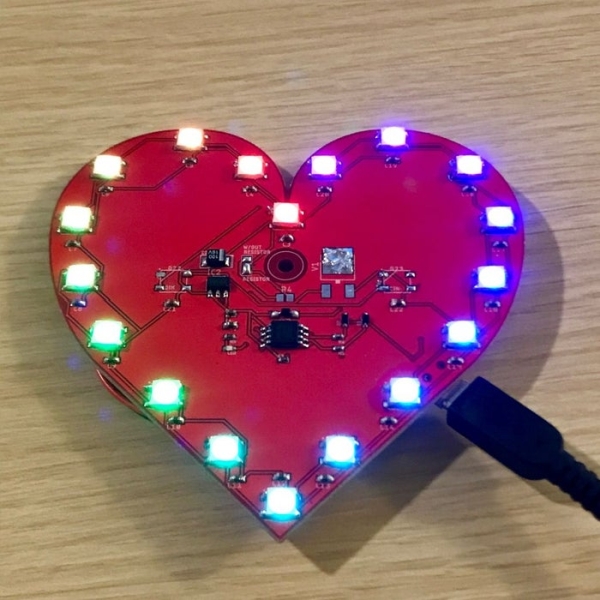
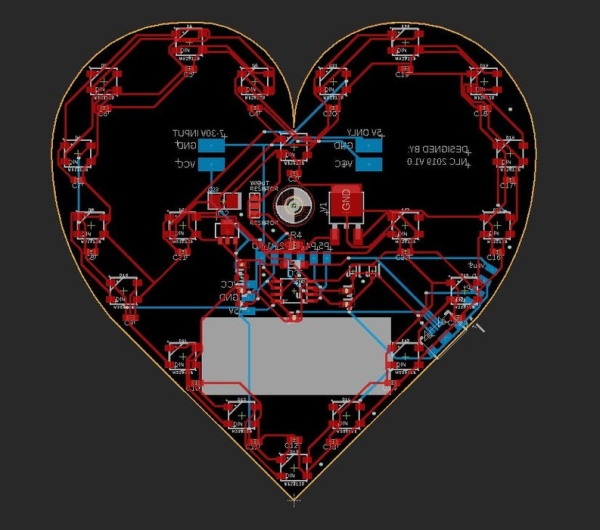
With Valentines Day approaching I thought it would be nice to make a project for the people who are special in my life; I thought the people of instructables would probably like it too! I’ve designed a ~100mm x 100mm or ~4in x 4in PCB heart. It uses the Attiny85 SMD microprocessor as the brain. The LEDs are SK2812s I salvaged from another project after first trying WS2812b LEDs which are garbage for reusing. I’ll save you the time and just tell you not to use them, they’re way too sensitive to heat and thus suck. I wanted everything to be surface mounted so that’s how I designed it. In the final product, I ended up removing the center two LEDs as I was having issues getting them to work. Overall I enjoyed making this PCB with its special shape, which was an interesting process to make btw, and getting my hands dirty with some solder paste. I know my loved ones will enjoy this memorable piece of art just as much as I did, hopefully, you will too!

Like always please read the whole Instructable before you begin, it will save you the time and tears haha.
Step 1: Tools & Parts

Tools:
Soldering Iron (Small chisel tip)
Solder
Solder Paste (https://www.amazon.com/gp/product/B017RSGPI8/ref=p…
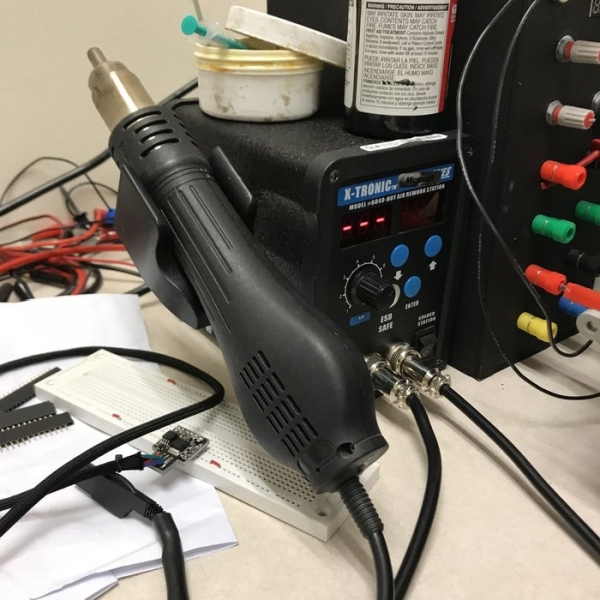
Heat Gun
SMD Tweezers
Glasses… Lol
Parts:
1x PCB Heart (https://www.ebay.com/itm/113619091202)
1x 9V Battery Connector (https://www.ebay.com/itm/113626063872) (or another power source either 5V or 7-30V)
1x Digispark Arduino (Has all the parts you’ll need to desolder!)
or…
1x Attiny85 SOT8
1x MC78M05BDTRKG (DPACK) or L78XX (SOT89) (5V Regulators)
1x 100uf C3528 16V Polarized Capacitor (optional)
1x Red 0402 LED
2x 66.5Ohm 0402 Resistor
2x Zener Diode (SOD-323)
1x Diode (SOD123)
1x 4.7uf 0805 Capacitor
1x 0.1uf 0402 Capacitor
18x SK6812 LEDs
18x 0.1uf 0603 Capacitor
2x 1.5KOhm 0402 Resistor
1x Micro USB SMD
Step 2: Put It Together!

I’d start with the small components first then move to the SK6812 LEDs. I used the solder paste and applied very and I mean very small drops of solder paste to the pads; you’ll want to check each pad after everything is soldered to make sure none of the pads bridged and everything is secure! I used my SMD tweezers to place everything on the solder paste then I used my heat gun set at approximately 220 degrees Celsius. You’ll observe the paste liquify and turn to a shiny silver when its done in about 3-5 seconds. Use a soldering iron to fix any mistakes.
Let’s start with the capacitors first:
C1: 0.1uf 0402
C2: 4.7uf 0805
C3-C22: 0.1uf 0603
C23: 100uf C3528 Polarized!!
Diodes next:
D1-D2: Zener SOD-323
– D1 and D2 have to be placed in a very specific direction! The indicator line should be closest to the bottom of the board!
D3: Regular Diode SOD123
– The orientation of D3 should have the indication line closest to the smaller of the two 5V-regulators.
Resistors:
R1-R2: 66.5Ohm 0402
R3: 1.5KOhm 0402
R4: 300-500Ohm OPTIONAL Resistor!!
R5: 1.5KOhm 0402
5V-Regulators:
Solder either regulator, just be aware of the current consumption for the LEDs!!
Microprocessor:
Throw that Attiny85 on there and solder it down!
LEDs:
Allow the board to cool then place all the LEDs down on the board. You’ll want to spend as little time with the heat gun on the LEDs to prevent destroying them. Once you see it melt move on!
Micro USB:
This was last because it’s on the back and it sucks to solder everything else if the board is wobbly. Be sure to check for bridging.
On the back, I gave you the option to solder a digispark Arduino board directly to the back if you wanna skip all this other soldering nonsense. Additionally, I have a direct 5V power supply option or a 7-30V option, DO NOT REVERSE THE POLARITY! I forgot to add polarity protection… my bad.
Also! I made a small mistake when labeling the w/out resistor and resistor jumper option, you’ll need to solder the resistor option if you did not use a resistor and if you did happen to use a resistor you will need to solder the w/out resistor option.
I think that’s about it… I guess we’ll move on to coding!
Step 3: CODE

These are the three code files I used so you can play around with them. In order to use the Rainbow code, you will also need to download the Color_Definitions file! The rainbow file will make your heart light up like a rainbow and the colors will move across each LED, pretty neat. The V-Heart_RGBW_4C will allow you to test all 4 functions of your RGBW led if you have those installed. The simple file is a very basic piece of code to test all the LEDs for one specified color.
You can write your own code or whatever pleases your little heart. Just ensure not to set the brightness at 225 (MAX) because each LED consumes approximately 120mA so… math… 2400mA is a lot of current. You’ll need to plug into a 5V source with the current that you’ll need or make sure that you add a beefy 5V regulator.
//RAINBOW CODE//
#include
#include “Color_Definitions.h” #ifdef __AVR__ #include #endif
// Which pin on the Arduino is connected to the NeoPixels? // On a Trinket or Gemma we suggest changing this to 1 #ifdef __AVR_ATtiny85__ #define NEO_PIN 0 // NeoPixel DATA #undef LED_BUILTIN #define LED_BUILTIN 1 // LED on Model A #else #define NEO_PIN 0 // NeoPixel DATA #endif #define NEO_PTYPE NEO_GRBW // | What type of NeoPixel strip is attached to the Arduino? #define NUMPIXELS 20 // How many NeoPixels are attached to the Arduino? #define BRIGHTNESS 15 // set max brightness
#define IWAIT 2000 #define SWAIT 20 #define LWAIT 50 #define HWAIT 1500
Adafruit_NeoPixel strip = Adafruit_NeoPixel(NUMPIXELS, NEO_PIN, NEO_PTYPE + NEO_KHZ800);
// IMPORTANT: To reduce NeoPixel burnout risk, add 1000 uF capacitor across // pixel power leads, add 300 – 500 Ohm resistor on first pixel’s data input // NOTE: RGBW LEDs draw up to 80mA with all colors + white at full brightness!
void setup() { #ifdef __AVR_ATtiny85__ // This is for Trinket 5V 16MHz if (F_CPU == 16000000) clock_prescale_set(clock_div_1); // End of trinket special code #endif
#ifdef LED_BUILTIN // Turn the onboard LED off by making the voltage LOW pinMode(LED_BUILTIN, OUTPUT); digitalWrite(LED_BUILTIN, LOW); #endif
strip.begin(); strip.setBrightness(BRIGHTNESS); // set brightness strip.show(); // Initialize all pixels to ‘off’
#ifdef IWAIT delay(IWAIT); #endif }
void loop() { rainbowCycle(SWAIT);
}
// Slightly different, this makes the rainbow equally distributed throughout void rainbowCycle(uint16_t wait) { uint16_t i, j;
for(j=0; j<256*5; j++) { // 5 cycles of all colors on wheel for(i=0; i< strip.numPixels(); i++) { strip.setPixelColor(i, Wheel(((i * 256 / strip.numPixels()) + j) & 255)); } strip.show(); delay(100); } }
// Input a value 0 to 255 to get a color value. // The colours are a transition r – g – b – back to r. uint32_t Wheel(byte WheelPos) { WheelPos = 255 – WheelPos; if(WheelPos < 85) { return strip.Color(255 – WheelPos * 3, 0, WheelPos * 3); } else if(WheelPos < 170) { WheelPos -= 85; return strip.Color(0, WheelPos * 3, 255 – WheelPos * 3); } else { WheelPos -= 170; return strip.Color(WheelPos * 3, 255 – WheelPos * 3, 0); } }
Source: Valentines PCB Heart
