Summary of Using the ST7735 1.8″ Color TFT Display with Arduino
Summary: This tutorial shows how to use the 1.8" ST7735 color TFT display (128×160, 18-bit color) with an Arduino to display images, colored text, and simple animations. The display uses SPI (4–5 wires), includes a microSD slot, onboard 3.3V regulator, PWM-backlight control, and is 5V logic compatible. The project connects only the TFT to an Arduino and requires basic components and wiring.
Parts used in the ST7735 1.8" Color TFT Display with Arduino:
- ST7735 1.8" Color TFT display (128×160, 18-bit color, built-in microSD slot)
- Arduino Uno (cheap Arduino Uno)
- Small breadboard
- Wires
Hi guys, welcome to today’s tutorial. Today, we will look on how to use the 1.8″ ST7735 colored TFT display with Arduino. The past few tutorials have been focused on how to use the Nokia 5110 LCD display extensively but there will be a time when we will need to use a colored display or something bigger with additional features, that’s where the 1.8″ ST7735 TFT display comes in.
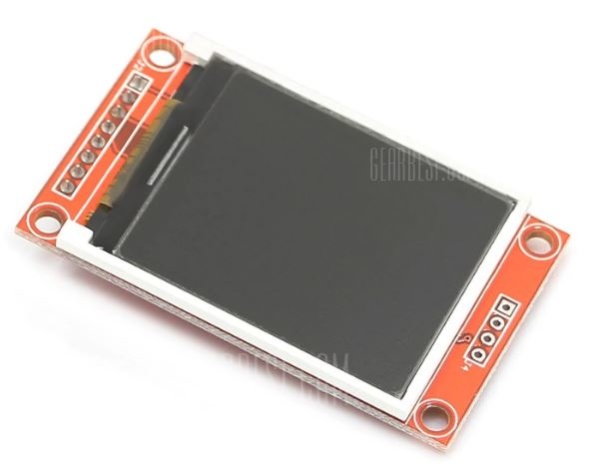
The ST7735 TFT display is a 1.8″ display with a resolution of 128×160 pixels and can display a wide range of colors ( full 18-bit color, 262,144 shades!). The display uses the SPI protocol for communication and has its own pixel-addressable frame buffer which means it can be used with all kinds of microcontroller and you only need 4 i/o pins. To complement the display, it also comes with an SD card slot on which colored bitmaps can be loaded and easily displayed on the screen.
Other features of the display include:
- 1.8″ diagonal LCD TFT display
- 128×160 resolution, 18-bit (262,144) color
- 4 or 5 wire SPI digital interface
- Built-in microSD slot – uses 2 more digital lines
- 5V compatible! Use with 3.3V or 5V logic
- Onboard 3.3V @ 150mA LDO regulator
- 2 white LED backlight, a transistor connected so you can PWM dim the backlight
- 1×10 header for easy breadboarding
- 4 x 0.9″/2mm mounting holes in corners
- Overall dimensions: 1.35″ x 2.2″ x 0.25″ (34mm x 56mm x 6.5mm)
- Current draw is based on LED backlight usage: with full backlight draw is ~50mA
The goal of this tutorial is to demonstrate the abilities of the TFT to display images and text in different colors and some animation.
Required Components
The following components are needed for this tutorial:
As usual, the exact components used for this tutorial can be bought by following the link attached to each of the components above.
Schematics
The schematics for this project is fairly easy as the only thing we will be connecting to the Arduino is the display. Connect the display to the Arduino as shown in the schematics below.
Read more: Using the ST7735 1.8″ Color TFT Display with Arduino
- What is the resolution of the ST7735 1.8" TFT display?
The resolution is 128×160 pixels as stated in the article. - Does the ST7735 display support full color?
Yes, it supports 18-bit color (262,144 shades) based on the article. - How does the ST7735 communicate with the Arduino?
It uses the SPI protocol with 4 or 5 wire SPI digital interface as described in the article. - Can I use the display with 5V Arduino logic?
Yes, the article states the display is 5V compatible and can be used with 3.3V or 5V logic. - Does the display include a microSD slot?
Yes, the display has a built-in microSD slot which uses two additional digital lines according to the article. - Is there onboard power regulation for the display?
Yes, the article says there is an onboard 3.3V @ 150mA LDO regulator. - How many Arduino pins are needed to use the display?
The article notes you only need 4 I/O pins for SPI, with 2 more needed if using the microSD slot. - Can the backlight be dimmed?
Yes, the display has 2 white LED backlight and a transistor connected so you can PWM dim the backlight as mentioned in the article. - What is the typical current draw of the display?
The article states current draw depends on backlight usage; with full backlight draw is approximately 50mA.