Story
The main purpose of this project is to build a system based on chip ATMEGA328P, Arduino compatible, and interface it with a 2.2″ QVGA TFT display using the library ILI9341. As an alternative to the self-build system you can use an Arduino Pro 3.3 V/ 8 MHz board or similar.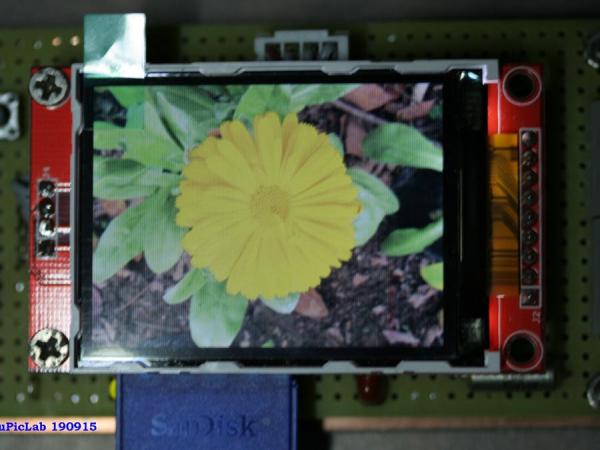
This system works well and can be very useful for many applications, as data-loggers, graphic terminal, etc. A great advantage of this system is to operate at 3.3 V with a modest power (180 mW). It is very suitable to be powered by a lithium 3.6V rechargeable battery. The regulator adopted still works well with a typical drop-out of about 50mV at low currents.
For the program, I used the library Seeed ILI9341 2.2 TFT + SD by Albert Miao, Loovee and Visweswara (https://github.com/gmtii/ili9341-arduino). The next photo shows the look of the TFT display used.
Hardware
Having already experienced the self-construction on the bread boards using the Arduino chip ATMEGA328P programmed with boot-loader, I decided for a version powered to 3.3V instead of the classic 5 V. This is possible because the chip ATmega328P works also at lower voltages (1.8V), and has a less consumption. But the quartz in this case should be 8 MHz instead of 16, I have tried to overclock to 16 without having problems, but I recommend to use a 8 MHz crystal, for more reliable operation. The following figure shows the prototype and component layout.
To show the details of the card the display module was removed, it is connected to the board via a 9-pin strip connector (TFT interface) and a 4-wire cable and connector (SD interface). On the right you can see a small card, a USB to serial converter, which only serves to program the system.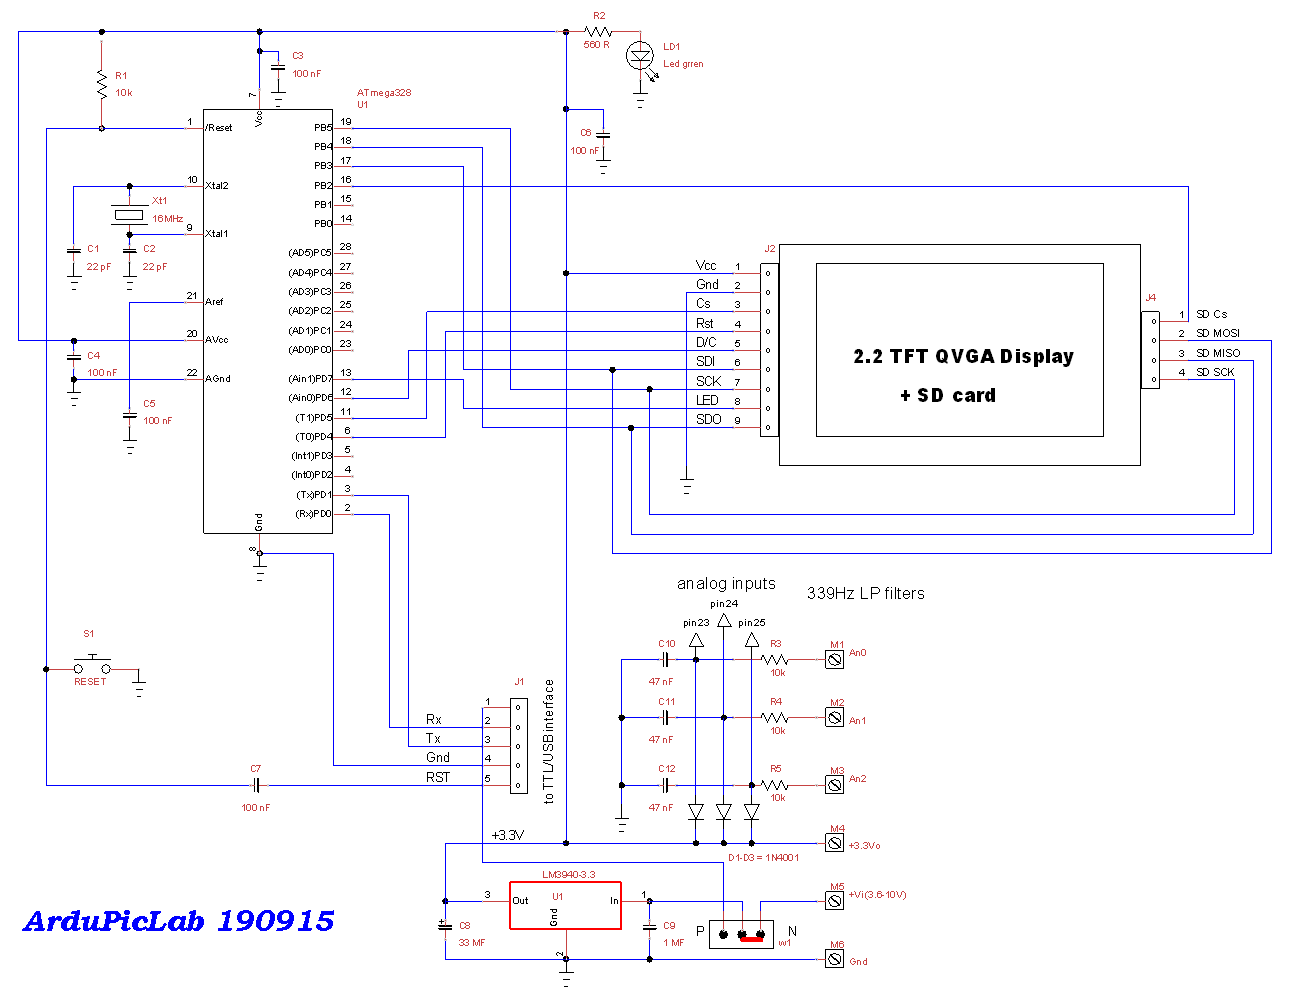
In the figure below you can see a graphical example of 240 samples acquired on sinusoidal signal of about 1 Hz . I can not call ‘oscilloscope’ this system , as it is not fast enough to update the display.
For more detail: How to use the TFT display 2.2″ QVGA with Arduino