Summary of Updated Movie Box
This article details a DIY project to build a compact movie player by housing a Raspberry Pi v3 and an external hard drive inside a modified VHS cassette. The guide covers modifying the hardware, including removing USB ports for better cable management, customizing power and data cables via soldering, and securing components with epoxy. It emphasizes the need for basic soldering skills and provides a step-by-step process from preparing the cassette to final assembly, allowing users to create a portable "Movie Box" for family vacations.
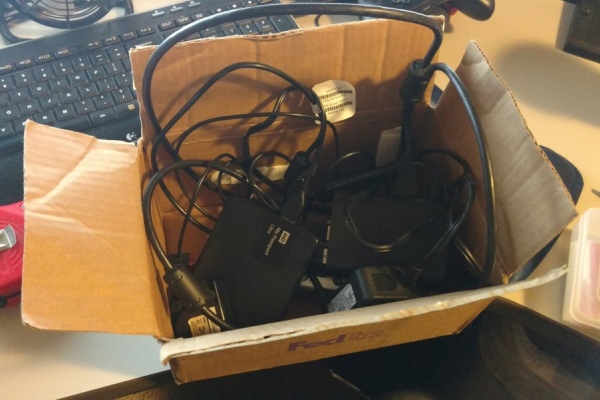
Parts used in the Movie Box:
- Raspberry Pi v3 B+
- WD Elements/MyPassport Drive
- 2.5A 5v Power supply
- Class 10 Micro SD Card
- 90 degree Micro USB extension cables
- HDMI Female-Female coupler
- Micro USB OTG Adapter
- 10cm HDMI male Full size -> HDMI 90 Male Ribbon cable
A few months back, I posted an Instructable on my Raspberry Pi movie player tucked into a VHS cassette. Since then, I have built several for friends and family, and have simplified the process. Using a Raspberry Pi v3, we no longer need a USB hub and no longer need to remove the GPIO.
This tutorial requires some beginning to moderate soldering skills. Modifications will probably void warranties on all components, so do this at your own risk!
RECAP:
I have a Rasbperry Pi running Kodi that I like to take on family vacations. My in-laws call it the “Movie Box”. However, I wanted something more compact and clean than the box I carried everything in.
I’d seen some people putting Pi’s in VHS tapes, but never saw a how-to, so I thought I’d make one.
Step 1: Parts List:
This is the Hardware needed to build this project. Software and video content is up to you to provide. Links to Amazon provided at time of writing:
Raspberry Pi v3 B+ (Link)
WD Elements/MyPassport Drive (Link)
2.5A 5v Power supply (Link)
Class 10 Micro SD Card (Link)
90 degree Micro USB extension cables (Link)
HDMI Female-Female coupler (Link)
Micro USB OTG Adapter (Link)
10cm HDMI male Full size -> HDMI 90 Male Ribbon cable (Link)
Step 2: Tools List
Soldering Iron
Snips
Needle Nose Plieers
Wire Strippers
Hot Glue Gun
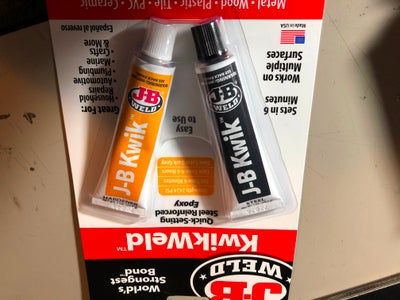
Epoxy
Step 3: Step 1: Prep the VHS Cassette
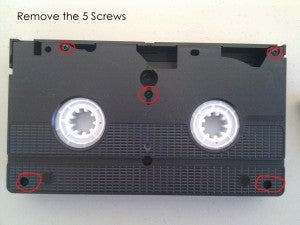
Remove the screws from the back of the cassette. Set them aside and save them. Many of the plastic pieces inside the case can be reused as offsets for your Pi, so save them as well as you open things up
Remove the tape and discard it.
Using a razor knife, cut notches into the plastic “walls” inside the cassette, and then use your needlenose and snips to work them out. You should be able to end up with a relatively clean inside.
I only remove the walls. Leave any plastic posts intact. These will help with the overall structure.
I also saved the plastic case that my hard drive came in. I cut out some pieces and hot glued them to the bottom of the case to cover the large holes left by the tape reels. (The picture of this is from my previous project, where I used a clear CD instead)
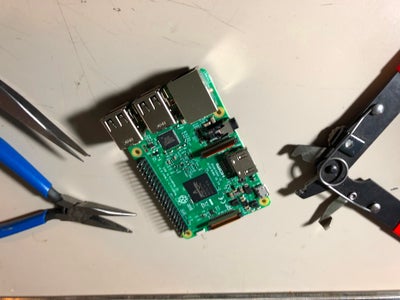
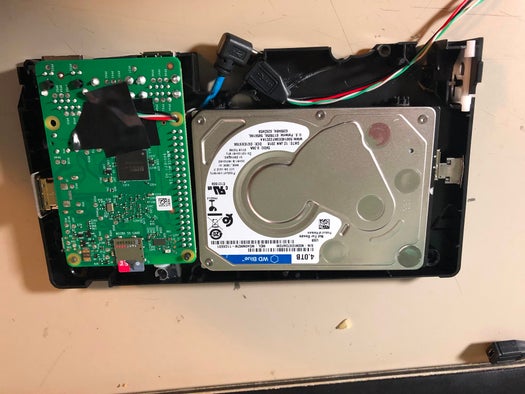
Step 4: Step 2: Mod Your Pi
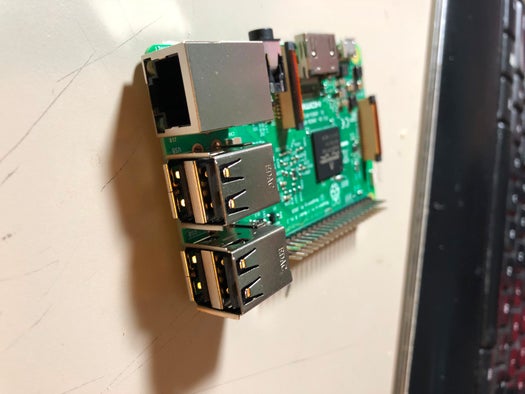
In order for our connections to all be on the back of the cassette, we want to move the HDMI. The Pi has 2 sets of USB ports.We will remove the middle set (between the other USB and the Ethernet port) to make room.
I’ve found that trying to desolder the ports is an easy way to fry a Pi. I have had much more luck removing them physically.
Start by snipping the top metal corners of the USB port and using your Needlenose to work the metal off. Bend back and forth until it breaks off. Continue removing the metal sheath until just the black plastic section of the ports remains.
This can be worked back and forth to weaken the pins that are soldered to the board. Working the port back and forth with your hands, you should be able to get it to snap off easily. Note the picture where the pins are still in the board after the port has been removed. Snip these off.
Check the fit of your HDMI ribbon and coupler. This will be glued into place with epoxy later.
Step 5: Step 3: Prep the Hard Drive
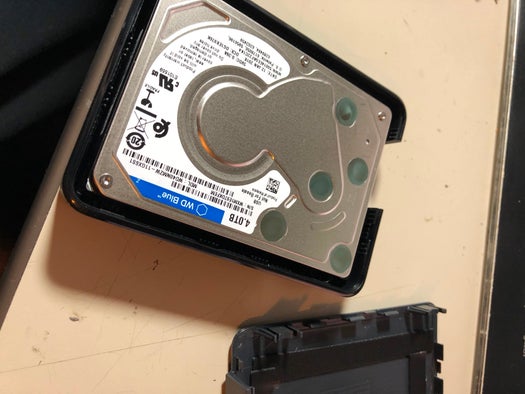
We need to remove the Hard drive from its enclosure. Using a knife or prying tool, peel the cover off the Hard drive and remove the drive.
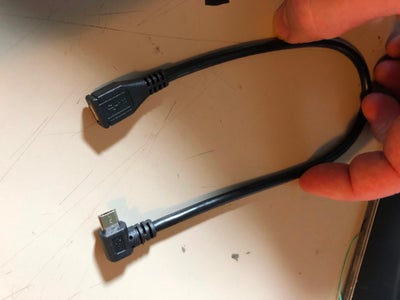
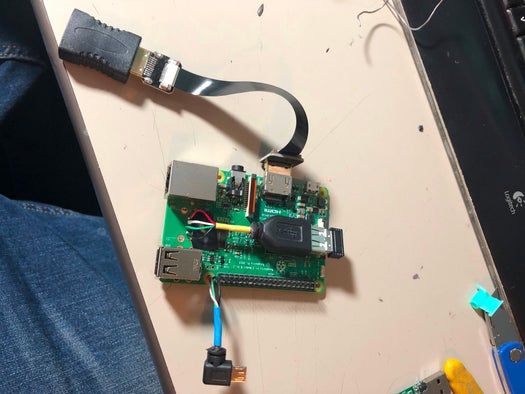
Step 6: Step 4: Make Your New HDD Cable
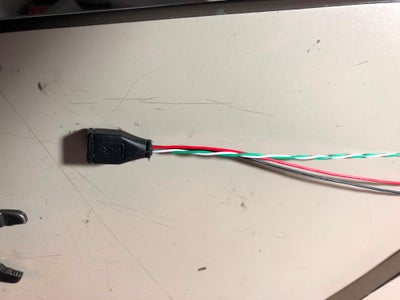
This may be one of the trickiest steps. The Micro USB Extension cable will be cut and turned into two wires: One that is soldered to the Pi, and the other that connects to the hard drive.
This setup will allow us to unplug the Pi from the Hard drive and plug in another USB cable so that the drive can still be accessed from a PC. This makes updating content MUCH easier.
The male end should have about 1.5-2 inches of wire. This will connect to the Pi.
The female end will connect to the USB OTG adapter. If you can find a slimmer connector or cable that fits, please let me know in the comments.
I had to shorten the length of the OTG adapter slightly in order to make it fit. I bent the metal piece up using needlenose, then snipped off the excess plastic.
Step 7: Step 5: Make Your Power Cable
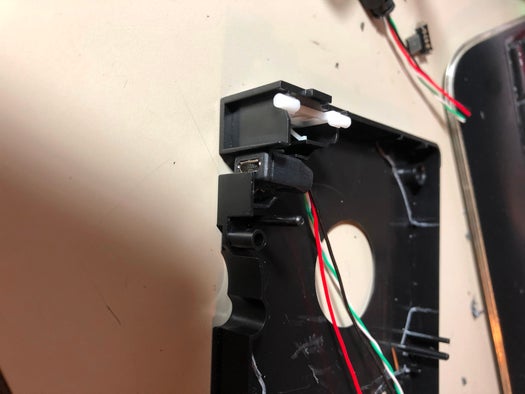
The second USB extension cable will be used as a power source. Like with the hard drive, I couldn’t find a male adaper that fit, so I soldered the red and black wires directly to the Pi.
The Picture showing the solder points to the Pi is from the previous project. Only the power wires in the bottom right apply here.
Step 8: Step 6: Plan Your Layout
Place the Pi and Hard drive both inside the VHS cassette. Find where interior plastic may need to be cut further. Cut out the back of the bottom piece of VHS to allow for your wires and ports.
Using the plastic pieces from the inner workings of the cassette, you can make offsets and peg stands that fit into the screw holes for the Pi. I found that these made excellent stabilizers for it.
Step 9: Step 7: Add Your Remote
There are a few options for a remote control. On some of these, I have used a USB keyboard/mouse combo remote that seemed great, until I realized the range wasn’t so great.
The MCE remotes remain my favorite to use, but the IR Receiver for it can be bulky and hard to place.
I’ve tried connecting an IR receiver directly to the GPIO, but the software setup of programming a remote can be tricky if you haven’t done it before.
If you use a USB method, I recommend cutting the female end off a USB extension cable and soldering it to the remaining unused USB port we removed.
Step 10: Step 8: Glue It Up
With your layout planned, and your rig tested to make sure everything works, mix up some epoxy and glue in any pegs that will hold your Pi in place, as well as your USB connectors on the outside of the case.
Get your wires and cables in place on the Pi, and affix the Female HDMI Coupler to the remaining USB port and Ethernet port on the Pi. This will keep the wire from simply pushing in when you attempt to plug in your HDMI cable to it.
I usually like to tape up the whole thing when done to make it eaiser to work with.
Step 11: Step 9: Put It Together
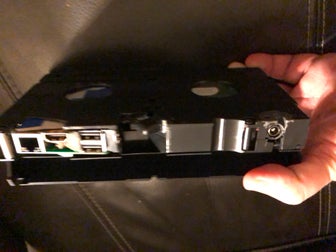
When all the epoxy is dried, put your components into the case and close it up. Enjoy taking your entire movie collection everywhere you go!
Source: Updated Movie Box
- Can I use a Raspberry Pi v3 without a USB hub?
Yes, using a Raspberry Pi v3 means you no longer need a USB hub or need to remove the GPIO. - What is the best way to remove the USB ports from the Pi?
The author recommends physically snipping the metal corners and bending the port back and forth until it snaps off, rather than desoldering. - How can I make updating content easier on the hard drive?
You can cut a Micro USB extension cable to connect the drive so that you can unplug the Pi and plug in another USB cable to access the drive from a PC. - Does the project require advanced soldering skills?
No, the tutorial requires beginning to moderate soldering skills. - What should I do with the plastic pieces inside the VHS cassette?
You can reuse them as offsets for your Pi and cut out some pieces to hot glue to the bottom of the case to cover holes left by tape reels. - How do I secure the HDMI ribbon cable and coupler?
You should check the fit first and then glue them into place with epoxy later. - Can I use a USB keyboard/mouse combo remote?
Yes, but be aware that the range might not be great, though you can solder a female end to the remaining unused USB port. - What tools are needed to prepare the VHS cassette?
You will need a razor knife, needle nose pliers, and snips to cut notches and remove plastic walls.