The project
This project follows on from the excellent work by ScotSEA and his Arduino reset program (see http://www.instructables.com/id/CatGenie-Resetting-a-SaniSolution-Cartridge/ ). I had never taken my Catgenie apart as Scott did, but had built a small contact board instead. I had previous updated Scott’s program to so that it output some debugging output to the computer during the reset, as the process had never been very smooth.
Today I got round to testing some more permanent solutions. I tried :
– Making the Arduino pretend to be a cartridge . This didn’t work for some reason – the controller never seems to receive any I2C commands from the Catgenie.
– Replacing the cartridge with a 24LC00 EEPROM . While I could read from and write to the chip using the Arduino, the Catgenie didn’t like it.
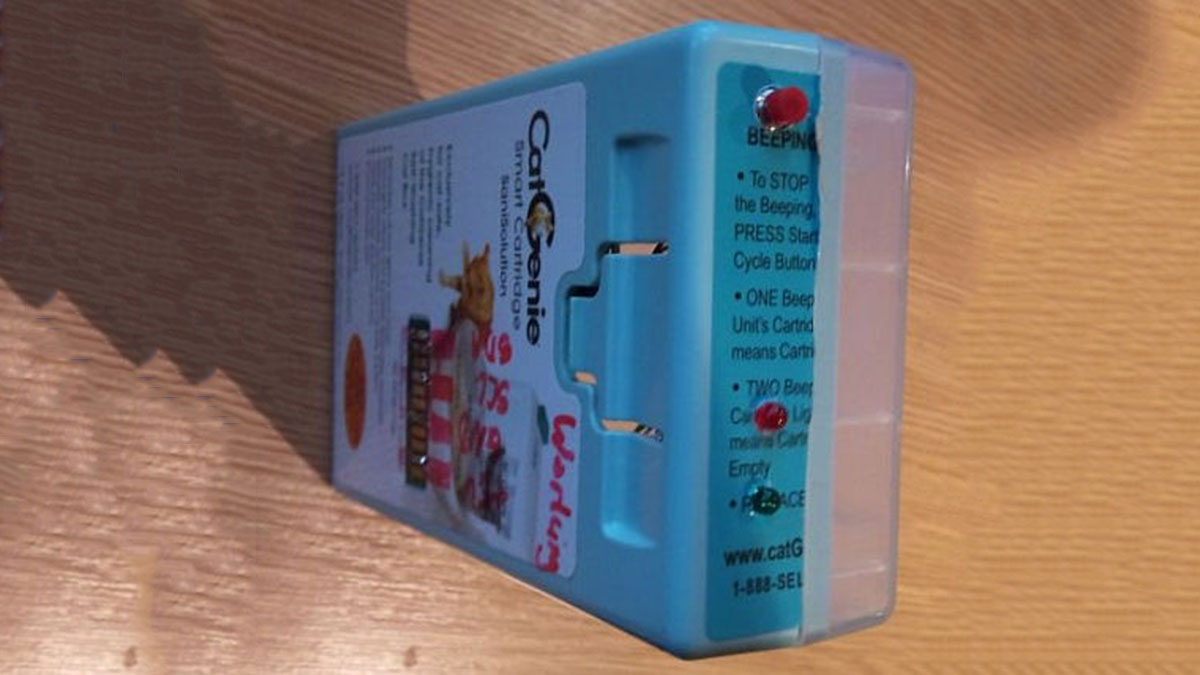
The solution I ended up with is a modified SaniSolution cartridge that contains an Arduino, some indicator LEDs and a button to reset the cartridge. It is powered by the Catgenie and so is fully self contained.
Step 1: Preparing the cartridge
Overview
The Catgenie communicates with the chip on the cartridge through the exposed contacts. For the more technical minded, the Catgenie acts as an I2C bus master (providing a clock signal), and the cartridge acts as a slave. We will add our Arduino as a second slave on that same bus.
To facilitate this, we will solder some wires to the contacts, and feed these inside the cartridge to be connected to our circuit.
Drilling holes
It may help to remove the cartridge label as shown in the picture above. There are four I/O connections on the cartridge, each exposed through two of the connector terminals. Counting from the top :
Terminal Usage
1 and 2 +5V
3 No connection
4 and 5 Ground
6 No connection
7 and 8 SCL (the I2C Clock line)
9 No connection
10 and 11 SDA (the I2C Data line)
Drill 4 holes in the plastic part of the cartridge (be careful not to drill the circuit board), between terminals 1/2, 4/5, 7/8 and 10/11.
Connecting the wires
Find two piece of twisted-pair cable and strip a few millimetres of insulator from the ends.
Push the stripped conductors of one pair through the top two holes, from the inside side of the cartridge. Do the same with the second pair and the bottom two holes. Lay the conductors flat on the terminals, and then solder them to the terminals, as shown in the pictures.
Hopefully you can do better than my child-like attempt at soldering!
Make a note
Write down the colours of the wires that you soldered to each connector – you’ll need this later in the process.
Now we can take the cartridge apart. Use a small screw driver to loosen the catches on the side of the cartridge, and prise it apart carefully.
Before we install any electronics into the cartridge, we will drill some holes and fit the indicator LEDs and button. This will depend on the size of your LEDs and button. Make the holes in the top of the cartridge so that they are visible and accessible when the cartridge is inserted into the Catgenie.
Solder a length of twisted pair wire to each LED and to the button before fitting them. I used a glue gun to fix the LEDs and button in place.
The photo above shows the inside of a cartridge with 2 LEDs fitted, and also shows the wires that connect to the chip on the front of the cartridge. Note that I used a glue gun to secure those wires as well to prevent their movement causing fatigue of my terrible soldering joints.
Step 3: Prepare the Arduino
We need to upload some code to the Arduino that will instruct it how to re-program the counter on the chip and control the indicator LEDs. The process of doing this is straight forward, but is better explained by a more general guide. If you are unfamiliar with the Arduino, I suggest reading the Getting Started guide, at http://arduino.cc/en/Guide/HomePage .
You need to run the Arduino Development environment, after connecting the board to your PC using a USB interface. The USB connector will power the board during this process.
Download the sketch, from http://www.poptart.org/catgenie2.pde . It can run either in ‘master’ or ‘slave’ modes. You need to use the master mode when testing connected to the PC’s USB, and slave mode when its running through the Catgenie.
Locate the ‘Wire.begin()’ lines in the setup() function. To start with, use the standalone option, and upload it to your Arduino using the development environment.
Step 4: Build the strip board
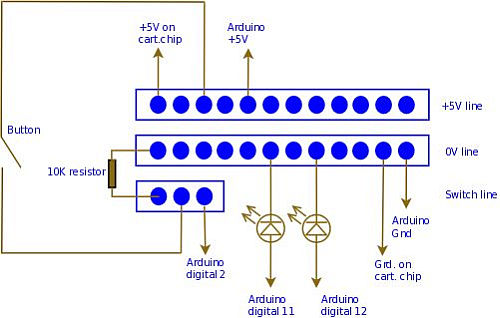
A small strip board needs to be created to connect up the LEDs, switch and cartridge chip. The photo above shows how to do this. There are three strips:
– +5v line, to connect the power from the Catgenie up to the Arduino and switch
– 0v line, to sink voltage from the LEDs and provide a common to the Arduino
– Switch line, which pulls the Arduino’s input line down low when the switch is not depressed
Just cut a small piece of strip board and solder in some terminal pins. Connect the ground strip to the strip below it by soldering a 10K resister between the strips.
The +5V and Ground lines from the cartridge chip can then be soldered to 2 of the terminal pins. The other terminal pins should then be connected to new wires that connect to components or to the Arduino connectors.
[box color=”#985D00″ bg=”#FFF8CB” font=”verdana” fontsize=”14 ” radius=”20 ” border=”#985D12″ float=”right” head=”Major Components in Project” headbg=”#FFEB70″ headcolor=”#985D00″]You will need :
– An Arduino board. I am using the Duemilanove, but the newer Uno or one of the smaller cheaper boards should be fine
– 2 x LEDs (eg. one red, one green)
– 1 x press switch/button
– 1 x 10k resistor
– A small piece of stripboard to wire up the LEDs and button
– Some terminal pins
– A soldering iron and solder
– Some thin wire (I used some un-twisted Cat-5)
– A very small drill bit (I used 1.0mm), and a drill[/box]
For more detail: CatGenie: A smart, resettable SaniSolution cartridge


