
Summary of Universal Remote Laser Tag Using Arduino
Summary: A DIY laser tag system uses everyday universal TV remotes as guns and wearable vests built around Arduino Micros and IR receivers. The project emphasizes low cost and customization, and the provided parts list supports making two complete vests with components for IR detection, indicators, sound, switches, power, and mounting materials.
Parts used in the Universal Remote Laser Tag:
- Safety vest (2x)
- Arduino Micro (2x)
- IR receiver (6x)
- Piezo transducer (2x)
- Red LED (6x)
- 360 ohm resistor (6x)
- 100 ohm resistor (6x)
- 1K ohm resistor (2x)
- 0.1uF capacitor (10x)
- Micro lever switch (2x)
- SPST slide switch (2x)
- 9V battery (2x)
- 9V battery snap (2x)
- Coroplast sheets (old political signs)
- Thread
- Sticky-back velcro
- Tape
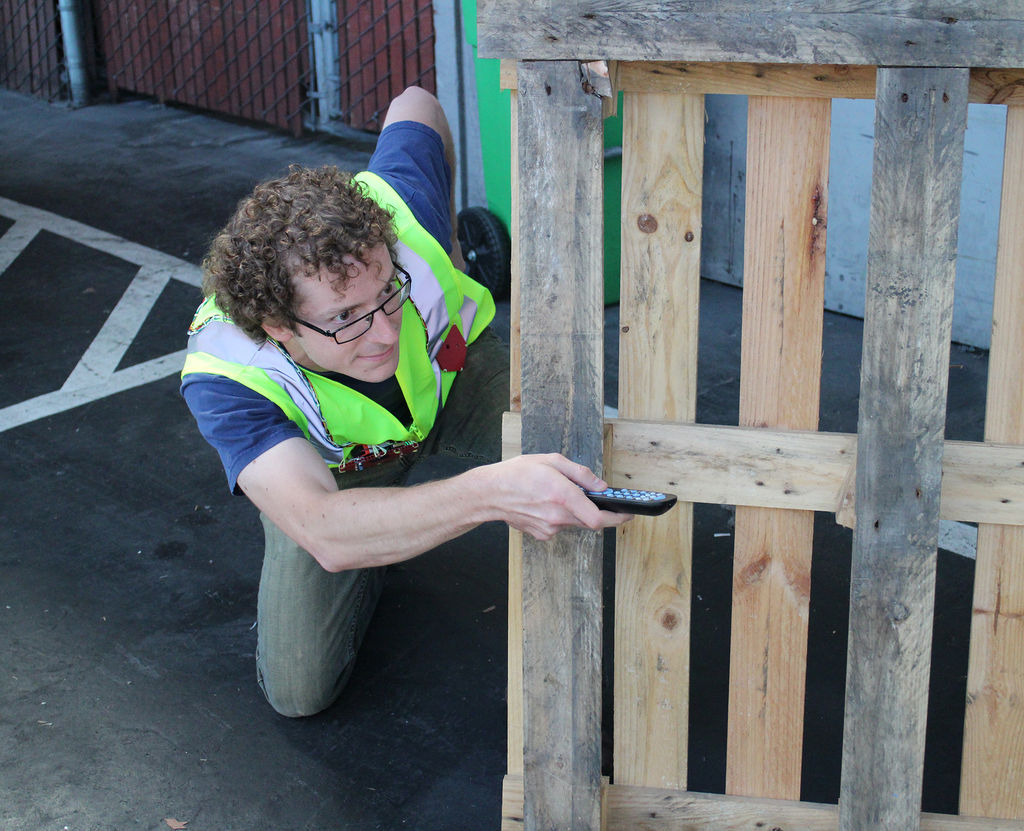
Blast away your friends for hours on end with this custom laser tag system. Who needs to pay to play in an arena when you can make your very own game? Best of all, no special equipment is required, because the “guns” are regular universal TV remotes!
Step 1: Parts and Materials
This list includes enough parts to make two complete laser tag vests:
(2x) Safety vest
(2x) Arduino Micro (RadioShack #: 276-258)
(6x) IR receiver (RadioShack #: 276-640)
(2x) piezo transducer (RadioShack #: 273-073)
(6x) red LED (RadioShack #: 55050629) web only
(6x) 360 ohm resistor (RadioShack #: 55049382) web only
(6x) 100 ohm resistor (RadioShack #: 271-1311)
(2x) 1K ohm resistor (RadioShack #: 271-1321)
(10x) 0.1uF capacitor (RadioShack #: 55047557) web only
(2x) micro lever switch (RadioShack #: 275-016)
(2x) SPST slide switch (RadioShack #: 275-401)
(2x) 9V battery (RadioShack #: 23-2211)
(2x) 9V battery snap (RadioShack #: 270-324)
coroplast sheets (old political signs)
thread
sticky-back velcro
tape
Step 2: Design Overview
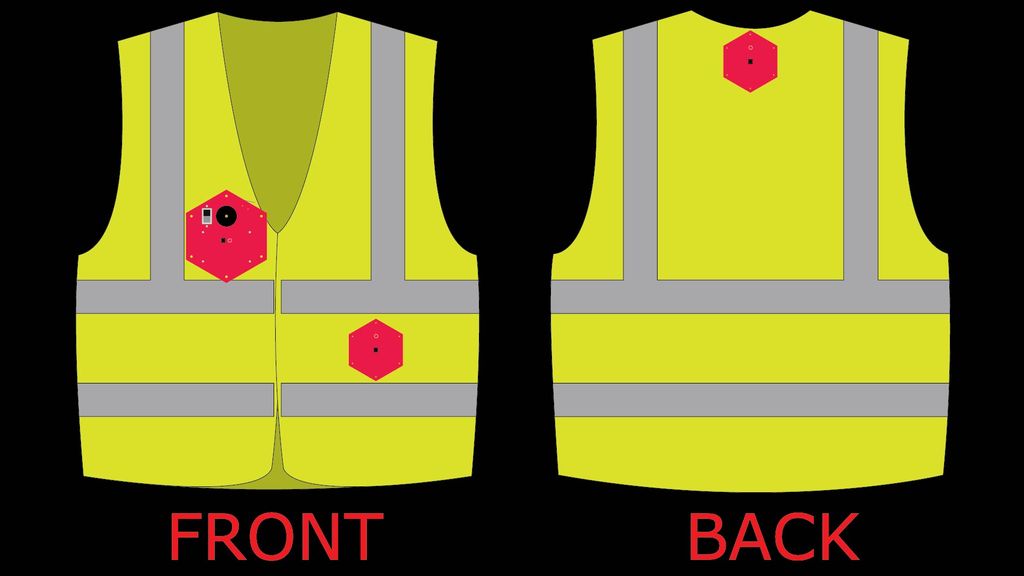
My main goals when designing the system were to keep it low cost and easily customized.
For more detail: Universal Remote Laser Tag
- What is used as the guns in this laser tag system?
Regular universal TV remotes are used as the guns. - How many vests does the parts list support?
The list includes enough parts to make two complete laser tag vests. - Which microcontroller is used in the project?
The project uses the Arduino Micro. - How many IR receivers are included in the parts list?
Six IR receivers are included. - What components provide sound and visual feedback on the vests?
A piezo transducer provides sound and red LEDs provide visual feedback. - What power source is specified for each vest?
Each vest uses a 9V battery with a 9V battery snap. - Are there switching components listed for controlling the vests?
Yes, micro lever switches and SPST slide switches are included. - What materials are suggested for mounting or construction?
Coroplast sheets, thread, sticky-back velcro, and tape are suggested for mounting and construction.
