Summary of Tiny MatchBox LCD Display – Desktop Decor
This article guides beginners in building a compact desktop display using an Arduino Pro Micro and a ST7789 LCD screen housed in a matchbox. The device connects via USB to upload 240x240 BMP images. It emphasizes low cost, simple soldering, and the use of CoolTerm software for serial communication. The project involves cutting the matchbox for enclosure, wiring components, and uploading images through a specific baud rate.
Parts used in the Tiny MatchBox LCD Display:
- Arduino Pro Micro Board
- ST7789 240 *240 LCD Display
- USB Cable
- Matchbox (3.5 * 4.5 * 1.5 cm)
- Wires
Have a nice day, in this instructable I’ll explain how to make a little decorative display for your desktop. It connects to your PC via USB and you can upload any image you want (240*240 BMP)
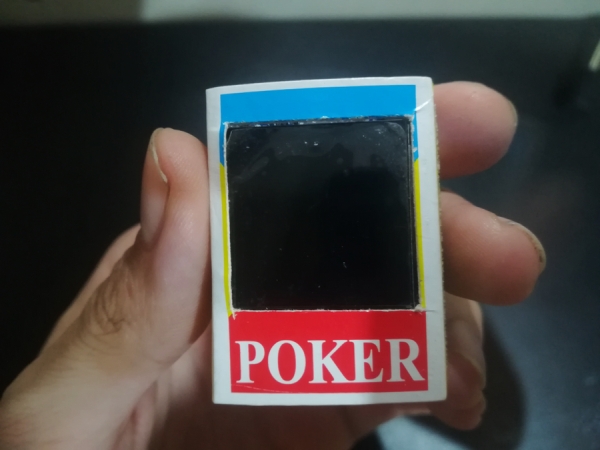
It uses an Arduino pro micro for the serial connection and a ST7789 LCD display, I decided to use a matchbox for enclosure as it is the perfect size and looks really cool.
This project is perfect for beginners and cheap to make.
Supplies
Arduino Pro Micro Board
ST7789 240 *240 LCD Display
USB Cable
Matchbox (mine is 3.5 * 4.5 * 1.5 cm)
Wires
Tools:
Hotglue gun (with hotglue)
Scalpel
Soldering iron (with solder)
Rule
Diagonal pliers (for cutting the wire)
Software:
Arduino IDE (Adafruit GFX and Arduino ST7789 Fast Libraries)
Board drivers
Arduino Code and images to upload
CoolTerm (for the serial COM)
Step 1: Connections and Code
Im using a pro micro board so i had to install the correct drivers and add it to the boards manager in the Arduino IDE .
(Find everything you need about the pro micro here: https://learn.sparkfun.com/tutorials/pro-micro–fi…)
You can also use an Arduino nano or any Arduino board with serial COM integrated.
Please download and upload the code to your board (I used the code from cbm80amiga, just avoided a line that shows the upload time on the display). It also contains some pictures so you can test it.
Test the circuit first on a breadboard to check if everything is right before soldering (for testing please check the step “Upload Images”).
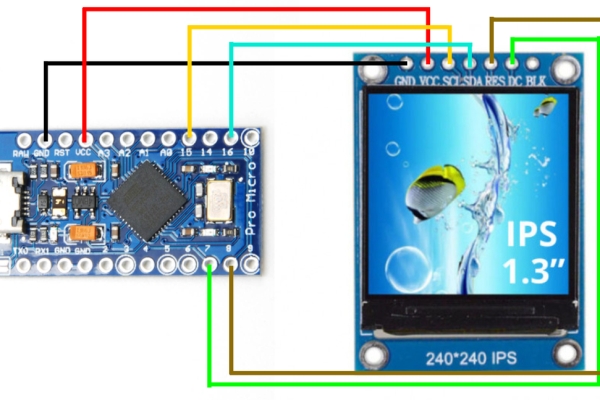
CONNECTIONS:LCD ——— Pro Micro Board
GND ———> GND
VCC ———> VCC
SCL ———> D15 (SCK pin)
SDA ———> D16 (MOSI pin)
RES ———> D8
DC ———> D7
BLK ———>NC
WARNING: If you are using a different board than pro micro make sure you are connecting SCL and SDA right to your Arduino as SCK and MOSI could be in different pins (example D13 & D11)
I made all connections as on the diagram, soldering short wires so they fix nice on the box (about 5cm long wires). Test the display to see if you soldered all right (for testing please check the step “Uploading Images”)
Step 2: MatchBox Enclosure
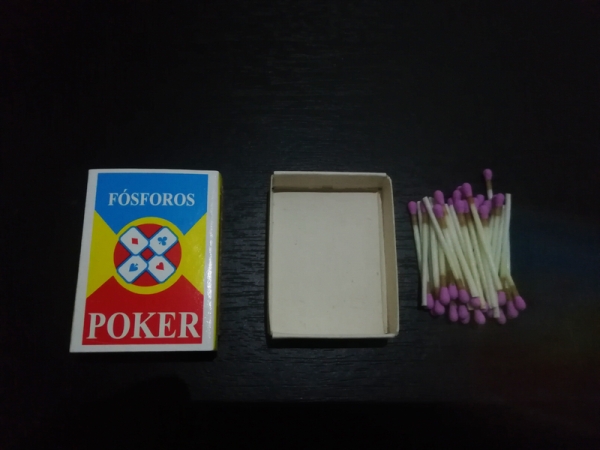
My matchbox is the perfect size for the display (3.5 * 4.5 * 1.5 cm). I started by selecting the place i want for the screen and cut a square for it (2.6 cm), i smashed the matchbox so i can cut it flat, make sure to just cut the front side of the box.
Place the pro micro board on the slide part of the box and mark where the usb port is so we can connect the cable, you can use a marker around the port and stick it to the cardboard so you cut it perfect.
Now we are ready to glue it all, start by adding glue to the flat side of the pro micro and stick it in place (where you made the hole for the usb port) I added a bit more glue around the board to make sure it doesn’t move as we will be using the usd port.
Organize your wires inside the box so you can put the display in place, make sure to smash the wires so the display is flat and we can slide the cover. Add plenty of glue below and arround the display and keep it in place while it cools (make sure not to burn your fingers)
Slide the cover part of the box and line up the hole with the screen, I added a bit of glue so both part stick together and don’t scratch the display. you can use the square from the box to cover the screen and leave a little window.
Step 3: Upload Images
We will send images in BMP format and 240*240 pixels using CoolTerm for the serial communication. You can edit your images to 240*240 on photoshop and export it as a BMP file.
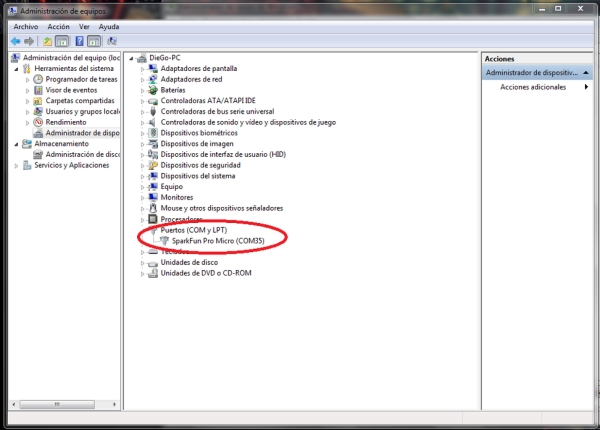
– Connect the arduino pro micro to your PC and make sure it appears the serial port on your device manager.
– Run Coolterm, it will show the selected COM port and baudrate (we will upload to 115200, as it will upload faster)
– Click “Connection”, “Options” and make sure to select the right COM port from the pro micro and a baudrate of 115200 and click “OK”.
– Now we have it set up and we can “Connect”, it will show the connected time and bytes sent.
– We can just drag and drop our BMP image on CoolTerm or click “Connection”, “Send Text/Binary Files” then click “All Files (*.*)” and select the image to upload.
– It will start uploading and it will take 21 seconds to upload, you can send only one image at the time and it will upload on top of the last one as on the video.
Hope you find this project interesting and want to make one, I would like to see your matchbox displays.
Source: Tiny MatchBox LCD Display – Desktop Decor
- How do I connect the SCL pin on the LCD?
The SCL pin connects to D15 on the Pro Micro board. - Can I use an Arduino Nano instead of a Pro Micro?
Yes, you can use an Arduino Nano or any Arduino board with integrated serial COM. - What image format is required for this project?
You must use BMP files that are exactly 240*240 pixels. - What baudrate should I set in CoolTerm?
You should set the baudrate to 115200 for faster uploads. - How long does it take to upload an image?
It takes approximately 21 seconds to upload one image. - What tools are needed to cut the matchbox?
You need a scalpel to cut the box and a hotglue gun to assemble it. - Which libraries are required for the Arduino IDE?
You need Adafruit GFX and Arduino ST7789 Fast Libraries. - How do I send an image using CoolTerm?
You can drag and drop the BMP file onto CoolTerm or select Send Text/Binary Files.