
Summary of TIDY POV DISPLAY USING THE ESP32
This article details Chinese YouTuber [corebb]'s second-generation POV display, upgraded from 5050 LEDs to 160 tiny APA102 chips for better resolution. After assembly challenges with a contract manufacturer, the project was completed using a modified stencil. The build features an ESP32 controller, SDCard storage, wireless LiPo charging, hall effect switches, and a resin-printed case with camera mounts. It successfully streams live webcam video, though the ESP32 limits further resolution increases.
Parts used in the TIDY POV DISPLAY USING THE ESP32:
- 160 APA102 addressable LEDs (2mm size)
- ESP32 microcontroller
- Arduino stack software
- SDCard module
- LiPo battery cell
- Wireless charging circuit
- Hall effect switches
- JLCEDA design software
- Resin-printed case
- Screw-thread mount
Chinese Youtuber [corebb] presents the second version of his POV display. The earlier version used 5050-sized SMT addressable LEDs, which didn’t give great resolution, so he rev’d the design to use a much higher number (160 to be exact) of APA102 LEDs. These are 2mm on the side, making them a little more difficult to handle, so after some initial solder paste wobbles, he decided to use a contract assembly house to do the tricky bit for him. This failed as they didn’t ‘understand’ the part and placed them the wrong way around! Not to be deterred, he had another go with a modified solder stencil, and eventually got the full strip to light up correctly.
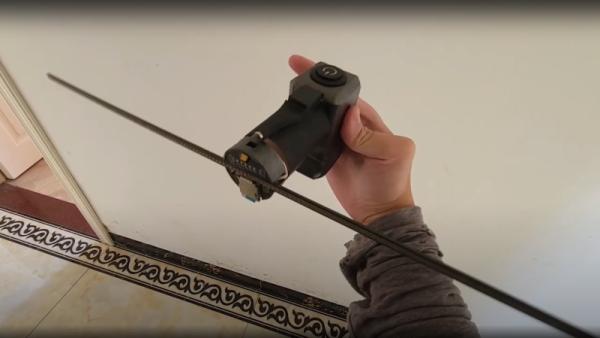
Based on an ESP32 (using the Arduino stack) and SDCard for control, and a LiPo cell charged wirelessly, the build is rather tidy. A couple of hall effect switches are mounted at the start of each of the two arms, presumably lining
up with a magnet on the case somewhere, although this isn’t clear. The schematic and PCB appear to have been designed with JLCEDA, which is a repackaging of EasyEDA. We can see the attraction with the heavy integration of this with the JLC and LCSC services. It appears that he even managed to get streamed video working — showing a live video from a webcam — which is quite an undertaking to pull off when you think how much processing needs to happen in real-time. As he alludes to in the video, trying to increase the resolution beyond this point is not viable with the processing capability of the ESP32.
A resin-printed case finishes off the build, with a screw-thread mount added to the rear, to allow typical camera mounts to be used to hold the thing down. A smart move we think.
We love POV displays around here, this spherical POV display is especially fabulous, but you don’t need fancy hardware if you have a handy ceiling fan and a bit of protoboard spare.
Source: TIDY POV DISPLAY USING THE ESP32
- Why did the creator upgrade the LED type?
The earlier version used 5050-sized LEDs which did not provide great resolution, so he switched to 160 smaller APA102 LEDs. - What issue occurred with the contract assembly house?
The assembly house failed to understand the part and placed the small LEDs the wrong way around. - How was the LED placement problem finally solved?
The creator used a modified solder stencil after initial attempts with a contract manufacturer failed. - What components are used for control and power?
The system uses an ESP32 with the Arduino stack and an SDCard, powered by a wirelessly charged LiPo cell. - How does the device detect position or alignment?
A couple of hall effect switches are mounted at the start of each arm to align with a magnet on the case. - Which software tools were used to design the schematic and PCB?
The design was created using JLCEDA, which is described as a repackaging of EasyEDA. - Is it possible to stream live video with this device?
Yes, the creator managed to get streamed video working showing a live feed from a webcam. - Can the resolution be increased beyond the current level?
No, increasing the resolution beyond this point is not viable due to the processing capability of the ESP32. - How can the device be mounted securely?
A screw-thread mount was added to the rear of the resin-printed case to allow typical camera mounts to be used.
