Update:
I’ll add some clarifications after reading comments on various forums.
It doesn’t need a 70Mhz ARM CPU, all it does is shift bits into a shift register, that’d be a total waste.
There aren’t 16 CPU’s. the slices are designed to be either slave or master, just one ATMega328P chip, they’re chained together, each slice could be independent but it only needs one master.
charlieplexing wouldn’t have been better, it’d have increased the complexity of the board layout and the LED’s wouldn’t anywhere near as bright, the CPU would also need to be faster and its harder to do cool looking patterns, we’ve done a lot of charlieplexed projects. charlieplexing is awesome within its field.
——————
We wanted to kickstart one of other projects at NullSpaceLabs but its a much more narrow field project and we’re going back and forth on what is best, working prototype or solidly laid out plans, partial prototype and partial laid out machine and software, with previous similar builds.
But while we ponder all of that, the blinky ball came from nowhere, its been a popular build at the space, and generated a lot of attention, but its an expensive one off build, so why not kickstart it to reduce costs. (one off’s in parts cost alone would be more than the the total cost of the kickstarter version)
http://www.kickstarter.com/projects/charliex/blinky-ball
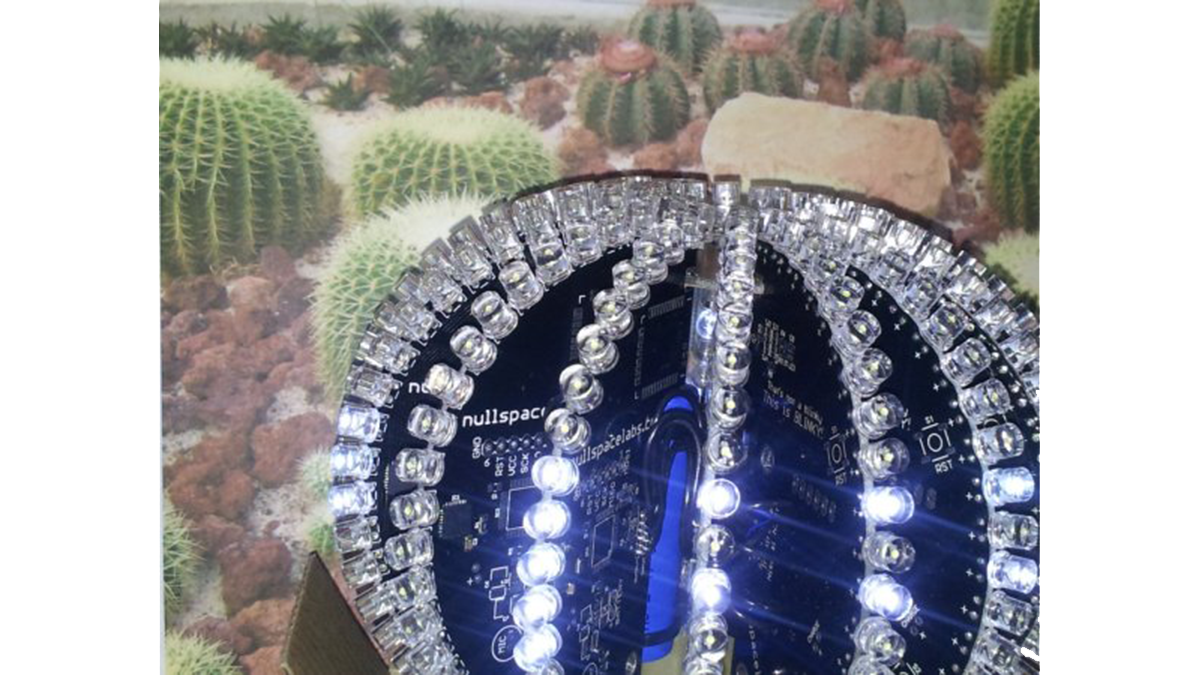
The idea came from a build we saw on Hackaday. The PCB’s have a dedication to the original ball maker, Nikolai, his is different to ours and ours is a scratch build . If there is one thing we really like at NullSpace its blinky LED’s.
http://hackaday.com/2011/10/16/we-want-this-led-ball/
We wanted it too!
So from the post on Hackaday
this :-
Notes
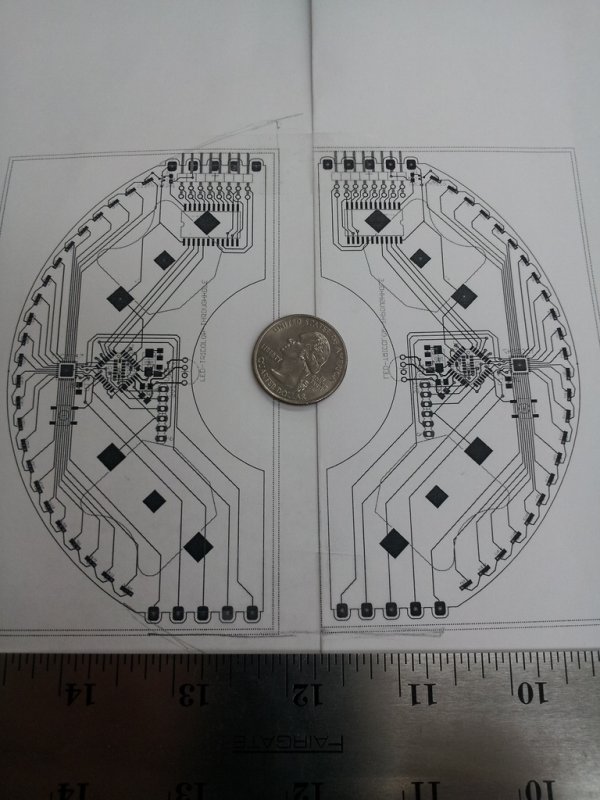
It is split into 16 slices, each slice can operate as a slave or master, you just build one differently its powered by an ATMega328 so easy to use on avr studio/arduino etc. The master slice can be independent,
The bluetooth module is connected to rx/tx of the blinky so it can be remote controlled from anything with bluetooth SPP, unfortunately that means none jailbroken iPhones are out of the picture, you might be able to do something with xcode and your own phone, but i’m unaware of such a thing. Android is no problem, or meego/symbian/windows mobile etc. Windows/OSX/Linux are all fine too.
I made a simple app that pushes 8 bits (it scales it to 12 bits internally since that is the resolution the LED drivers can handle) via bluetooth and then when its received a push command or the buffer is filled the ball displays that frame of data. That makes it really easy to make patterns and so on.
The sample code on the ball just draws a few patterns, some of it uses modified octobrite code. You can do each led/slice individually by shifting a slice at a time, or the whole ball at once.
The accelerometer is the MMA TI 3-Axis we’ve used before, its SPI and easy to use.
[box color=”#985D00″ bg=”#FFF8CB” font=”verdana” fontsize=”14 ” radius=”20 ” border=”#985D12″ float=”right” head=”Major Components in Project” headbg=”#FFEB70″ headcolor=”#985D00″]Arduino[/box]
For more detail: The LED Blinky ball using Arduino


