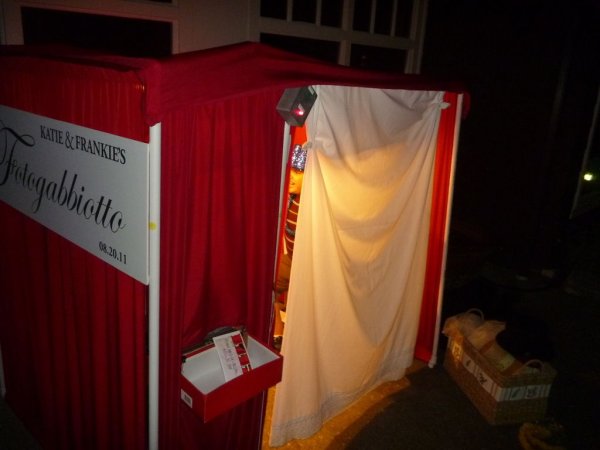
This is a tutorial on how to build your own Photobooth. My friend had a wedding coming up and was in need of a Photobooth. Photobooth rentals go anywhere from $500 – $1500 so we decided to do our own & hence another DIY Photobooth project was born. This one however is a little different in that it includes a lighting and LED control feature leveraging the Arduino and some custom software.

Step 1: Building the Photobooth Structure
My friend Diego took care of this portion of the project. The Photobooth frame was built with PVC pipes and joints and his wife did a fantastic job sewing together the fabric which slips into the PVC pipe.
Step 2: The Electronics for the Lighting and LED Control
If you’re good on electronics and soldering, you can do the project with an Arduino following this schematic and instructions in this manual. If you go this route, you’ll build the circuit yourself with your existing Arduino and then you’d just need the DIY Magic Mirror/Photobooth Software.
You’d save yourself some time though with the DIY Magic Mirror /Photobooth kit which involves much less soldering and includes the software.
The DIY Magic Mirror / Photobooth Kit plugs into the USB port on your laptop and then it’s just a matter of installing the software and hooking up the printer and monitor.
Step 3: DIY Photobooth Software
You can Google around and find lots of really good DIY Photobooth software out there. For this project though, we needed the lighting and LED control feature so I had to code it myself. I was able to leverage another project of mine, the DIY Magic Mirror. In that project, I had already written the X-10 lighting and LED control functions using Adobe Flash interfaced with the Arduino. So it was just a matter of adding some extra code for the Photobooth functionality. The other nice thing about this is that the software also doubles as a Breathalyzer so you can do a Photobooth and then check the alcohol level of your guests. Hey, it may come in handy.
The manual (see page 46) goes in to greater detail on how to setup the Photobooth software but here’s the gist:
1. Run the Config program and turn on the Photobooth
2. Go to the Photobooth settings screen where you can turn on printing, turn on the X-10 control, turn on the LED control, specify the layout of the 4 x 6 photostrip (most printers these days can handle 4 x 6 photo paper). You can also create a custom logo to appear on the screen and a custom background for the Photostrip printout.
Laptop
Printer (capable to handle 4 x 6 paper size)
Monitor
HD Webcam – $50
DIY Magic Mirror/Photobooth Kit & Software ($139) or Arduino with the DIY Magic Mirror/Photobooth Software ($49)
2 Clip Lamps – $40
1 Green LED – $1
1 Red LED – $1
Optional enclosure box for the LEDs – $5
X-10 RF Transceiver TM571 – $16
X-10 Firecracker CM17A – $5
X-10 Lamp Module LM465 – $10
PVC pipe and Fabric for the Photobooth Structure – $80
Optional Photobooth Sign from Kinkos
Optional Photobooth Start Button – $20
For more detail: The DIY Photobooth with Lighting Control using Arduino
