Setup an Arduino MKR1000 board to read temperature data and send those readings to ARTIK Cloud for monitoring.

Things used in this project
Hardware components |
||||||
 |
|
× | 1 | |||
 |
|
× | 1 | |||
Software apps and online services |
||||||
|
||||||
Story
This project setup an Arduino MKR1000 board which reads temperature data and sends those data to Artik cloud. The project consists of three steps, i.e. setting up Arduino MKR1000 to read temperature values and create temperature device type and temperate device in Artik cloud. The last step is sending data to Artik cloud and you can monitor the temperature changes from the Artik dashboard.
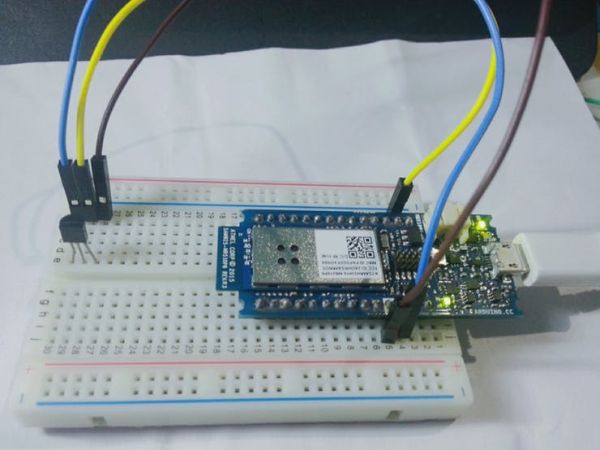

Setup Arduino MKR1000 board and the temperature sensor
==>> Download Arduino IDE or use Arduino Web editor.
Upload this code to check the MKR1000 and temperature sensor.
// Simple sensor test programme
int sensorPin = A0;    // select the input pin for the sensor
int sensorValue = 0;   // variable to store the value coming from the sensor
float temperature = 0.0;
float voltage = 0.0;
void setup() {
Serial.begin(9600);
analogReadResolution(10);
}
void loop() {
// read the value from the sensor:
sensorValue = analogRead(sensorPin);
Serial.print("sensorValue = ");
Serial.print(sensorValue);
voltage = sensorValue * (3300/1024); // in milliVolt
Serial.print(" voltage = ");
Serial.print(voltage);
temperature = (voltage - 500 ) / 10;
Serial.print(" temperature(C) = ");
Serial.println(temperature);
delay(100);
}
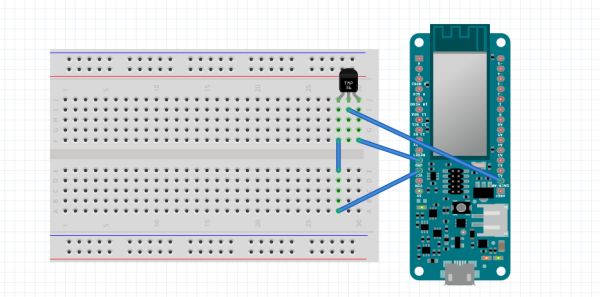
==>> connection
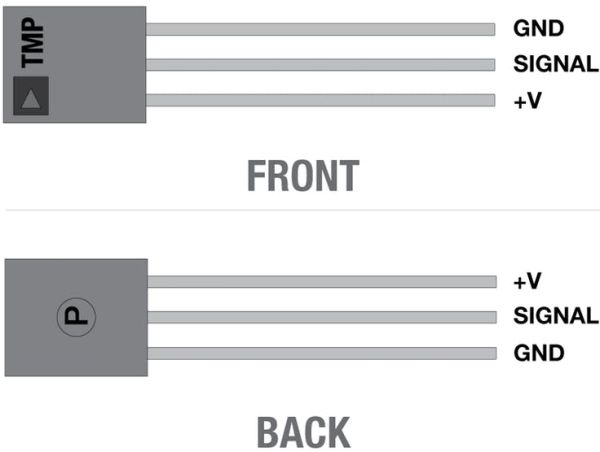

TMP +v to MKR1000 – VCC
TMP GND to MKR1000 – GND
TMP SIG to MKR1000 – A0
And you will serial monitor like this:
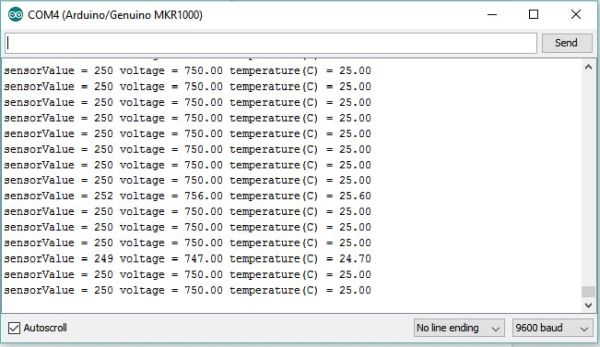
That’s mean our temperature sensor and Arduino MKR1000 working perfectly
Setup Artik Cloud
Now Time to Connect Cloud (Samsung Artik Cloud)
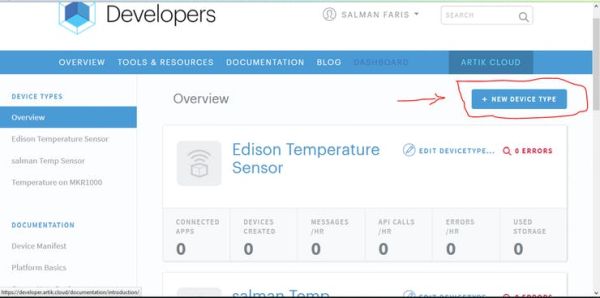
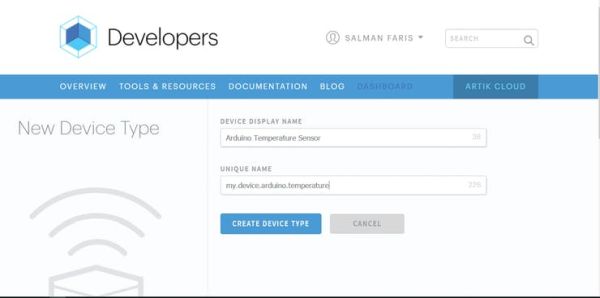
Go to Developer Dashboard to create a device type.
- Sign in to Developer Dashboard
- Click the “+ Create Device Type“
- Name the device type “Arduino Temperature Sensor” and give it an unique name “my.device.arduino.temperature“
- Click “Create Device Type” to create the device type
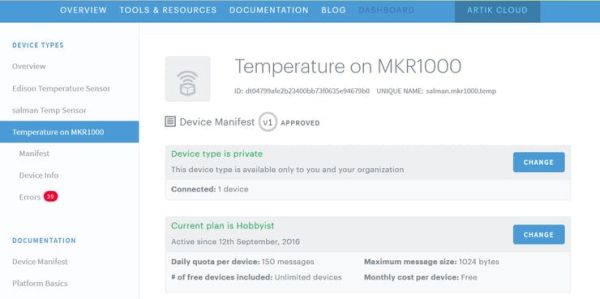
Now create a new Manifest for the new device type in
- Click “Arduino Temperature Sensor” in the left column
- Click “Manifest” and then “+ New Manifest“
- Enter Temperature as the Field Name and “Double” as Data Type
- Click “Manifest” and then “+ New Manifest“
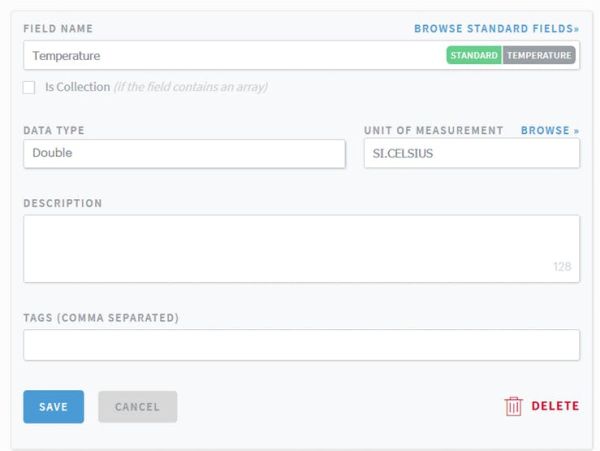
- Click “Save” and then “Next: Actions“
- Leave Actions as default and click “Save New Manifest“
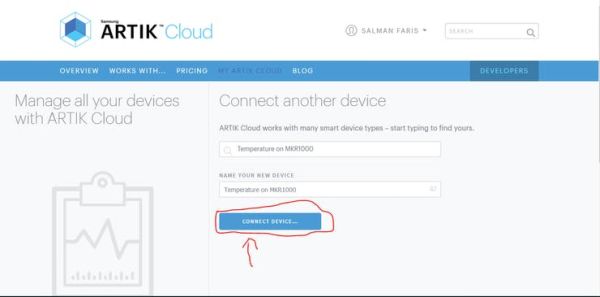
==>> Go to MY ARTIK Cloud to create a new Arduino Temperature Sensordevice.
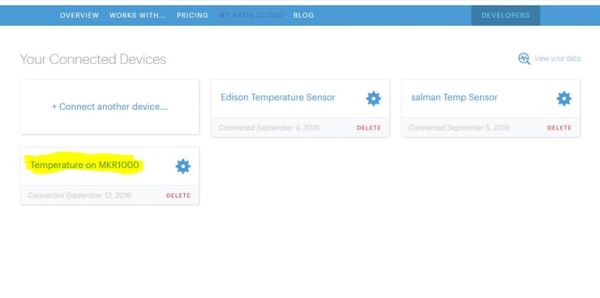
Sign in to MY ARTIK Cloud
Click to connect a new device. Select the “Arduino Temperature Sensor” device type
Click “Connect Device…“
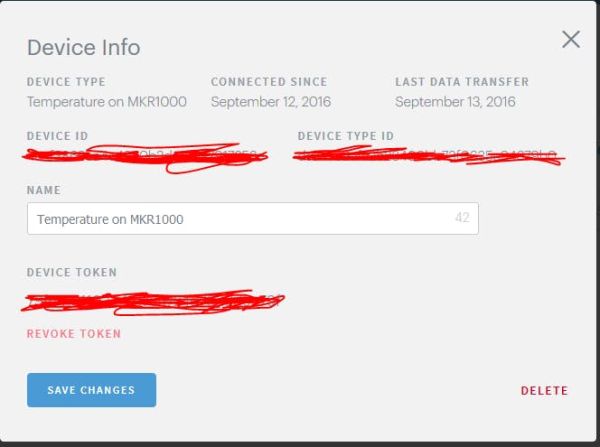
Click the Settings icon of the newly created device. In the pop-up, click “GENERATE DEVICE TOKEN…“.
Copy the device ID and device token on this screen. You will use these in the code.
==>> Click the Settings icon of the newly created device. In the pop-up, click “GENERATE DEVICE TOKEN…“.
==>> Now Artk part is Set
Sending Temperature Readings to ARTIK Cloud
==>> paste you DEVICE ID in
String deviceId = "your deviceId";
==>> paste you DEVICE Token in
String deviceToken = "your deviceToken";
==>> paste Your wifi name
char ssid[] = "Your wifi name";
==>> paste Your wifi password
char pass[] = "Your wifi Password";
all set Upload your code
#include <WiFi101.h>
#include <ArduinoJson.h>
#include <ArduinoHttpClient.h>
#include <SPI.h>
// ARTIK Cloud REST endpoint
char server[] = "api.artik.cloud";
int port = 443; // We're using HTTPS
// Device ID tokens
String deviceToken = "Your deviceToken";
String deviceId = "Your deviceId";
// Your wifi network
char ssid[] = "Your wifi name";
char pass[] = "Your wifi Password";
float temperature = 0.0;
boolean onFire = false;
char buf[200]; // buffer to store the JSON to be sent to the ARTIK cloud
const int LED = 6;
int ledState = 0;
WiFiSSLClient wifi;
HttpClient client = HttpClient(wifi, server, port);
int status = WL_IDLE_STATUS;
void setup() {
pinMode(LED,OUTPUT);
Serial.begin(9600);
while ( status != WL_CONNECTED) { // Keep trying until connected
Serial.print("Attempting to connect to Network named: ");
Serial.println(ssid);
// Connect to WPA/WPA2 network:
status = WiFi.begin(ssid, pass);
}
}
void loop() {
Serial.println("loop");
ledToggle();
Serial.println("making POST request");
String contentType = "application/json";
String AuthorizationData = "Bearer " + deviceToken; //Device Token
temperature = ((analogRead(A0) * (3300/1024)) -500 ) / 10 ; // in milliVolt
onFire = false;
int len = loadBuffer(temperature,onFire);
Serial.println("Sending data "+String(temperature));
// push the data to the ARTIK Cloud
client.beginRequest();
client.post("/v1.1/messages"); //, contentType, buf
client.sendHeader("Authorization", AuthorizationData);
client.sendHeader("Content-Type", "application/json");
client.sendHeader("Content-Length", len);
client.endRequest();
client.print(buf);
// read the status code and body of the response
int statusCode = client.responseStatusCode();
String response = client.responseBody();
Serial.print("Status code: ");
Serial.println(statusCode);
Serial.print("Response: ");
Serial.println(response);
Serial.println("Wait a bit");
delay(30000); // delay 5 min
}
int loadBuffer(float temp, boolean onFire ) {
StaticJsonBuffer<200> jsonBuffer; // reserve spot in memory
JsonObject& root = jsonBuffer.createObject(); // create root objects
root["sdid"] =  deviceId;
root["type"] = "message";
JsonObject& dataPair = root.createNestedObject("data"); // create nested objects
dataPair["Temperature"] = temp;
dataPair["onFire"] = onFire;
root.printTo(buf, sizeof(buf)); // JSON-print to buffer
return (root.measureLength()); // also return length
}
void ledToggle(){
if (ledState == 0){
digitalWrite(LED,LOW);
ledState = 1;
} else {
digitalWrite(LED,HIGH);
ledState = 0;
}
}
==>> open serial monitor
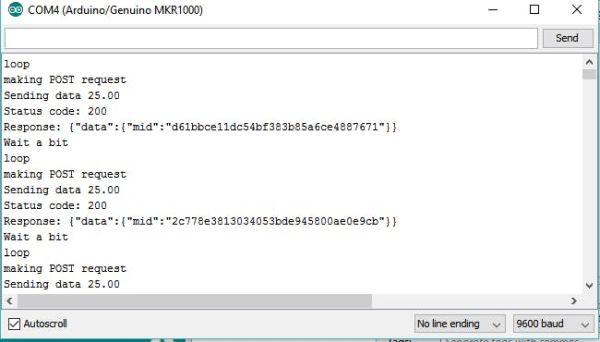
==>> if see like this , then all set
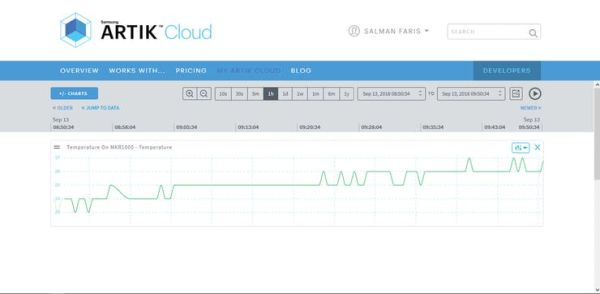
Now Sign in to My ARTIK Cloud.
Click Arduino Temperature Sensor. Then click “+/- CHARTS” and check the Temp field to visualize a chart.
Thank You …
Schematics
Pin connection
Code
Source : Temperature Monitoring with Arduino MKR1000 and ARTIK Cloud