Summary of Table Tennis Bat With Machine Learning AI (Arduino Nano 33 BLE Sense + TensorFlow Micro)
This project enables table tennis players to monitor shot performance using an Arduino Nano 33 BLE Sense and TensorFlow Micro. By attaching the device to a bat, users can train a custom machine learning model via the Tiny Motion Trainer to classify specific shots, providing real-time feedback to improve gameplay skills during practice sessions.
Parts used in the Table Tennis Bat With Machine Learning AI:
- Arduino Nano 33 BLE Sense
- SparkFun LiPo Charger/Booster - 5V/1A
- Battery (LiPo) 3.7V 400mAh
- Stranded Wire 26 AWG
- TPU Filament
- 3D printer
- Soldering Iron + solder wire
- Wire cutter
- Mac/Windows/Linux PC
- Fusion 360 software
- Tiny Motion Trainer software
Since the pandemic started, me and my housemates bought a Table Tennis table and started playing a lot of Table Tennis. I made this project so that I could monitor and test how well I perform my shots based on what the device is telling me, so that I could improve my game.
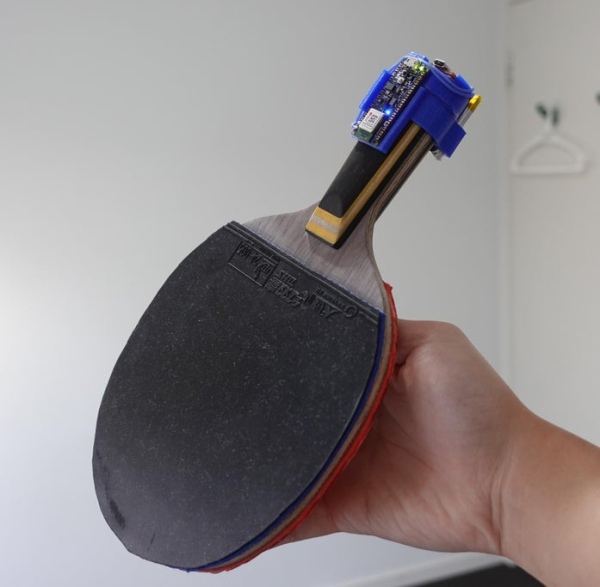
I use the Arduino Nano 33 BLE Sense and TensorFlow Micro with the Tiny Motion Trainer “Experiment” developed by Google Creative Labs for this project.
Please watch the YouTube video to watch me build the project and test it in a Table Tennis game!
Supplies
Parts for the project:
SparkFun LiPo Charger/Booster – 5V/1A
Equipment:
3D printer
Soldering Iron + solder wire
Wire cutter
Mac/Windows/Linux PC
Step 1: 3D Print the .stl Files Using TPU and Glue the Two Parts Together
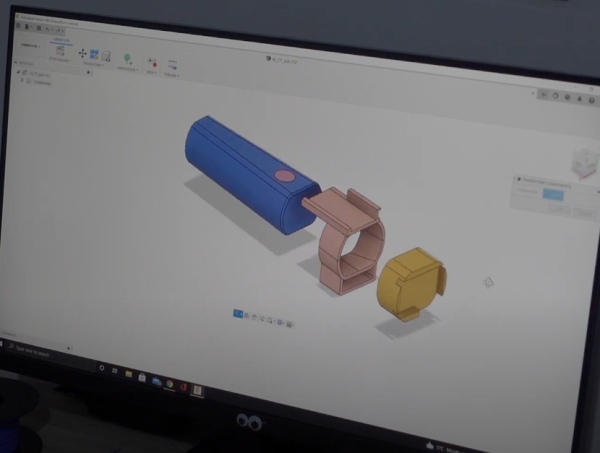
The 3D model for this build is designed in Fusion 360. This current model only works for the Penhold Grip Table Tennis bat.
Use infill 25% with 6 walls for the print settings.
If the case is too tight or too loose adjust the print size between 97% – 104% depending on how tight or loose.
Step 2: Mount the Electronic Components
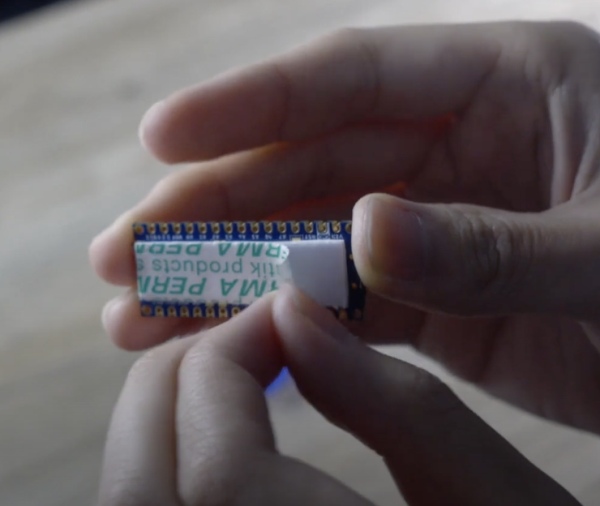
Apply a double sided tape to the Arduino and Boost Converter and mount it to the case as shown in the picture.
Slide the Lipo Battery to the battery compartment.
Step 3: Soldering
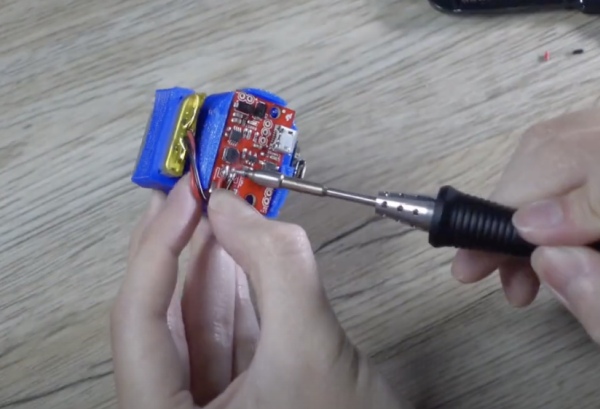
You can connect the battery to the boost converter with the JST connector or solder it directly to the board. I choose to solder to make the wires shorter and the project more neat.
- Cut the battery wires (Please cut it individually!) to 3-4 cm length.
- Positive lead from the battery goes to Vinput of the boost converter.
- GND lead from the battery goes to GND of the boost converter.
- 5V from the boost converter goes to Vin of the Arduino.
- GND from the boost converter goes to GND of the Arduino.
If everything is soldered properly, then you should be able to see a blinking LED when you toggle the power-switch on the boost converter.
Step 4: Plug in the Arduino to Your PC
Use a Micro-USB cable to connect your Arduino to your PC and follow the steps in this Github Page:
https://github.com/googlecreativelab/tf4micro-motion-kit
The page will guide you to download the Arduino IDE and install the drivers and libraries necessary for this project.
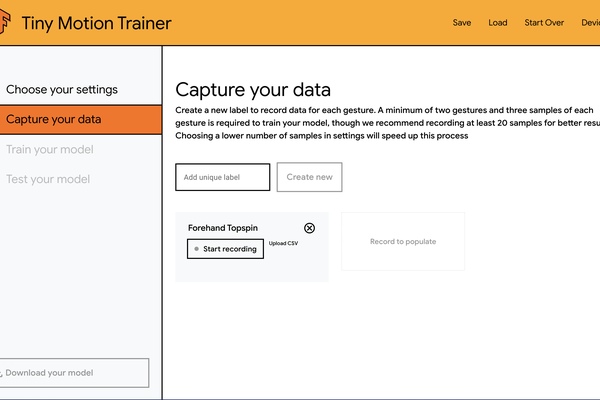
Step 5: Use the Tiny Motion Trainer
After you have uploaded the code to the Arduino:
- Launch the Tiny Motion Trainer > Start New Project > Pair your Arduino to your PC via Bluetooth.
- Adjust the Capturing Threshold (you want this number high enough not to trigger when you swing back your bat, but also not too high so that you can activate it when performing your shots)
- Leave the number of samples as default.
- Leave the delay between captures as default.
- Go to the “Capture your data” tab on the left.
- List all the type of shots you want the device to classify.
- Capture 20-100 samples for each type of shots.
- Train your model.
- Test your model.
Step 6: Test Your Model and Play Some Table Tennis!
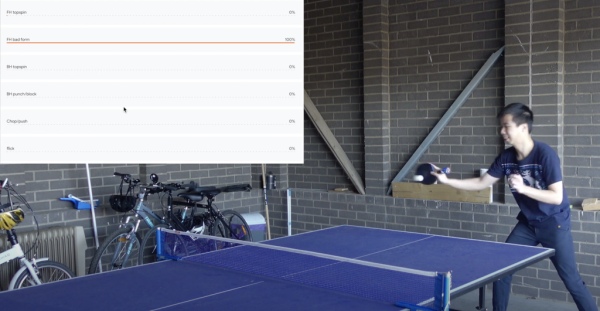
Once you are happy with the result of the trained model you can save it so you can open the model anytime you want. Now you can bring your bat to the table and have fun!
Source: Table Tennis Bat With Machine Learning AI (Arduino Nano 33 BLE Sense + TensorFlow Micro)
- How is the 3D printed case designed for the bat?
The model is designed in Fusion 360 specifically for the Penhold Grip Table Tennis bat. - What print settings are recommended for the TPU filament?
Use 25% infill with 6 walls, adjusting the size between 97% and 104% if the fit is too tight or loose. - How do you connect the battery to the boost converter?
You can use a JST connector or solder directly, connecting the positive lead to Vinput and GND to GND. - Where does the 5V output from the boost converter go?
The 5V output connects to the Vin pin of the Arduino Nano 33 BLE Sense. - Can I modify the capture threshold settings?
Yes, adjust the Capturing Threshold so it does not trigger when swinging back but activates during shots. - How many samples are needed for training each shot type?
You should capture 20-100 samples for each type of shot you want the device to classify. - What software is required to upload code to the Arduino?
You need the Arduino IDE along with necessary drivers and libraries found on the provided Github page. - Does the device work with any grip style?
The current model only works for the Penhold Grip Table Tennis bat.