Summary of SPEAKR (Singing Portable Electronic Arduino Kite – Remix!)
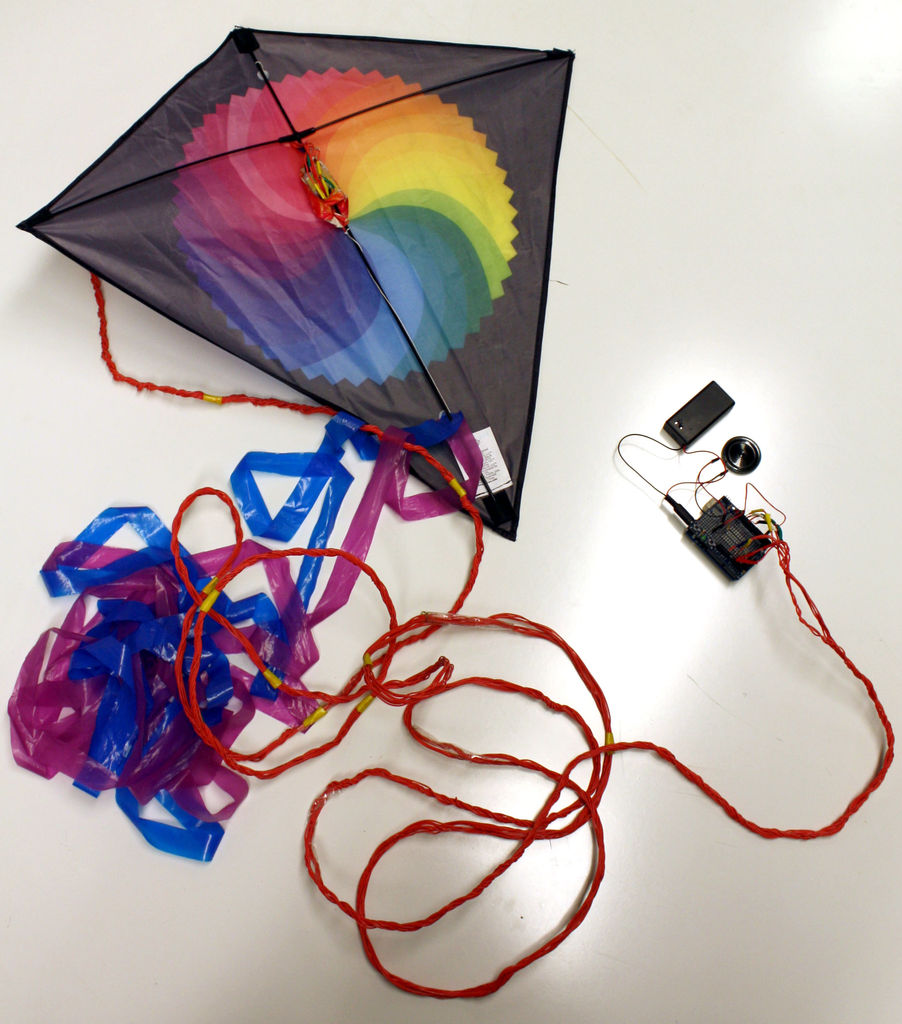
Powerhouse Pirates made the SPEAKR: a kite-mounted Arduino system that maps an accelerometer’s readings to audible tones, letting you hear the wind electronically. The project uses common, low-cost components and simple wiring; the accelerometer and speaker are mounted on a kite and connected to an Arduino powered by a 9V battery. Instructions cover assembling the Arduino, preparing long kite lines, wiring and mounting the accelerometer, and protecting the electronics for flight.
Parts used in the SPEAKR (Singing Portable Electronic Arduino Kite - Remix!):
- Arduino Uno
- Protoshield or breadboard
- 9V battery with 2.1mm plug (or wall adapter)
- 100 ohm resistor
- 8 ohm speaker
- Accelerometer MMA7361
- 200 ft of 22 gauge wire (or eight 25 ft pieces)
- Computer
- Soldering kit
- Colored electrical tape
- Bubble wrap
- Duct tape
- Wire stripper
- Scissors
- PC board or small breadboard
- Optional: female headers
- Kite of your choice
Nature has a way of speaking to us in a way that soothes and revitalizes. Sounds of the wind in various places create low volume tones that we barely hear. They have a certain beauty and randomness to them that are unique to nature. We’ve all heard the wind rustling the leaves, hitting our cars, and, even in its most raw form, moving up against our ears on the beach and in open fields, but have we ever really gotten a chance to hear what the wind would sound like if we analyzed it electronically?
The Powerhouse Pirates have done just that. We modified a simple kite to hold an accelerometer and programmed an Arduino to play tones based on the accelerometer’s input. The result is the SPEAKR! (Singing Portable Electronic Arduino Kite – Remix!). If the virtual world had wind, this is what it would sound like. And the best part is that it’s cheap to build and easy to adapt! We’re going to show you how…
Step 1: What you’ll need….
 1) Arduino Uno (Adafruit Link) and Arduino Software
Most Arduinos or Arduino alternatives will work here.2) Protoshield (or breadboard) (Adafruit Link)
The only thing used here is one circuit to the speaker and its corresponding resistor. We liked using the protoshield because it attaches right to our Arduino UNO.
3) 9V Battery 2.1mm plug (Adafruit Link)
This makes life easier. You can also use a wall adaptor, but then you have to bring your wall outside.
4) 1 100 ohm resistor (Amazon Link)
You only need one of these, and the actual resistance governs how loud your speaker is (so go for 1k or less).
(We purchased all of the above materials from our friends at Adafruit in their Arduino Starter Pack for $65 http://www.adafruit.com/products/68. If you’ve never used an Arduino before, it has a ton of replay value, so we’d recommend taking the plunge for a starter kit similar to this one.)
5) 8ohm speaker (Amazon Link)
This is where creativity comes in. Notice that though the speaker itself is less than a dollar, the shipping puts the total cost at about 14 bucks. We had a little fun here- we disassembled a talking greeting card and found one of these bad boys inside. The cards are available at most dollar stores. Radio Shack sells these speakers cheaply, as well.
6) Accelerometer – MMA7361 (Amazon Link)
Here’s another point where we encourage getting creative. We used a MMA7361 – available off Amazon and Ebay for relatively cheap, but chances are if you dig deep you can find a similar model online for under 5 dollars. Wiring and documentation may be a bit different, but what’s the fun in a project if it’s not challenging?
7) 200 ft of 22 gauge wire (or 8 pieces of 22 gauge wire at 25 ft) (Radio Shack Link)
24 gague wire works, as well. 20 is starting to get a bit on the thick side. The thinner the wire, the easier it is to fly the kite. There is a tradeoff with the length of wire, as the signal degrades over long distance.
8) Misc odds and ends
a) Computer
b) Soldering Kit
c) Colored electrical tape (for marking wires- colored sharpies will work as well)
d) Bubble wrap 3″x2″ (for protection in the event of a not-so-smooth landing)
e) Duct tape (to make the world go round)
f) 9V battery (power the Arduino)
g) Wire stripper (for electrical entertainment)
h) Scissors (because cutting with our teeth is annoying)
i) PC Board or breadboard (hold the accelerometer in place on the kite)
j) Optional: female headers if you don’t want to solder your accelerometer to your breadboard
k) A windy day (or a car will work in a pinch)
…And last but not least, a kite of your choice! We bought ours for $5 at Five Below. The bigger the kite, the better it will support weight, but some larger kites are more difficult to fly (and more painful to watch crash if you’re not experienced).
Step 2: Assemble the Arduinooooo!
2. Solder the Protoshield together.
3. Properly attach the Protoshield to the Arduino Uno.
Step 3: Cut and Label Wires
2. Strip the ends of the wire with a wire stripper.
3. Label the ends with tape – we found that colored electrical tape worked best.
4. Twist the wires together to get a rope-like structure.
Step 4: Assemble Accelerometer and Wires
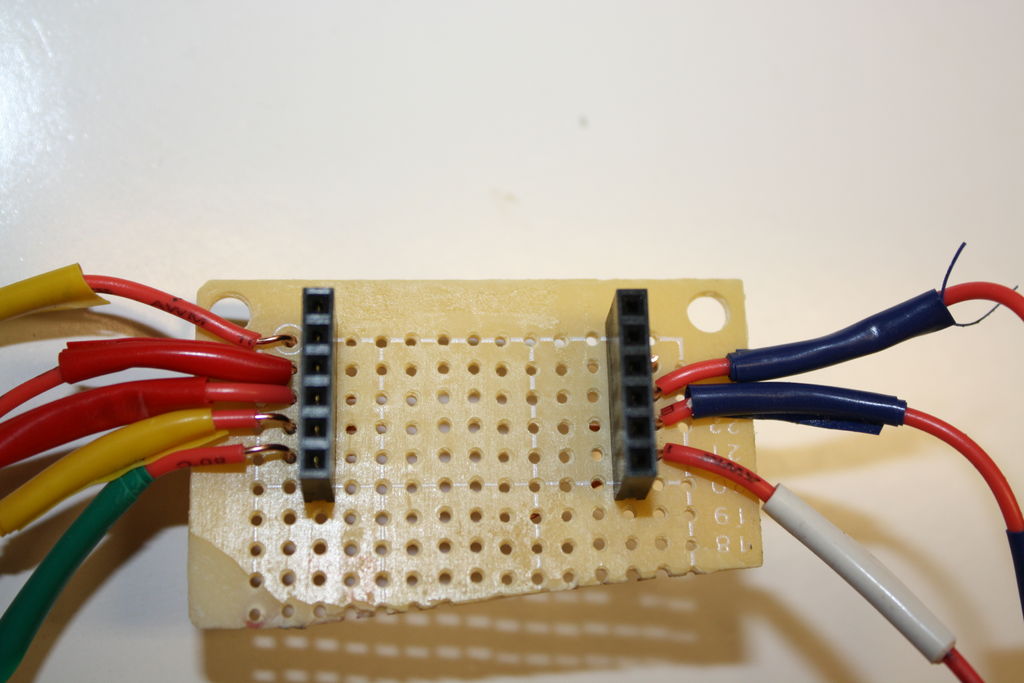
2. Solder wires to the PC board.
3. Solder the wires to the headers.
4. Cut the PC board (it’s pretty big otherwise).
5. Snap in the accelerometer.Be sure to write down which wires are going to which ports!Note: You can solder the accelerometer directly to the PC board, but we chose to use female headers instead so we could re-use the accelerometer for our other projects.
- What is the SPEAKR project?
The SPEAKR is a kite-mounted Arduino system that uses an accelerometer to generate tones representing wind motion. - Which Arduino is recommended?
An Arduino Uno is used, though most Arduinos or alternatives will work. - What accelerometer is used in the project?
The project uses an MMA7361 accelerometer. - How is the speaker connected?
The speaker is connected to the Arduino through the protoshield or breadboard with a resistor (100 ohm recommended). - What power source is suggested?
A 9V battery with a 2.1mm plug is suggested, or optionally a wall adapter. - How long should the kite wire be?
The guide uses 200 ft of 22 gauge wire or eight 25 ft pieces; thinner wire is easier to fly but long runs can degrade the signal. - Can I reuse the accelerometer for other projects?
Yes, the tutorial uses female headers so the accelerometer can be reused. - Where can I find a cheap speaker?
The tutorial suggests salvaging an 8 ohm speaker from a talking greeting card or buying one cheaply from stores like Radio Shack.