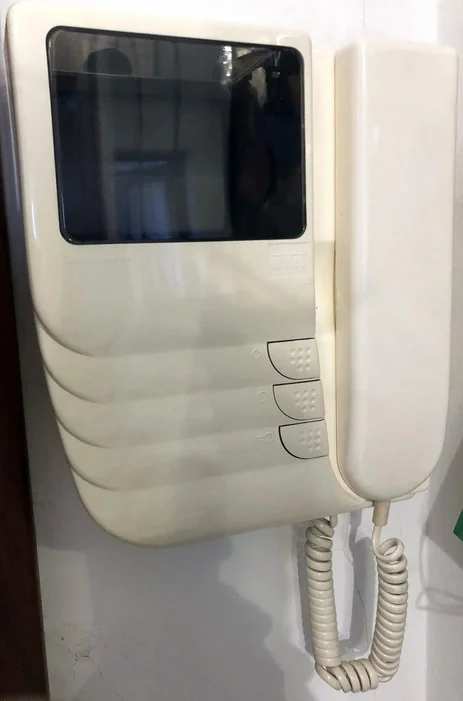
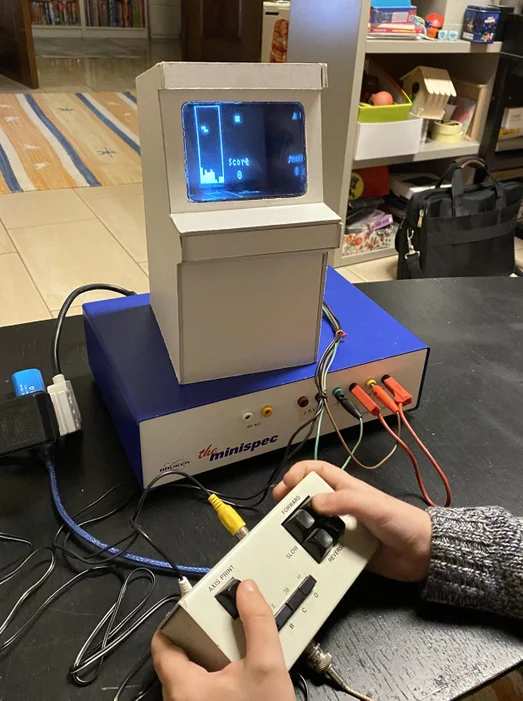
I have built this Mini Cardboard Arcade using a B&W small CRT (Cathodic Ray Tube) recovered from an old video intercom.
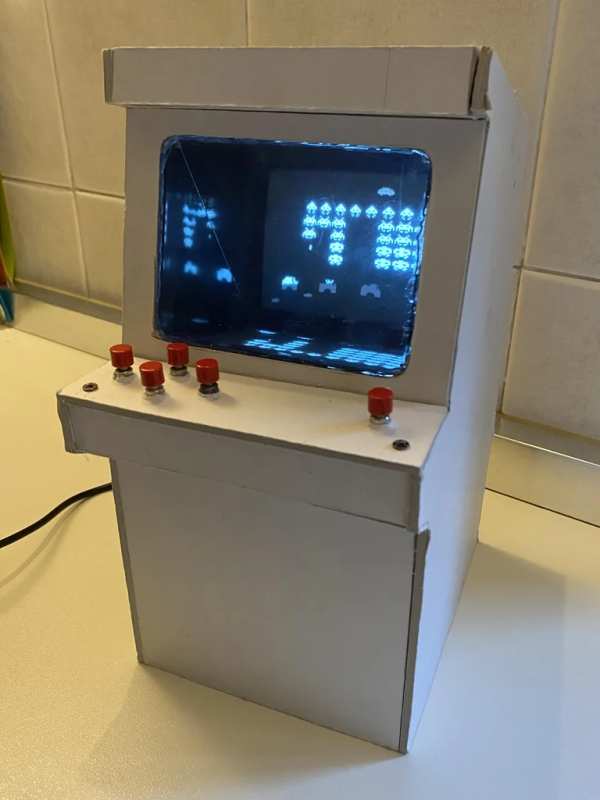
It is based on an Arduino Nano emulating the classical Space Invaders.
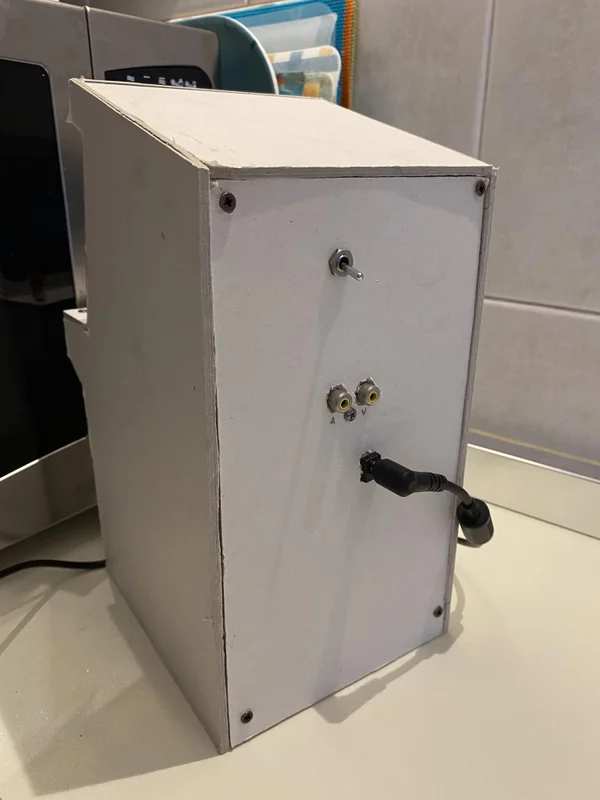
The switch on the rear turns ON the Arduino and starts the game. Alternatively, one can use the two Audio/Video sockets on the back to connect another source.
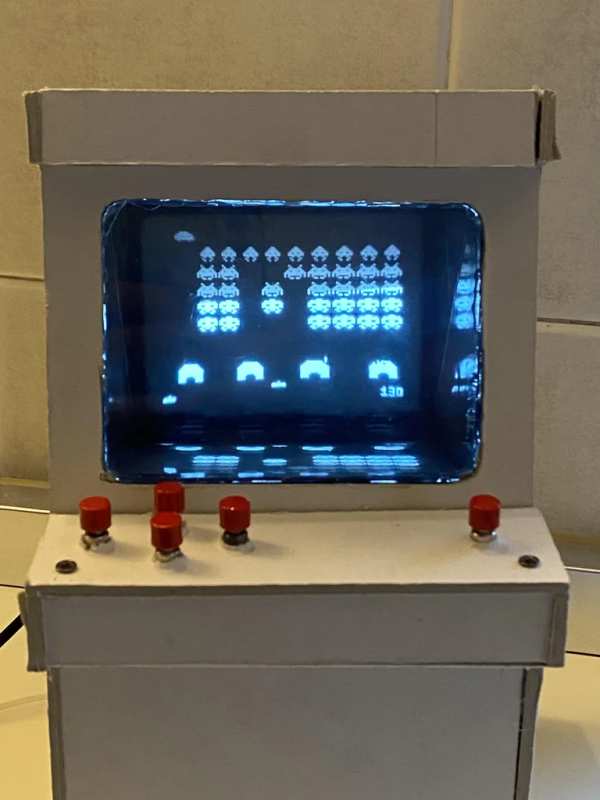
The reason to use this old, miniaturized CRT, is to give a proper vintage look to this small replica of one of the very first arcade games. Quoting Wikipedia “Space Invaders is considered one of the most influential video games of all time”.
I plan to test and add more games in the future.
Supplies
The majority of the components I used for this project, come from recovered material. The only new parts are an Arduino Nano and few resistors. For this reason, if you want to reproduce it, you may not be able to get the exact components of the following list. Just take it as a reference.
- a small CRT recovered from an old video intercom, model Umet Domus Scout 1204/D001D
- an Arduino Nano
- resistors: 1 x 1 kOhm, 1 x 470 Ohm, 1 x 100 Ohm
- a piezo speaker
- 2 x A/V socket (RCA)
- 5 x game buttons
- PS (for my CRT I need 19V DC, coming from an old laptop PS) with its socket.
- A little switch.
- connecting wires
- hard cardboard or Masonite (about 4 mm thick) to build the arcade cabinet
- cutting tools, hot glue, tin and iron soldering
Step 1: Find the Video Input of the CRT
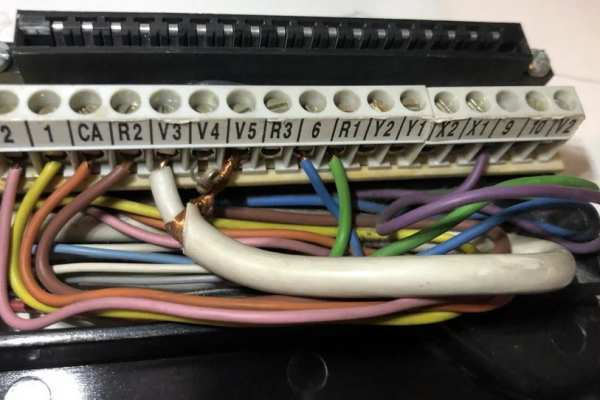
The first step, once you get your own CRT, is to find the value of the supply (in my case it is 19V DC) as well as the video input.
This is not too difficult for a video intercom, since the video is normally fed through a coaxial cable, as shown in these pictures.
You can test the CRT with an external video signal.
Step 2: Build the Cabinet for the CRT
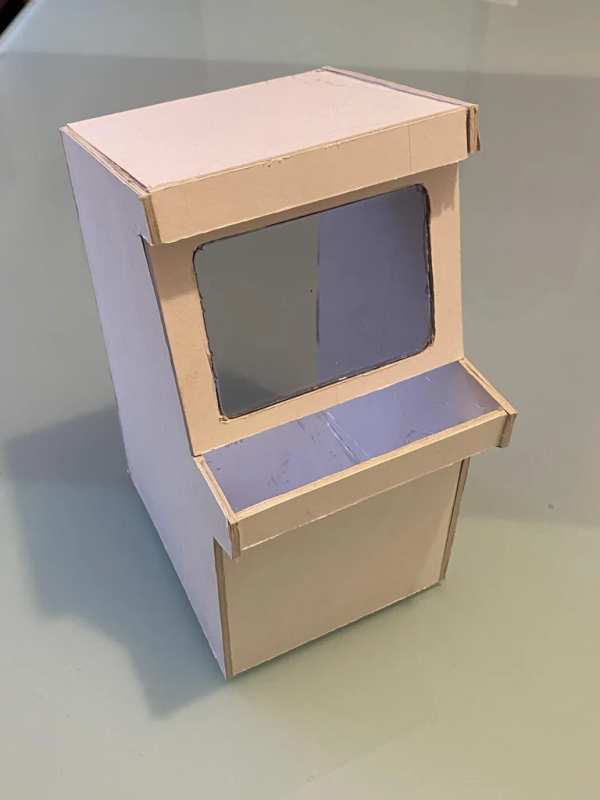
The correct size of the mini arcade cabinet depends on the CRT size and orientation. In my case the CRT in the intercom has been mount vertically, and it has a 45 degree mirror to see the image from the front. This choice is perfect for this project, since many arcades where built in this way to avoid having a too deep cabinet.
You can find the quotes (in cm) I used in my project in the hand drawing reported in this chapter.
I cut the cardboard with a cutter and fix all the parts with hot glue. You can see the result in the pictures here.
The hot glue is perfect since it fixes the cardboard in few seconds and the final result is sturdy and robust. I made an internal structure with hot glue and small piece of cardboard, and fixed the electronic board and CRT with screws, exploiting the pre-existing holes that where used to fix them in the original plastic case.
In this way all the parts can be easily disassembled for repairs and modification.
Step 3: Arduino TVout and Speaker
To reproduce Space Invaders you need first to download the code, available at the bottom of this page, and the bitmaps.h file. Copy both of them in the folder SpaceInvaders.
Then you need to download the TVout libraries, that has to be saved in the standard Arduino libraries folder.
You can immediatly upload the game on the Arduino Nano. If you don’t get any other error message, you can start to build your hardware.
In the link above you can see how to connect the Video Output. In brief:
- Arduino D9 pin (sync) to 1 kOhm tp RCA video
- Arduino D7 pin (video) to 470 Ohm to RCA video
- Arduino GND to RCA GND
For the sound, connect Arduino D11 pin to a piezo speaker directly, or to a normal speaker (low impedance) via 100 Ohm resistor. The other speaker pin to must be connected to GND.
Now you can connect the RCA video signal to the CRT. If you can see the image, you can start the next step.
Step 4: Connecting the Five Buttons
For this and other games, you need five buttons: Left, Right, Up, Down and Fire. The connections are the following:
- Left D3
- Right D2
- Up D4
- Down D5
- Fire D10
and all the other pins to GND.
You can place the buttons as shown in the picture on this step. Fire, of course is the button alone in the right side.
Step 5: Putting Things Together
At this point you can put all the things together. Fix the CRT, the Arduino and the speaker in the cabinet.
For the Arduino PS, you can fed the 19 V, through a switch, directly in the VIN port (pin 30). But in my CRT there is also a stabilized 12V (done with a 7812 Voltage Regulator) ad I preferred to use this supply.
I also recommend to connect audio and video to the RCU plugs, and then to the CRT video input and speaker, as shown in this picture. In this way, when the switch is ON the Arduino starts and send the signal to the CRT. But when the switch is OFF, you can send to the Arcade cabinet an external video signal, and you can use it to play other games.
Furthermore, you can fix the Arduino in the box in a way that allows to access it via its female mini-USB, so that you can upload other games in the future.
Step 6: Conclusion
I know the question is: ”why struggling to use a CRT, when you can find more modern and better video screens?”
Well, because I think the retro-ism and vintage look of this game is just cool! Nowadays CRTs, that where ubiquitous just a couple of decades ago, are almost disappeared, and I want a reason to preserve a miniaturized CRT from the 80s-90s (which, in itself, is a bit of an engineering marvel).
There are many improvement you could do:
· Use masonite instead of cardboard for the cabinet
· Add more games (this is my plan for the future).
· Paint the cabinet.
· Using a mini-joystick instead of the four buttons for the directions.
If you decide to build your own version, please do not hesitate to show some picture in the section “I Made It!”
Step 7: Acknowledgments
My acknowledgments go to Nootropic Design for Space Invader code for Arduino. You can find many other games at the same link. I plan to test some others in the future as well.
Source: