Summary of Smart Tank Chassis with Ultrasonic Sensor using Arduino
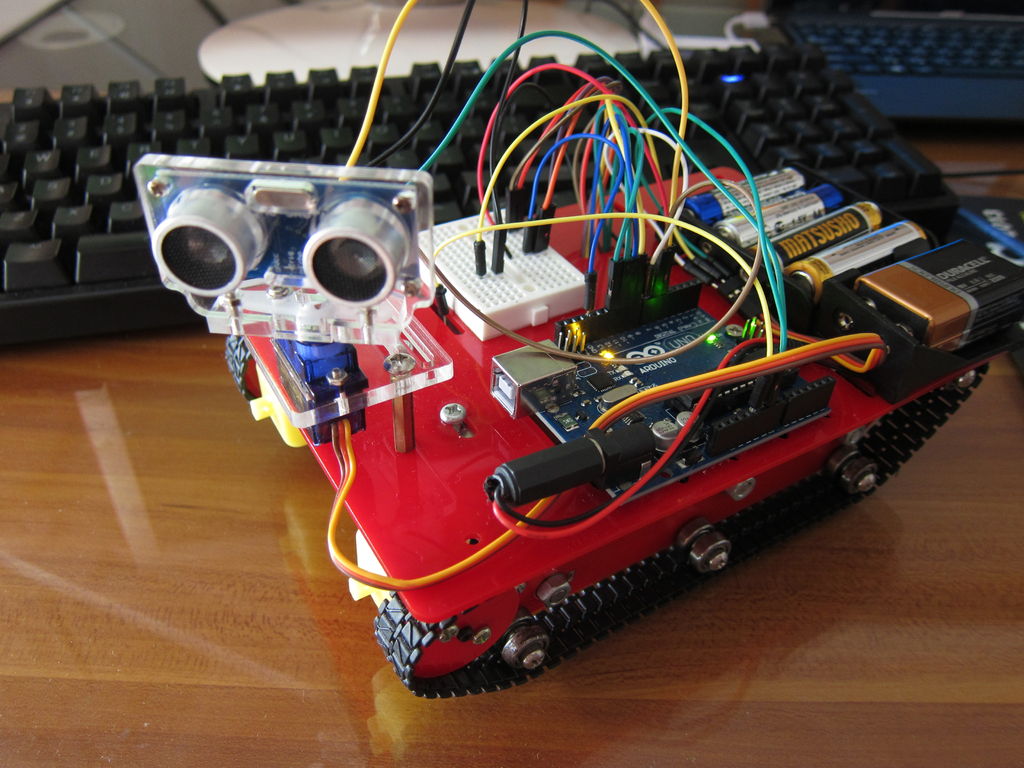
This article details an Arduino-based project where a smart tank autonomously navigates using an ultrasonic sensor. The system measures distance to obstacles; if the path is clear (over 30cm), the tank moves forward, but it turns right when an object is detected closer than that threshold. This self-control mechanism eliminates manual input by utilizing sound wave reflection logic.
Parts used in the Smart Tank with Ultrasonic Sensor:
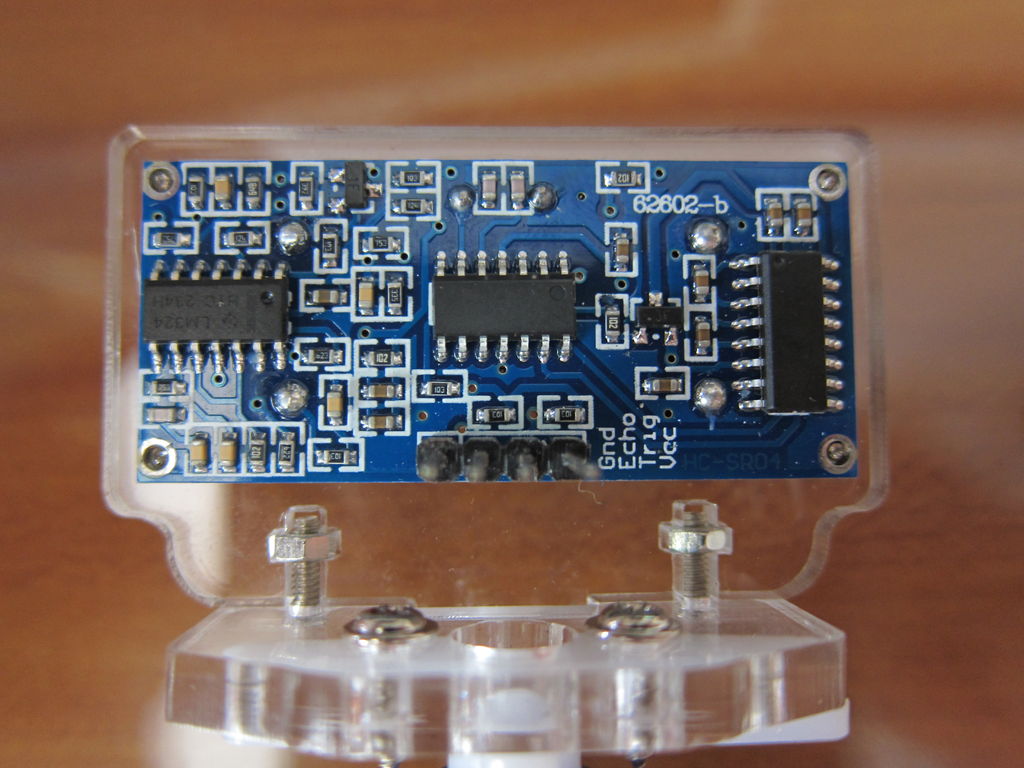
- HC-SR04 Ultrasonic Sensor
- Servo and Rack
- Smart Tank Chassis
- Arduino Uno
- Small Breadboard
- Battery Box AA x 4
- Battery Box 9-volt
In the previous projects I tried different ways to control the smart tank manually. But how about if the tank makes its own decision and control itself? It should be quite interesting. Ultrasonic sensor can help to do so by sending sound wave in front of the sensor. It receives the wave once the wave meets obstacles and reflects to the sensor so as to determine the distance. So I’ve bought an ultrasonic sensor and start another project.
Step 1: Parts
HC-SR04 Ultrasonic Sensor with Servo and Rack
Battery Box AA x 4
I just add one more sensor on top of the third project actually.
Step 2: Wiring
I leave the servo unwired at this stage. For the sensor the wiring is as follow:
GND > Arduino GND
Echo > Pin 6
Trig > Pin 5
VCC > 5V
For the smart tank I listed the wiring again below. That is the same as the previous projects:
IB on the right side > pin 8
IA on the left side > pin 9
IA on the right side > pin 10
IB on the left side > pin 11
VCC on both side > + of the battery box
GND on both side > – of the battery box and Arduino GND
Step 3: Test the sensor
I wanna test if the sensor works, so I google it and find anything can help. Google is our friend and this link can be one of the reference:
http://arthursrobotorial.blogspot.hk/2012_12_01_archive.html
#define trigPin 5
#define echoPin 6
void setup()
{
Serial.begin (9600);
pinMode(trigPin, OUTPUT);
pinMode(echoPin, INPUT);
}
int CheckDistance()
{
long duration, distance;
digitalWrite(trigPin, LOW); // Added this line
delayMicroseconds(2); // Added this line
digitalWrite(trigPin, HIGH);
// delayMicroseconds(1000); – Removed this line
delayMicroseconds(10); // Added this line
digitalWrite(trigPin, LOW);
duration = pulseIn(echoPin, HIGH);
distance = (duration/2) / 29.1;
return distance;
}
void loop()
{
int testDistance = CheckDistance(); /// get object distance using ping
/// if object is more than 50 cm away it is out of range
if (testDistance >= 50 || testDistance <= 0) /// if object is more than 50 cm away it is out of range
{
Serial.println(“Out of range”);
}
else /// object is closer than 50cm, print distance
{
Serial.print(testDistance);
Serial.println(” cm”);
delay(500); ///wait half a sec before next ping
}
In Arduino IDE, select Tools > Serial Monitor. It shows the distance if succeeds.
Step 4: Test the sensor with the tank
Then I combine the code in the first stage with the code in the third project and revise a little bit: If the distance between the sensor and the object is more than 30cm, it goes forward. Otherwise it turns right.
#define trigPin 5
#define echoPin 6
int motorPin = 8; //right side to IB – forwward
int motorPin2 = 9; //left side to IA – forwward
int motorPin3 = 10; //right side to IA – backward
int motorPin4 = 11; //left side to IB – backward
void setup()
{
Serial.begin (9600);
pinMode(motorPin, OUTPUT);
pinMode(motorPin2, OUTPUT);
pinMode(motorPin3, OUTPUT);
pinMode(motorPin4, OUTPUT);
pinMode(trigPin, OUTPUT);
pinMode(echoPin, INPUT);
}
void forward(){
digitalWrite(motorPin, HIGH);
digitalWrite(motorPin2, HIGH);
digitalWrite(motorPin3, LOW);
digitalWrite(motorPin4, LOW);
}
void backward() {
digitalWrite(motorPin, LOW);
digitalWrite(motorPin2, LOW);
digitalWrite(motorPin3, HIGH);
digitalWrite(motorPin4, HIGH);
}
void turnLeft() {
digitalWrite(motorPin, HIGH);
digitalWrite(motorPin2, LOW);
digitalWrite(motorPin3, LOW);
digitalWrite(motorPin4, HIGH);
}
void turnRight() {
digitalWrite(motorPin, LOW);
digitalWrite(motorPin2, HIGH);
digitalWrite(motorPin3, HIGH);
digitalWrite(motorPin4, LOW);
}
int CheckDistance()
{
long duration, distance;
digitalWrite(trigPin, LOW); // Added this line
delayMicroseconds(2); // Added this line
digitalWrite(trigPin, HIGH);
// delayMicroseconds(1000); – Removed this line
delayMicroseconds(10); // Added this line
digitalWrite(trigPin, LOW);
duration = pulseIn(echoPin, HIGH);
distance = (duration/2) / 29.1;
return distance;
}
void loop()
{
int testDistance = CheckDistance(); /// get object distance using ping
if (testDistance >= 30 || testDistance <= 0) /// if object is more than 30 cm away it goes forward
{
forward();
}
else /// object is closer than 30cm, turns right
{
turnRight();
}
delay(500); ///wait half a sec before next ping
}
The result seems ok.
For more detail: Smart Tank Chassis with Ultrasonic Sensor using Arduino
- How does the ultrasonic sensor determine distance?
The sensor sends sound waves that reflect off obstacles back to the sensor to calculate distance. - What happens when the object is more than 30 cm away?
The tank goes forward automatically. - What action does the tank take if the object is closer than 30 cm?
The tank turns right. - Which Arduino pins are used for the ultrasonic sensor?
The Trig pin connects to Pin 5 and the Echo pin connects to Pin 6. - Can the sensor detect objects outside its range?
No, objects more than 50 cm away or less than 0 cm are considered out of range. - How long does the code wait between pings?
The code waits half a second before taking the next ping measurement. - What reference link was used to test the sensor?
The author referenced a blog post at arthursrobotorial.blogspot.hk. - Does the servo need to be wired during the initial sensor testing stage?
No, the servo is left unwired during this specific testing phase.