Summary of Simple Temperature With Thermistor + Arduino
This article introduces thermistors as inexpensive, simple devices that change resistance with temperature, ideal for detecting changes rather than precise measurements. It explains using a voltage divider circuit with a 10K fixed resistor and an Arduino analog pin to convert resistance changes into readable voltage values.
Parts used in Thermistor Temperature Detection:
- Thermistor
- Arduino board
- 10K resistor
- Analog pins
A Thermistor is a thermal-resistor. It’s just a simple device that changes it’s resistance based on temperature. If the LRD/Photoresistor is day of of arduino class. The thermistor should be day 1.01. (Can I do that?).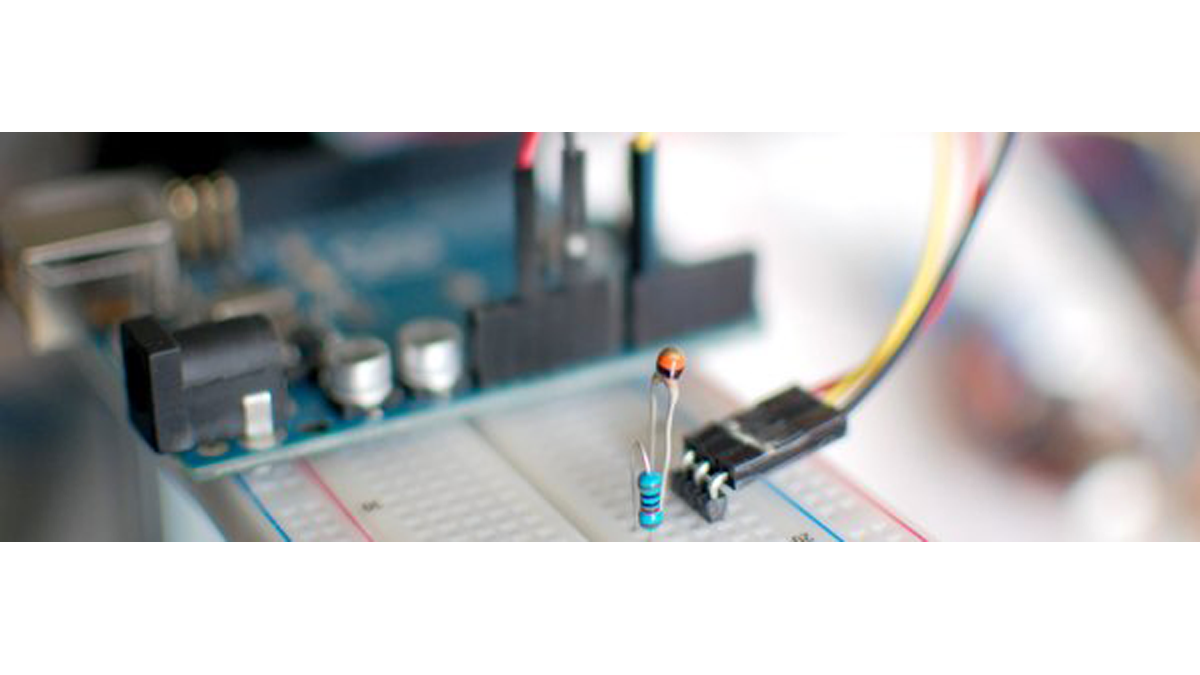
If you need precise temperature readings, this is not the part for you. Check out the DS18B20, TMP102, or MLX90614
Thermistors are not that precise or anything, so you wont be able to tell the temperature with it, but if you need to know when the temperature has changed, this will work for you. And on the plus side, they are crazy cheap considering the alternatives, incredibly simple to hookup, and have some of the easiest code ever. You can find these pretty easily at most hobby electronics shops, or just add some to your next sparkfun order.
Hooking it up, and why
The thermistor changes its resistance with temperature so we can measure that change using one of the Arduino’s analog pins. But to do that we need a fixed resistor (not changing) that we can use for that comparison (We are using a 10K resistor). This is called a voltage divider and divides the 5v between the thermistor and the resistor.
The analog read on your arduino is basically a voltage meter. at 5V (its max) it would read 1023, and at 0v it read 0. So we can measure how much voltage is on the thermistor using the analogRead and we have our reading.
The amount of that 5V that each part gets is proportional to its resistance. So if the the thermistor and the resistor have the same resistance, the 5V is split evenly (2.5V) to each part. (analog reading of 512)
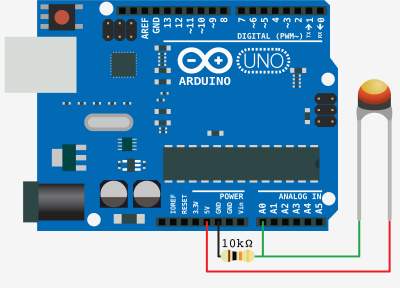
But if the thermistor is really hot and is reading only 1K of resistance, the 10K resistor is going to soak up 10 times as much of that 5V. So the thermistor would only get .45V. (analog reading of 92)
And if it is in the refrigerator, the thermistor may be 40K or resistance, so the thermistor will soak up 4 times as much of that 5V as the 10K resistor. So the thermistor would get 4V. (analog reading of 819)
For more detail: Simple Temperature With Thermistor + Arduino
- Is a thermistor suitable for precise temperature readings?
No, the article states thermistors are not precise enough for accurate temperature readings. - What alternative parts should I use for precise temperature readings?
You should check out the DS18B20, TMP102, or MLX90614 for precision. - How does a thermistor function in a circuit?
A thermistor changes its resistance based on temperature to allow measurement via an Arduino analog pin. - Why is a fixed resistor needed when using a thermistor?
A fixed resistor creates a voltage divider to compare against the changing resistance of the thermistor. - What value resistor is recommended for this project?
The article recommends using a 10K resistor for the comparison. - How does the analog read value relate to voltage levels?
An analog read of 1023 corresponds to 5V while 0 corresponds to 0V. - What happens to the voltage reading if the thermistor gets very hot?
If the thermistor resistance drops to 1K, it receives only 0.45V resulting in an analog reading of 92. - Can I detect temperature changes even if I cannot get exact temperatures?
Yes, the article confirms you can tell when the temperature has changed using a thermistor.