Summary of Simple LED Projects using Arduino
This article introduces two beginner Arduino projects: blinking two LEDs alternately and controlling an LED using a push button switch. It explains configuring I/O pins in the setup function and writing loop commands for timing and user input. The guide also references previous simple LED tutorials and provides code examples for both circuits.
Parts used in the Arduino Projects:
- Arduino Uno board
- LED1
- LED2
- Mini push button switch (normally open)
- Push to On switch
- Push to Off switch
This article is another step forward in learning more about Arduino. In our previous article, I have written in detail about blinking an LED using Arduino. We have demonstrated 5 simple led based projects using arduino, which will help you to learn its basic concepts.
1. Blinking Two LED’s using arduino
2. Control LED using a Push button switch
3. Toggle an LED using Push button switch
4. Toggle 2 LED’s using a Push button switch
1. Blinking Two LED’s using Arduino
As a beginner, if you have tried the “Hello World” program to blink an LED using Arduino; you can try to blink Two LED’s as next project. There are 14 I/O (input/output) pins in your Arduino uno board. These pins are numbered from 0 to 13. They can be configured as either input or output in the sketch you create for arduino. If you have learned the “Hello World” program carefully, you now know that input/output configuration of pins has to be done inside the setup() function. So here is the circuit diagram to blink 2 led’s using arduino.
Sketch to Blink Two LED’s using Arduino
const int LED1 = 12;
const int LED2 = 13;

void setup()
{
  pinMode(LED1,OUTPUT);
  pinMode(LED2,OUTPUT);
}

void loop()
{
  digitalWrite(LED1,HIGH);
  delay(1000);
  digitalWrite(LED1,LOW);
  digitalWrite(LED2,HIGH);
  delay(1000);
  digitalWrite(LED2,LOW);
}
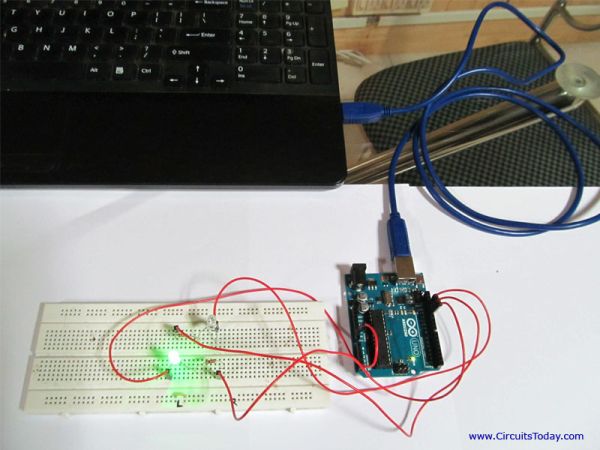
The only difference in this sketch is use of 2 pins in output mode. I have used pin number 12 and 13 as output. I have configured them as output inside the setup() function. Inside the loop(), I have written commands to blink LED’s alternatively. When LED1 is ON, LED2 will be OFF. After 1 second LED1 will turn OFF and at the same time LED2 will turn ON. Wait another 1 second and you will see LED2 turning OFF and LED1 turning ON. This cycle repeats.
I have added a photograph of the practical setup I made below.
2.Control LED with Push Button
If you observe carefully, so far we were just playing with some outputs. We made one LED blink and then we stepped ahead to make two LED’s blink. In both cases we wrote software commands to make our arduino blink led’s automatically at an interval of 1 second. What if we want to control led’s ON and OFF time based on a user input? This means, I want to give an input manually and based on my input LED should turn ON and OFF. We can use a push button switch to give user input to arduino. In fact, we can use any type of a simple switch like Push to On or Push to Off or a mini push button switch. In this example I am using a “normally open” mini push button switch. A normally open push button switch will be in its open state by default. This switch will close for the time we keep its actuator pressed. If you want to know more about working of different push button switches, you can read our detailed article on push button switches.
For more detail: Simple LED Projects using Arduino
- How many I/O pins are available on the Arduino Uno board?
The Arduino Uno board has 14 I/O pins numbered from 0 to 13. - Where must the input/output configuration of pins be done?
The pin configuration must be done inside the setup function. - Which pins were used as outputs in the blinking two LED sketch?
Pin numbers 12 and 13 were used as outputs. - What is the timing interval between the LEDs turning on and off?
The delay between state changes is set to 1 second. - Can different types of switches be used instead of a mini push button?
Yes, any type of simple switch like Push to On or Push to Off can be used. - What is the default state of a normally open push button switch?
A normally open switch is in its open state by default. - What happens when the actuator of a normally open switch is pressed?
The switch closes for the time the actuator is kept pressed. - Does this project require learning advanced programming concepts first?
No, it builds upon the basic Hello World program for blinking a single LED.