After building some of these:
https://www.instructables.com/id/Matrix-LED-Light/
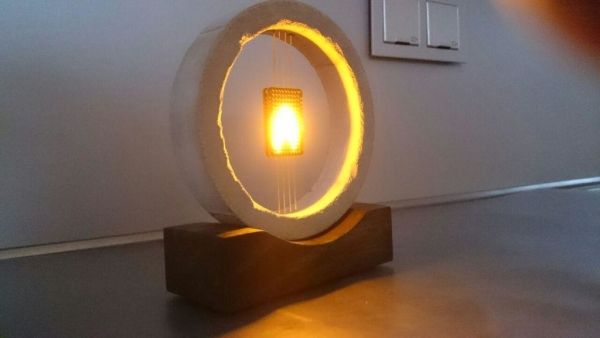
i’ve decided to bring the candle onto another level. While the first one looks good, it does look a little bit too much like the original. Nothing against the first design. It looks cool and modern.
My new approach is a little bit warmer and uses different materials. Still quite geometrical.
It “feels” warmer, just by breaking the light at the edges of the concrete, which makes a passive light.
So … this is my entry to the “REMIX”-Contest. Would be happy, if you vote for me.
Step 1: Tools and Material
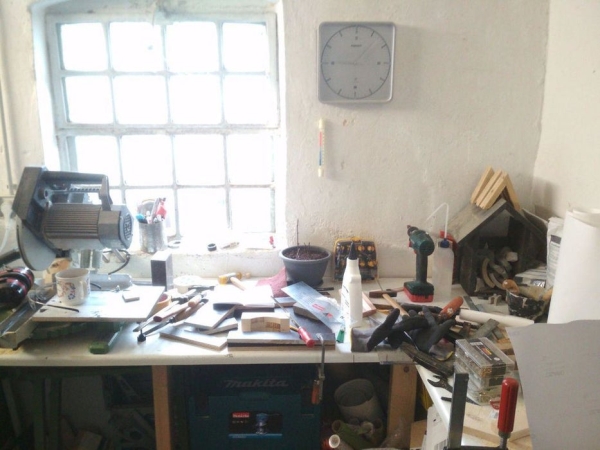
Wood, concrete, brassrods and some electronic parts. And wood glaze, if you like.
- A router/trimmer and basic woodworking tools
- a 160x160mm piece of wood (about 18mm thick)
- 3D-Printer
- 3M 8402 silicon Tape (or another idea, like grease or silicon-spray)
- quickcrete, (concrete)
- arduino pro micro 16Mhz (8Mhz doesn’t work)
- TP4506 LiPo-loader
- Adafruit LED-Matrix (yellow) and PWM Driver
- 0.8mm Brassrods
- double-sided gluetape
- hotglue gun (helps a lot)
- thin wire
- small switch
- 18650 flat LiPo (40mm wide fits perfect. 2000mha)
I’ve bought all electronics at EXP-Tech. The TP4506 and the pro micro where bought at ali-express.
Brassrods came from conrad-electronic. All other stuff (except the 3M 8402) where bought at a warehouse.
Step 2: The Ring (3D Parts)
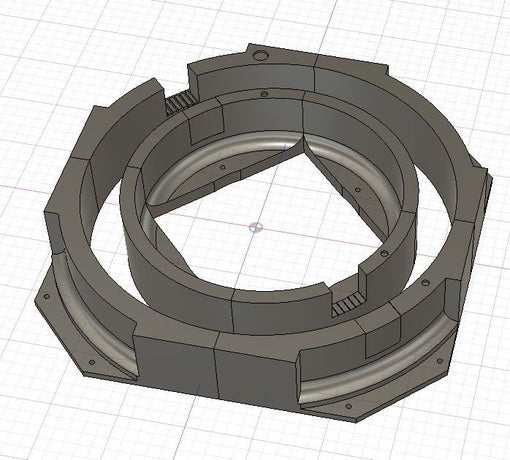
This took a lot of tries. How to cast a ring with rods inside and with nothing but PLA in my 3D-Printer.
The ring is made of one piece of concrete and the rods are in the concrete. Put in place before casting.
To get it in one piece, i had to print several parts which can be brake away after casting. And i had to find a “thing” which makes it more easy to seperate the 3D-printed parts from the concrete. Did i mention the rods? Well, those where another problem.
To start building the casting-form you’ll need to print every part. Some parts have numbers, which equal to the number of prints of each part.
I’m using Material4Print with 30% infill on an anycubic i3 mega.
Every part is separated into one file, so you can position it to your possibilities on your printer.
Step 3: Building the Casting Form
The pictures give you an idea of how to build it.
You need a solid base. Some flat piece of wood (“Siebdruckplatte” in german).
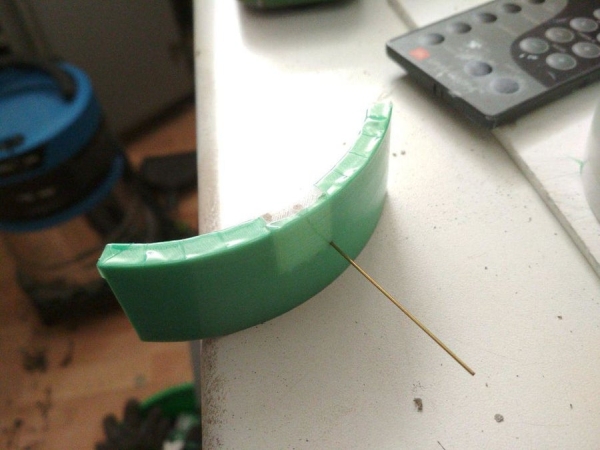
To get a smooth finish i’ve wrapped all parts with 3M 8402 Tape. It’s hard to get and quite expensive. But it works perfectly. And i’ve pre-punched the holes for the brassrods.
(My first idea was to use seven rods. But in the end it looks better with just four. And it is more interesting to build.)
Everything wrapped, try to solve the puzzle. The long helper can be used to get a real straight line in the “open” parts. Those parts, which have to hold the rods in place.
So put everything in place, screw the parts without rods onto your base, prepare your “rod-parts”, bring them back to your base … and screw them on. See the pictures for details.
And keep in mind, that you have to cut the tape later at the pre-pressed parts. Those have to be removed after casting or you won’t be able to get the PLA from your concrete-ring. Hard to describe, but you’ll see the problem, when you have build it.
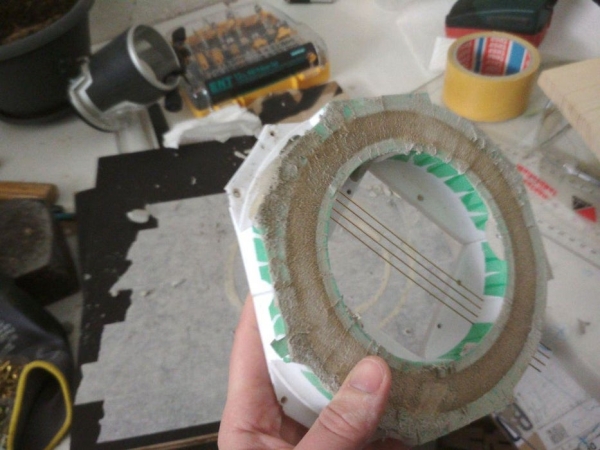
In the last “after casting” picture, you see the piece of PLA and the green tape, which have to be removed.
Bring the cleaned rods into position. Be carefull. Those small rods are quite weak. Position 1, 3, 5 and 7.
If you like to use all 7, you can do that, too. But i couldn’t get all 7 straight. So missing every second part is a good option.
Bend the end a little bit. The end should not touch the casting-form. And after that, you should cover those rods.
Step 4: Casting
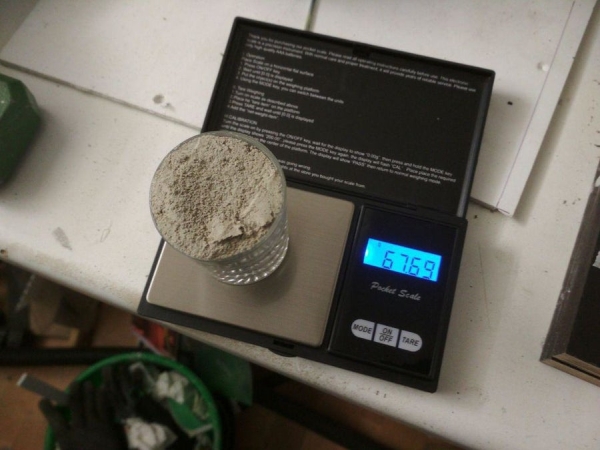
Quickcrete is on of my favourite things in the last two years. Just mix it quite liquid. Just as liquid as something you would still be able to suck through a big straw.
You’ll need about 500g of concrete. Well, you don’t need that much, but it is very much easier if you have too much concrete. Mix it, stir it and get ready to cast.
Casting needs some preperation. Have everything in place. Some plastic to smooth the final surface. Towels. Water. Just everything you can think of what you “might” need.
Quickcrete dries quick. Obvious.
Too much isn’t a problem, as long as the concrete is liquid enough. Just use a piece of plastik to smooth the surface.
Let it dry …
Step 5: Openening the Mold
How long is long enough? Even it is quickcrete, i let it dry abou 48 hours before i try to demold it.
That’s just my tip.
Start by getting rid of the screws and try gently to get the base off. Pull the helpers off and find all concrete drops which could lead into problems, when you try to push the PLA-Parts away from the concrete.
At first, you should remove the little “helpers” inside, which have hold the brass into it’s position.
AND cut or remove the tape at that 3 positions.
To remove the shell, start on the outer side removing the first parts.This is the most exiting part of this instructable.
Be gently, use “the force” … just don’t use too much strength.
See the pictures to get a better idea. The inner parts have to be pushed downwards.
So now let it dry for another 24 hours. After that, you can destroy the surface a little bit with a file. Just as you like.
Step 6: Wood – Part 1
The wood-case is made of three parts. Why three and not one?
Well … i’m not able to work on thicker pieces of wood. So i made it in three parts.
With a CNC you could probably make it in one part. With nothing but a mittersaw, jigsaw and a small router i didn’t find an option. And three parted gives it a little bit extra.
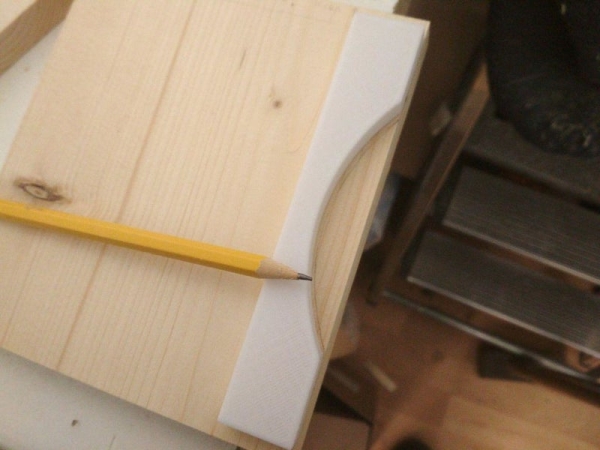
So you need a piece of wood in (at least) 160x160x18mm and the attached router-guide (3D-print).
Bring the guide into position and draw the line a little bit away from the guide. This will be the line to cut with the jigsaw.
Well, you could directly use the router to cut the circle-part. But if you use the jigsaw first, the router will just have to trim the rest which will result in a better surface. And you have to make three identical parts. So using less force is allways a good idea.
After using the jigsaw, glue the guide with a thin double-sided tape on to the wood.
Use your router ro trim the rest of it.
Remove the guide and cut the piece off. About 40mm. Mark the position on your mittersaw, becaus all parts should be equal.
Repeat this step three times to get three equal parts. Don’t worry, if the heights are a little bit different. You can use your grinding machine or your mitter saw to correct them. The circle part is important.
Source: Ring of Fire [REMIX]