
Summary of Remote sensing with Arduino and XBee
This article details a project to test the battery life of repurposed 12V lead-acid UPS batteries powering remote Arduino weather stations. The author successfully configured XBee radios for wireless communication after initial struggles with API mode, aiming to eliminate wires between sensor sites and a central computer. The current experiment measures how long a station runs on a single battery at spring temperatures without active sensors.
Parts used in Remote Sensing with Arduino and XBee:
- XBee radio chips
- Arduino board
- 12 volt lead-acid batteries (recycled from UPS)
- Sensors
- SparkFun explorer board
- eeeBox computer
Several years ago when I started messing around with Arduino and building my own weather station, I bought a few XBee radio chips with the idea of setting up some more remote sites without having to run wires out to the sensor stations. I spend several frustrating hours trying to get the radios to talk to each other, but couldn’t get them to work (I think this was because they were in API mode instead of AT mode). Then I got Building Wireless Sensor Networks and Arduino Cookbook and finally got 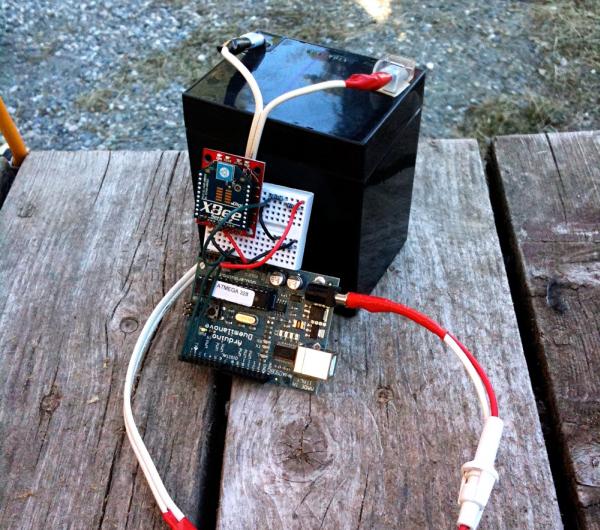 everything working.
At the same time, the batteries in our UPS at work needed to be replaced, and rather than immediately recycling them, I took a couple home to see if they still had enough juice in them to work in a remote sensing capacity. They’re 12 volt lead-acid batteries (which may make them unsuitable for winter) that were rated for 5 Amp-hours when they were new. That should be plenty of power to drive an Arduino, XBee and a couple sensors. The XBee chips have some data pins on them, so I may be able to eliminate the Arduino from each sensor station, depending on the type of sensor I use.
The current setup, shown in the photo at the top, is designed to see how long a remote station can run on one of the batteries without any sensors and at springtime temperatures (typically between 20°F and 60°F at our house). The Arduino is reading the input voltage and sending it wirelessly to an XBee coordinator plugged into a SparkFun explorer board and connected to my small eeeBox computer.
For more detail: Remote sensing with Arduino and XBee
- Why did the author initially fail to get the radios working?
The radios were likely stuck in API mode instead of AT mode. - What resources helped the author succeed with the radios?
Reading Building Wireless Sensor Networks and the Arduino Cookbook. - What type of batteries are being tested in this project?
12 volt lead-acid batteries taken from a work UPS. - What was the original capacity rating of the batteries when new?
They were rated for 5 Amp-hours when new. - What temperature range is used for the current testing conditions?
The tests occur at springtime temperatures between 20°F and 60°F. - Can the Arduino be eliminated from each sensor station?
Yes, depending on the sensor type, since XBee chips have data pins. - How does the system send data to the central computer?
The Arduino reads input voltage and sends it wirelessly via an XBee coordinator. - What hardware connects the XBee coordinator to the computer?
A SparkFun explorer board is used to connect the coordinator to the eeeBox.
